Painting your trim and doors is a project that can absolutely transform a room. But there's a huge difference between a quick coat of paint and a truly flawless, professional-looking finish. Getting that smooth, durable look you see in magazines is all about being strategic. It’s not about speed; it's about meticulous prep and choosing the right materials from the very beginning.
Why a Perfect Finish Matters
A top-notch paint job on trim and doors does more than just refresh a colour—it elevates the entire character of your home. For homeowners in Toronto and across the GTA, a professional-quality finish brings tangible benefits that go way beyond looks. Whether you're in Mississauga or a downtown condo, a beautifully executed paint job signals real attention to detail and can genuinely boost your home's perceived value.
This guide provides an objective structure for achieving the best results. A successful project boils down to three core elements:
- Durability: High-traffic spots like door frames and baseboards need a tough finish that can stand up to scuffs, dings, and grime.
- Appearance: A perfectly smooth, even coat—free of brush strokes and drips—is what creates that polished, high-end aesthetic.
- Longevity: When you do it right, your paint job should look great for years, holding up against the wear and tear of daily life and the humidity swings we see in the GTA.
The Foundation of Success
Getting that durable, long-lasting finish starts well before you open a can of paint. The best local professionals agree: the prep work—cleaning, sanding, and priming—is where 80% of the effort goes. It’s the non-negotiable first step to a job that lasts.
Primer, especially, is your best friend. It’s what gives the paint something to grab onto, ensuring the final colour is rich and consistent. If you're not entirely sure about its role, it’s worth reading up on what primer paint is used for.
The most common mistake we see is people rushing the prep. Taking your time to properly clean, fill, and sand every surface is the single most important factor in achieving a finish that looks and feels like a pro did it.
Here's a quick overview of what to expect for your interior painting project near you.
Project Snapshot: Painting Trim and Doors
| Project Phase | Key Focus | Average Time Per Room |
|---|---|---|
| Preparation | Cleaning, taping, filling holes, sanding | 3–5 hours |
| Priming | Applying one full coat of quality primer | 1–2 hours |
| Painting | Applying two coats of finish paint | 2–4 hours |
| Finishing | Cleanup, removing tape, final touch-ups | 1 hour |
This table gives you a realistic timeline. Rushing any of these stages, particularly the prep, will almost always lead to a disappointing result that won't last.
Exploring Finishing Methods
While this guide focuses on traditional brush-and-roller techniques, it's good to be aware of other options for creating durable surfaces. Beyond the liquid paints we use indoors, it's interesting to see how different industries achieve tough, lasting finishes. For a look at an industrial method, you can explore resources like What Is Powder Coating? Expert Guide to Durable Finishes. Having this broader knowledge helps put into perspective why choosing the right application for your specific project is so important.
Choosing Your Paint and Tools Like a Pro

The secret to a paint job that lasts is starting with the right materials, especially with the fluctuating humidity we see in Toronto. Walking into a paint store can feel overwhelming, but if you know what to look for, you can make choices that set you up for success. This knowledge is what separates a decent DIY result from the best professional-grade finish.
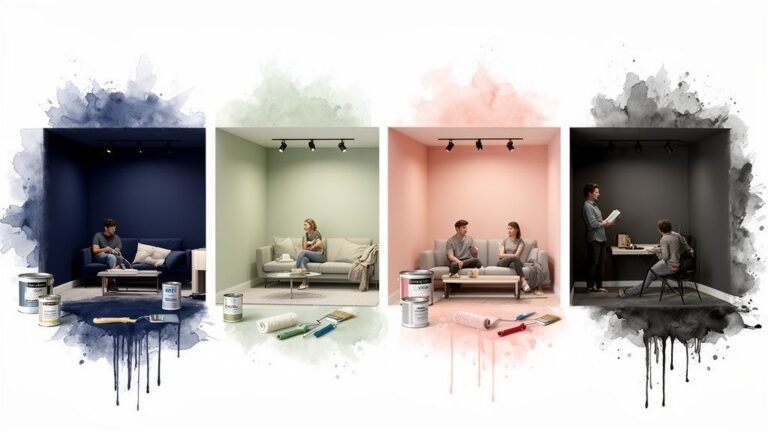
Decoding Paint Sheens for Trim and Doors
The sheen you choose determines not just the look but also the durability of your paint job. For high-contact surfaces like door frames and baseboards, this is a decision you don't want to get wrong. Here is an objective breakdown of the most common options for trim and doors.
| Sheen | Durability | Best For | Considerations |
|---|---|---|---|
| Satin | High | Baseboards, doors, and window casings in most rooms. | Gives you a modern, velvety look that’s a bit more forgiving of minor imperfections than semi-gloss. |
| Semi-Gloss | Very High | High-traffic areas, kitchens, bathrooms, and kids' rooms. | Its higher shine makes it incredibly easy to clean, but be warned—it will highlight any and all surface flaws. |
| High-Gloss | Extremely High | Statement doors, furniture, and unique architectural details. | Delivers a stunning, almost glass-like finish, but demands a perfectly smooth surface to look its best. |
For most projects around the Greater Toronto Area (GTA), satin is a fantastic all-around choice. It has the washability you need without the high shine of semi-gloss, offering a sophisticated look that can handle daily life. That said, if you're painting the trim in a busy entryway in Mississauga or a steamy bathroom, semi-gloss provides that extra layer of scrubbable protection.
The Great Debate: Latex vs. Oil-Based Paint
Not too long ago, choosing between latex (water-based) and oil-based paint was a tough call. Oil-based paints were the go-to for a rock-hard, durable finish, but they came with a serious downside: strong odours, painfully long dry times, and a nightmare cleanup.
Thankfully, the game has completely changed.
Modern water-based acrylic-alkyd hybrids give you the best of both worlds. You get the hard-wearing durability of an old-school enamel combined with the low odour and easy soap-and-water cleanup of latex. Plus, these low-VOC (Volatile Organic Compound) options are a much healthier choice for your home's air quality.
Selecting the Perfect Primer
Think of primer as the essential groundwork for your paint. It’s what helps the paint adhere properly, blocks stains from bleeding through, and gives you a uniform surface so your final colour looks exactly as it should.
- For bare wood: Always use a high-quality wood primer. It seals the porous surface and, crucially, stops tannins in the wood from bleeding through and discolouring your paint.
- For previously painted surfaces: A bonding primer is your best friend here. It's designed to create a tenacious grip on glossy or slick surfaces, ensuring your new paint won't peel or chip down the road.
- For drastic colour changes: Going from a dark colour to a light one? A tinted grey primer can be a lifesaver, often cutting down the number of topcoats you’ll need.
Before you settle on a shade, remember that mastering home design color is about more than just picking a swatch you like; it’s about understanding how light and space interact.
Your Essential Toolkit for a Professional Finish
You can have the best paint in the world, but without the right tools, you won't get those crisp, clean lines you're after. The good news is you don’t need a huge arsenal of supplies—just a few key items that are right for the job.
Picking between top brands can feel like splitting hairs, but both offer fantastic professional-grade options. Check out our comprehensive guide on Benjamin Moore vs. Sherwin-Williams if you need help deciding.
Here's what should be in your shopping basket:
- A 2.5-inch Angled Sash Brush: This is your precision workhorse. The angled tip gives you incredible control for cutting in along walls and around windows.
- A High-Density Foam Roller (4-6 inch): This is the key to a flawless finish on flat surfaces like door panels and wide baseboards. It leaves a smooth, spray-like texture with zero brush marks.
- Quality Painter's Tape: Don't cheap out on tape. A premium brand will create a tight seal to prevent paint from bleeding underneath and will pull off cleanly without damaging the surface.
- Sanding Sponges (Fine and Medium Grit): These are preferable over paper for trim work. They're flexible, easy to grip, and perfect for scuff-sanding surfaces to give the primer and paint something to hold onto.
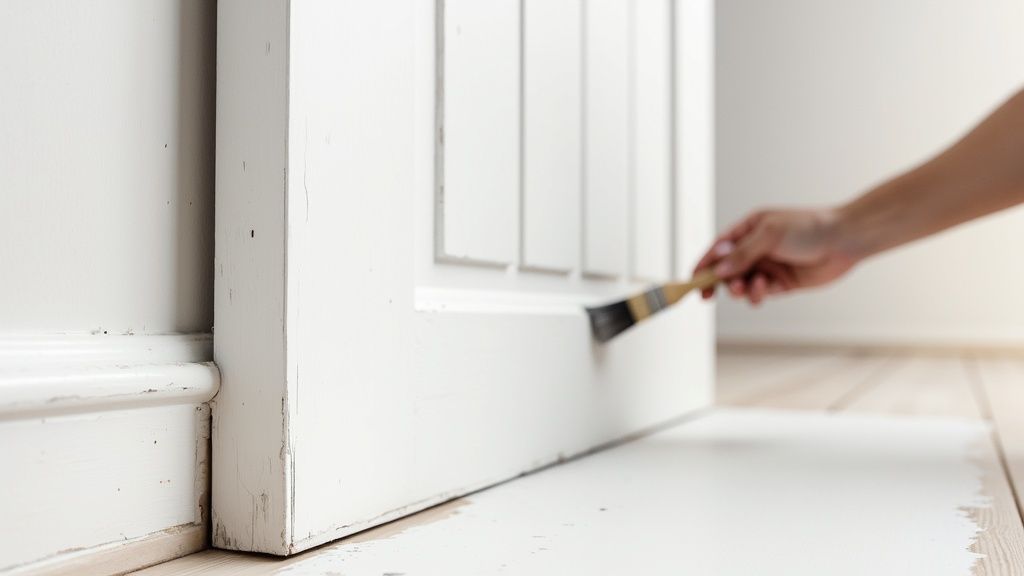
Flawless Trim Starts with a Solid Foundation
Ask any professional painter in the GTA, and they'll tell you the same thing: the real work happens long before a can of paint is even opened. Preparation isn't just a preliminary step; it's the most critical part of the entire project, often making up 80% of the total labour. This is where you earn that perfect, durable finish.
Rushing the prep stage is the number one reason DIY projects don't get that professional look. It's like building a beautiful house on a shaky foundation—it's bound to have problems. Grease, dust, and grime create a barrier that stops paint from sticking properly, which leads to chipping and peeling down the road. A perfectly prepared surface is the only way to guarantee your trim and doors will look incredible and last for years.
First Things First: A Thorough Clean
Before you even think about sandpaper or a caulking gun, every surface needs a deep clean. Baseboards, door frames, and window sills are magnets for dust, scuffs, and fingerprints. Painting over that grime is a recipe for failure.
For most areas, a simple mix of warm water and a bit of mild detergent will do the trick. If you're tackling tougher spots, especially in a kitchen or a busy hallway, a dedicated degreaser is your best friend. Just wipe everything down with a soft sponge, then follow up with a clean, damp cloth to rinse off any soap residue. Make sure everything is bone dry before you move on.
Making Repairs Invisible
With your trim and doors clean, it's time to play detective. Go over every inch and hunt down any imperfections—nail holes, dents, scuffs, or small cracks. These little flaws might seem minor now, but they'll stick out like a sore thumb under a fresh coat of semi-gloss or satin paint.
Grab a high-quality wood filler and a flexible putty knife. Press a small amount firmly into each blemish, overfilling it just a little to account for shrinkage as it dries. Once it’s cured, you'll sand it perfectly flush, making the repair completely disappear. For those gaps between the trim and the walls, a paintable acrylic caulk is what you need to create a seamless, built-in look.
Don’t just fill holes. Keep an eye out for old paint drips or rough patches from previous paint jobs. A quick scrape with your putty knife and a light sanding can erase the mistakes of the past, giving you a truly clean slate.
Sanding: The Step You Can't Afford to Skip
Sanding is a critical step, and its importance is impossible to overstate. Even if your trim has been painted before, that old finish is likely too smooth and glossy for new paint to grab onto. A light scuff-sanding is essential for creating a microscopic texture, or "tooth," that the primer and paint need to bond to.
You don't need to strip the old paint off completely. Just a quick pass with a medium-grit sanding sponge (around 120-150 grit) is enough to dull the sheen. For the spots you patched with filler, switch to a fine-grit sponge (220 grit) and sand them until they feel perfectly smooth and level with the surface.
After sanding comes the most important cleanup task of all: getting rid of every last speck of dust. Use a tack cloth or a vacuum with a brush attachment to leave the surface pristine. While this guide focuses on trim, many of these principles apply to bigger jobs; our detailed guide on how to prep walls for painting dives even deeper.
Taping for Razor-Sharp Lines
If you want those incredibly crisp, clean lines that scream "professional," you need good painter's tape. This is one area where spending a few extra dollars makes a huge difference. For homeowners in Mississauga looking for the best results, this is a detail that separates the pros from the amateurs.
Apply the tape in short, overlapping strips, which gives you more control. Once the tape is down, run a putty knife or even an old credit card along the edge to seal it tight. This simple move is the secret to preventing paint from bleeding underneath, giving you that satisfyingly sharp line when you peel it off.
Protecting Your Workspace
The final piece of the prep puzzle is protecting everything you don't want to paint. Lay down canvas or plastic drop cloths to cover the floors and drape any furniture that's too heavy to move.
A clean, protected workspace is an efficient one. It lets you focus on your painting technique without stressing about accidental drips and spills. Taking the time to get these prep steps right ensures your project starts on solid ground, setting you up for a result that looks clean, professional, and built to last.
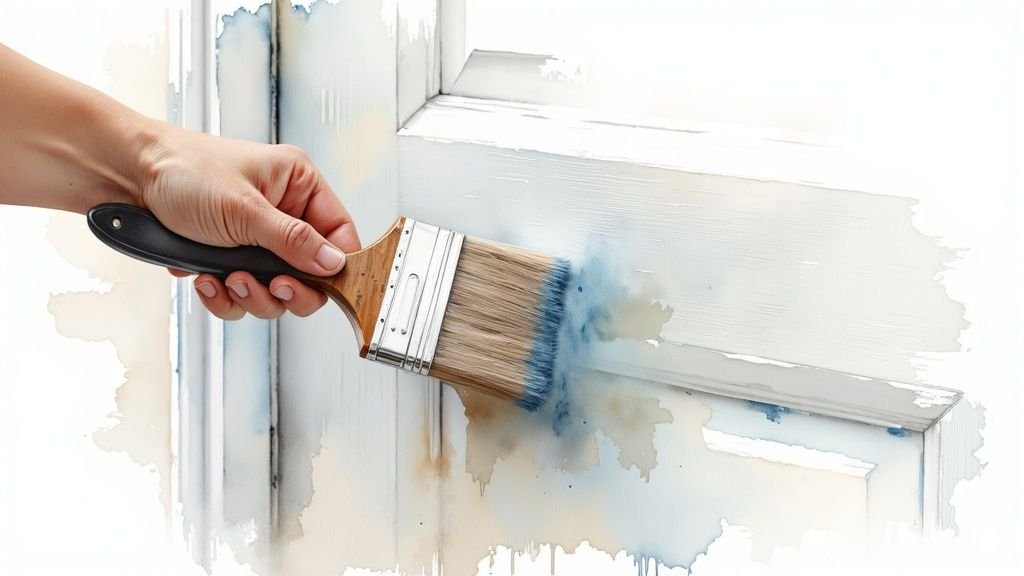
Applying Paint for a Smooth, Professional Finish
After all that careful prep work, we finally get to the satisfying part: laying down the paint. This is where your planning and elbow grease truly pay off, transforming those perfectly prepped surfaces into something that looks sharp, clean, and professionally done. The goal here is a flawless, even coat, and getting there is all about the right technique and a bit of patience.
This visual guide lays out the prep sequence we've been talking about—the absolute foundation for a great finish.
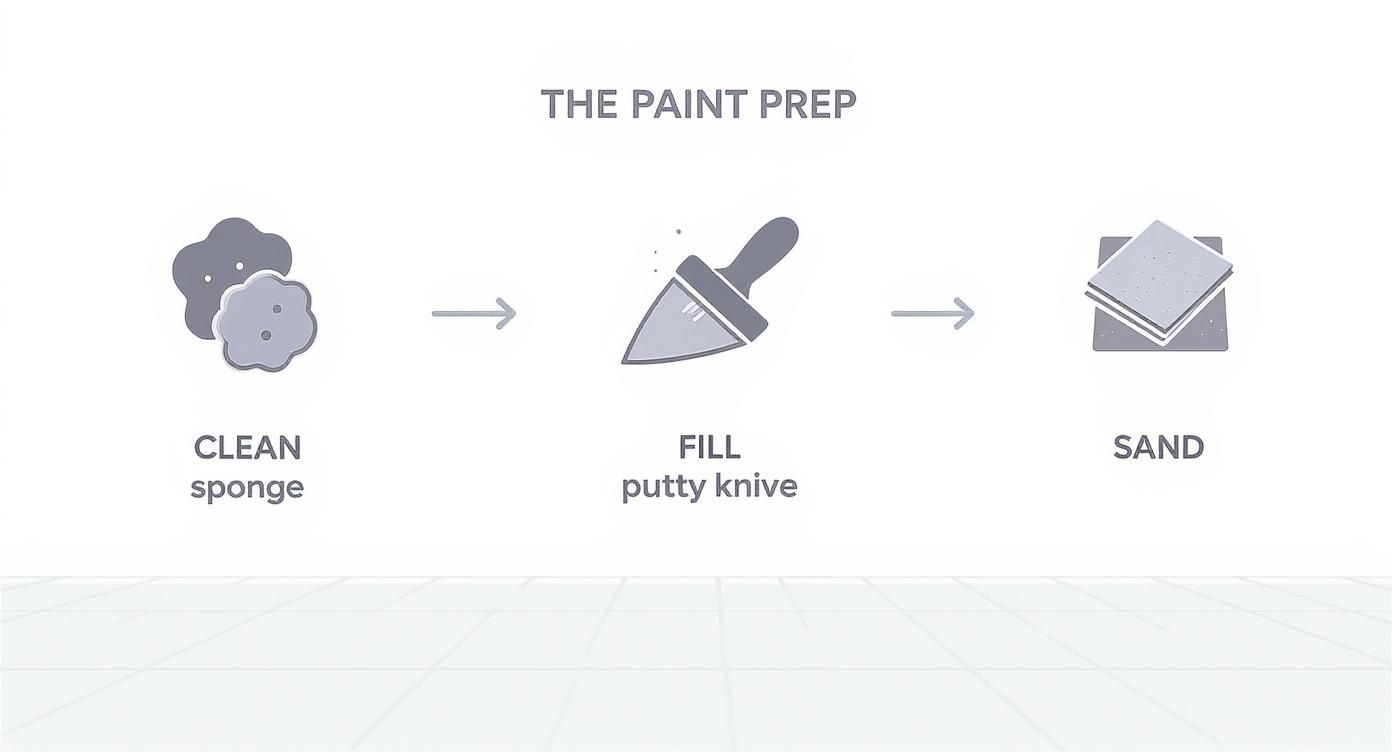
As you can see, cleaning, filling, and sanding aren't just suggestions; they're the non-negotiable pillars that hold up a durable, beautiful paint job.
The Critical First Coat of Primer
Think of primer as the essential handshake between the wood and your final paint colour. Homeowners in Mississauga and Toronto often want to skip this step, but its role is too important to ignore. Primer does more than just cover an old colour; it actually seals the surface and creates the perfect, uniform base for your paint to grab onto.
This adhesion is what gives your paint job long-term durability, preventing the chipping and peeling that can ruin a project down the line. Even more importantly, primer guarantees colour accuracy. It blocks any underlying tones from bleeding through, so that crisp white or deep grey you picked out looks exactly as it did on the swatch. For the best, most consistent results across the GTA, a quality primer is non-negotiable.
Mastering Your Brushwork
Getting that smooth, brush-mark-free finish on trim really comes down to technique. It all starts with how you load your brush. Don't just dunk the whole thing in the can. Instead, dip only about the first third of the bristles into the paint, then tap it gently against the inside of the can to knock off the excess. Avoid scraping it clean—you want to leave enough paint on the brush for a controlled, smooth application.
When you apply the paint, use long, steady strokes that follow the direction of the wood grain. The real secret here is to maintain a "wet edge." This just means you should always overlap your new stroke onto the still-wet edge of the previous one. It’s this simple technique that allows the paint to level out and blend together seamlessly, making brush marks practically disappear.
Here’s a pro tip from the field: work in smaller, manageable sections. Don't try to tackle an entire door frame at once. Focus on finishing one complete piece—like the top casing—before you move on to the sides. This makes it much easier to maintain that critical wet edge.
The Right Order for Painting Trim and Doors
When you're painting something with multiple planes, like a window casing or a six-panel door, the order you paint in actually matters. Following a logical sequence is the key to preventing smudges and getting those clean, crisp lines everyone wants.
For Window and Door Frames:
- Begin with the innermost edges, the ones right up against the glass or the door slab.
- Next, tackle the flat faces of the casing.
- Finish up with the outer edges where the trim meets the wall.
For Paneled Doors:
- Paint the recessed panels first with a good angled brush.
- Then, move on to the horizontal rails, working from the top down.
- Finally, paint the vertical stiles on the sides of the door.
This methodical approach is what the best painters in Toronto use to keep their work clean and efficient. It stops you from accidentally brushing up against partially dry paint, which is what causes most streaks and imperfections.
Avoiding Common Painting Pitfalls
Even when you do everything right, a few common issues can pop up. Drips, sags, and prominent brush marks are the usual suspects, but they're entirely preventable with a little foresight.
- Don't Overload Your Brush: This is the number one cause of drips and runs. It's always better to apply two thin, even coats than one thick, heavy one.
- Keep a Good Light Source: Proper lighting is your best friend on a paint job. Set up a work light so it shines across the surface you're painting. This angle will highlight any drips or uneven spots before they have a chance to dry.
- Sand Lightly Between Coats: Once your first coat is completely dry (check the can for recoat times!), give the surface a quick, very light scuff with a 320-grit sanding sponge. This tiny step knocks down any dust particles or minor bumps, giving the second coat an even smoother base to stick to. The result is a finish that feels like it came from a factory.
For big jobs with lots of doors, many of us pros turn to a sprayer to get the ultimate smooth finish. If that sounds like a good option for you, it’s worth checking out our guide to find the best paint sprayer for home use and see if it fits your project.
Respecting Drying and Curing Times
Finally, let's talk about patience—one of the most vital yet overlooked parts of any paint job. Paint goes through two stages: it becomes dry to the touch fairly quickly, but it takes much longer to fully cure. Curing is the chemical process where the paint hardens into a tough, durable film.
Rushing this is a surefire way to ruin all your hard work. If you apply a second coat before the first is truly ready, the paint can pull and peel right off. More importantly, closing a door or leaning something against the trim before the paint has fully cured can leave permanent dents and marks. Always follow the manufacturer's directions for both recoat and cure times—it’s the only way to ensure your beautiful new finish is tough enough to handle everyday life.
Finishing Touches and Professional Cleanup
With the last coat of paint on, you're in the home stretch. But don't rush it—these final steps are what separate a decent DIY job from a truly professional-looking finish. It all comes down to the details: getting those crisp lines, fixing minor imperfections, and cleaning up properly.
This is where patience really pays off. You're moving from the broad strokes of painting to the fine art of perfection. A methodical approach now will ensure your hard work shines and your gear is ready for the next project.
Achieving Perfect Paint Lines
Ask any painter when to pull off the tape, and you might get a few different answers. But for the latex paints we typically use on trim, there's a sweet spot: pull the tape while the paint is still tacky, usually within an hour of your final coat.
If you wait until the paint is completely cured, it forms a solid film over the tape and the trim. When you go to pull it, you risk tearing a chunk of your beautiful new paint job right off the wall, leaving you with a jagged, frustrating edge.
Found yourself in a spot where the paint has already fully dried on the tape? Don't worry, it happens. Grab a sharp utility knife or a razor blade and gently score the line where the tape meets the trim. This simple trick cleanly breaks the paint's seal, letting you peel the tape away without taking your hard work with it.
This little technique is a real lifesaver, especially for those of us in the GTA juggling busy schedules where tape might get left on a bit longer than planned. Nailing this step is key to getting that razor-sharp finish.
Inspecting Your Work for Flaws
Once the tape is down, it's time for a close-up inspection. Get a good light source and look over every surface from multiple angles. You're hunting for any little issues that might have popped up as the paint dried.
Keep an eye out for:
- Tiny drips or sags: Small runs that can happen if the paint was applied a little too heavily.
- Light or sheer spots: Areas where the coverage isn't quite opaque.
- Dust nibs: Annoying little specks of dust that decided to land in your wet paint.
For tiny flaws like a dust nib, you can often fix it without a fuss. Just wait for the paint to fully cure, then lightly sand the spot with 320-grit sandpaper until it's smooth. A quick dab of paint with a small artist's brush is all you need to make it disappear. This targeted approach saves you from having to recoat the entire piece.
If you find a larger area that looks a bit thin, a third coat might be the answer. A final, carefully applied coat can even out the sheen and give you that flawless, uniform look you're after.
Efficient and Responsible Cleanup
A professional job isn't done until the cleanup is complete. Taking the time to properly clean and store your tools not only saves you money but also shows respect for your craft. For homeowners in Toronto and Mississauga, this also means handling leftover materials responsibly.
Cleaning Your Tools:
- Latex Paint: First, scrape as much paint as you can back into the can. Then, wash your brushes and rollers with warm, soapy water. Keep rinsing until the water runs completely clear. A painter's comb is a fantastic tool for getting paint out from the base of the bristles, which is crucial for keeping your brush in good shape.
- Storage: After cleaning, gently reshape the bristles and hang your brushes to dry. Rollers should be stored standing on end. Keeping them in their original sleeves helps them hold their shape for the next job.
Proper care is the best way to protect your investment. A high-quality angled sash brush is a painter's best friend and can last for years if you treat it right.
When it comes to leftover paint, never just pour it down the drain or toss it in the garbage. The City of Toronto has specific guidelines for this. You can take any unwanted paint to a local Household Hazardous Waste Depot. It's an easy step that ensures these materials are handled safely, protecting our local environment and keeping the GTA clean.
Got Questions About Painting Your Trim and Doors?
Even with the best plan, you're bound to run into a few questions once the dust sheets are down. It happens on every job. Homeowners across Toronto often ask the same things, so we’ve pulled together the most common ones to give you clear, practical answers based on years of experience right here in the GTA.
Getting these details right is what separates a decent DIY job from a truly professional finish that lasts.
What's the Best Paint Sheen for High-Traffic Trim?
For trim and doors that see a lot of action, you can't go wrong with either a satin or semi-gloss finish. Your final choice really just depends on the look you prefer and how much abuse the surface is going to take.
- Semi-gloss is the workhorse of paint sheens. It’s tough as nails and incredibly easy to wipe down, which makes it the best recommendation for baseboards, door casings, and windows in busy spots like hallways, kitchens, and bathrooms.
- Satin gives you a more modern, velvety look with a bit less shine than semi-gloss. It’s still very durable and scrubbable, but it’s also a little more forgiving when it comes to hiding small dings and dents on the surface.
Think about the room itself. If you're painting the trim in a bustling family home in Mississauga, the bulletproof durability of semi-gloss is probably your best bet. But for a sleek downtown Toronto condo, a sophisticated satin finish might be the perfect fit.
Should I Tackle the Trim or the Walls First?
The best professional practice is to paint the trim first, then the ceiling, and finally the walls. We know it sounds a bit backward, but it’s the secret to getting those perfectly crisp, clean lines.
When you paint the trim first, you don't have to be super neat where it meets the wall. Just let the trim paint fully cure, then run a line of painter’s tape along the top edge for a perfect seal. This lets you cut in your wall colour right up to the tape, giving you a flawless line every single time. It's so much easier than trying to paint a skinny line of trim paint against a freshly painted wall.
Do I Really Need to Prime if the Trim Is Already Painted?
Yes, almost always. Skipping the primer is one of the biggest—and most common—mistakes we see people make. A good quality primer is non-negotiable for two main reasons.
First, it acts like a double-sided tape, ensuring the new paint actually sticks to the old surface. This is what prevents peeling and chipping down the road. Second, it blocks the old colour from bleeding through, so your new shade looks rich and true without needing a dozen coats. And if you’re moving from an old, oil-based paint to a new water-based latex? A dedicated bonding primer is absolutely essential for a finish that will actually last.
The time paint takes to dry and cure is a crucial part of the process, especially between priming and painting. Understanding these timelines is vital for a durable outcome. To learn more, check out our guide on how long paint takes to dry and cure.
For homeowners in Toronto and the GTA looking for the best, flawless, long-lasting finish without the hassle, Soca Services Painting offers expert interior painting services near you. Contact us today for a professional consultation.