
When you’re staring up at a two-storey great room ceiling in Mississauga or a tall loft in downtown Toronto, the thought of painting it can feel overwhelming. The best way to tackle a high ceiling painting project isn't just brute force; it's about having a solid, objective plan and the right equipment. Without them, you’re setting yourself up for a messy, frustrating, and potentially dangerous job where every mistake is amplified by the height.
Your Game Plan for Painting High Ceilings
Painting a high ceiling feels like a huge undertaking, but breaking it down with a professional, objective structure makes all the difference. It's not just about getting a taller ladder. Success comes from a methodical process, from the initial prep right through to the final cleanup. Trust me, proper planning will save you time, money, and the neck-craning headache of fixing mistakes that are ten, fifteen, or even twenty feet up.
The first thing the best painters do is a thorough assessment of the space and the job’s logistics. A soaring, modern ceiling is a different beast than a century-old one with delicate crown moulding. This initial walkthrough tells you exactly what kind of equipment you'll need. For most homeowners I talk to across the GTA, renting professional-grade gear like scaffolding or specialized ladders is the smartest and safest way to go. It’s almost always more cost-effective than buying something you'll only use once.
Assessing Your Project Needs
Before you even think about cracking open a can of paint, take a good, hard look at the room itself. Every space has its quirks.
- Ceiling Height and Shape: Are you dealing with a standard flat ceiling, or is it vaulted, sloped, or coffered? The geometry of the ceiling will dictate how you move around the room and the best way to apply paint for an even finish.
- Fixtures and Obstacles: Big chandeliers, pot lights, smoke detectors, and ceiling fans all need to be dealt with. You have to decide if you're going to painstakingly tape and cover them or, for a cleaner job, remove them temporarily.
- Current Condition: Scan the surface for any imperfections. Hairline cracks, old water stains, or peeling paint have to be properly repaired before you even think about priming. A fresh coat of paint will only highlight these flaws, not hide them.
A professional-looking paint job is 80% preparation. Rushing this stage is the single biggest mistake I see, and it’s the number one reason for a poor outcome—especially on a huge, visible surface like a high ceiling.
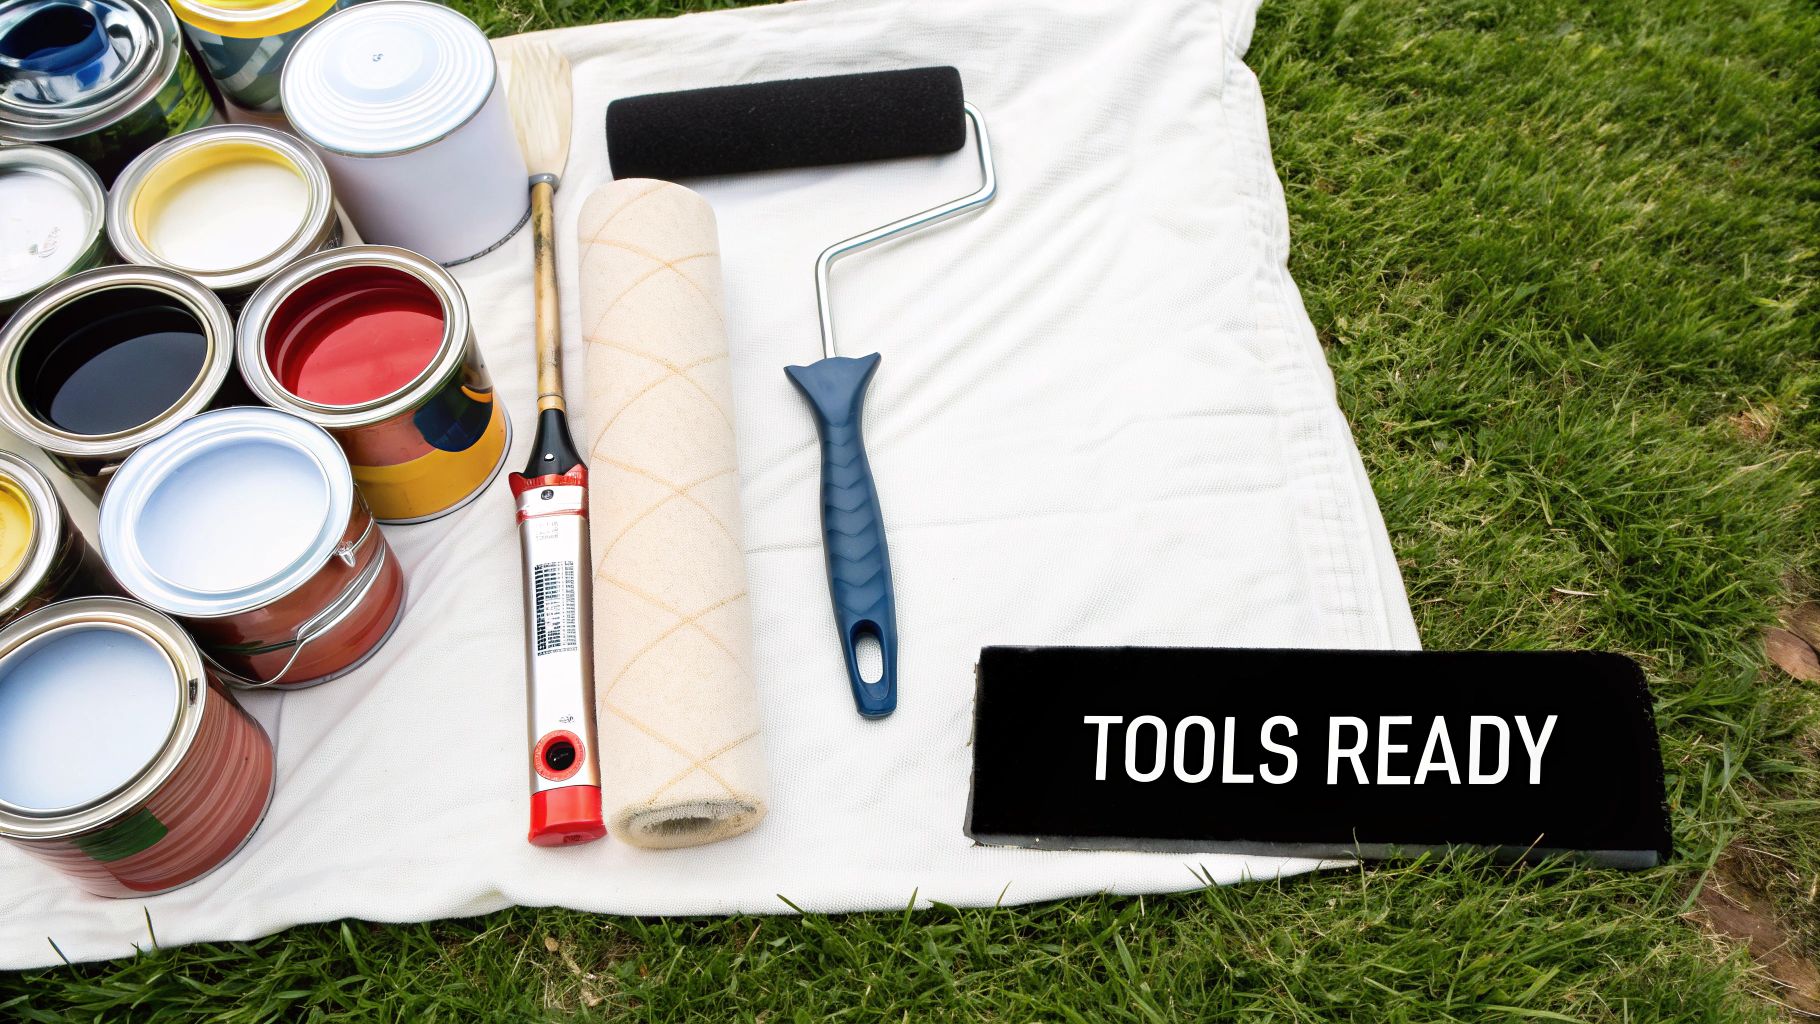
To get the job done right, you need the best tools. Here's a quick rundown of the essentials you'll want to have on hand.
Essential Toolkit for High Ceiling Painting
This table is your quick-reference guide to the must-have tools for painting high ceilings. Having these items ready will make the job safer, faster, and give you a much better finish.
| Tool | Primary Use | Why It's Essential for Height |
|---|---|---|
| Extension Pole | Attaching rollers and brushes | Allows you to paint large sections from the ground or a stable platform, minimizing ladder time. |
| Sturdy Ladder/Scaffolding | Reaching the ceiling safely | A-frame ladders are okay for edges, but scaffolding provides a stable, wide platform for safer, more efficient work. |
| High-Quality Roller Covers | Applying paint smoothly | A thick nap (e.g., 1/2" to 3/4") holds more paint, reducing trips up and down the ladder. |
| Cut-in Brush | Painting edges and corners | An angled brush on an extension pole gives you better control for crisp lines around trim and walls. |
| Drop Cloths (Canvas) | Protecting floors and furniture | Canvas is more durable and less slippery than plastic, which is a critical safety factor when working at height. |
| Painter's Tape | Masking off trim and walls | Ensures clean lines and protects surfaces you don't want painted. Essential for a professional look. |
| Paint Tray and Liners | Holding paint | Look for a deep-well tray that won't tip easily and use liners for quick colour changes and cleanup. |
Having this toolkit assembled before you start is a non-negotiable step for a project of this scale.
Ultimately, the secret is to treat your home project with the same serious approach a professional painter would. It’s all about creating an objective, repeatable workflow, from prep to cleanup, that guarantees a flawless result every time. In fact, that's how many of the best contractors got their start—by mastering these foundational skills. For anyone thinking about taking their painting skills to the next level, understanding the business side is just as critical. There are some fantastic insights on how to start a painting business that really break down these professional principles.
Gearing Up: Safety and Efficiency for High Ceilings
When you're staring up at a tall ceiling, your first thought shouldn't be about the colour, but about safety. Trust me, working at height is no joke, and having the right equipment is the only way to do this job safely and efficiently, whether you're in a sprawling Mississauga home or a downtown Toronto condo.
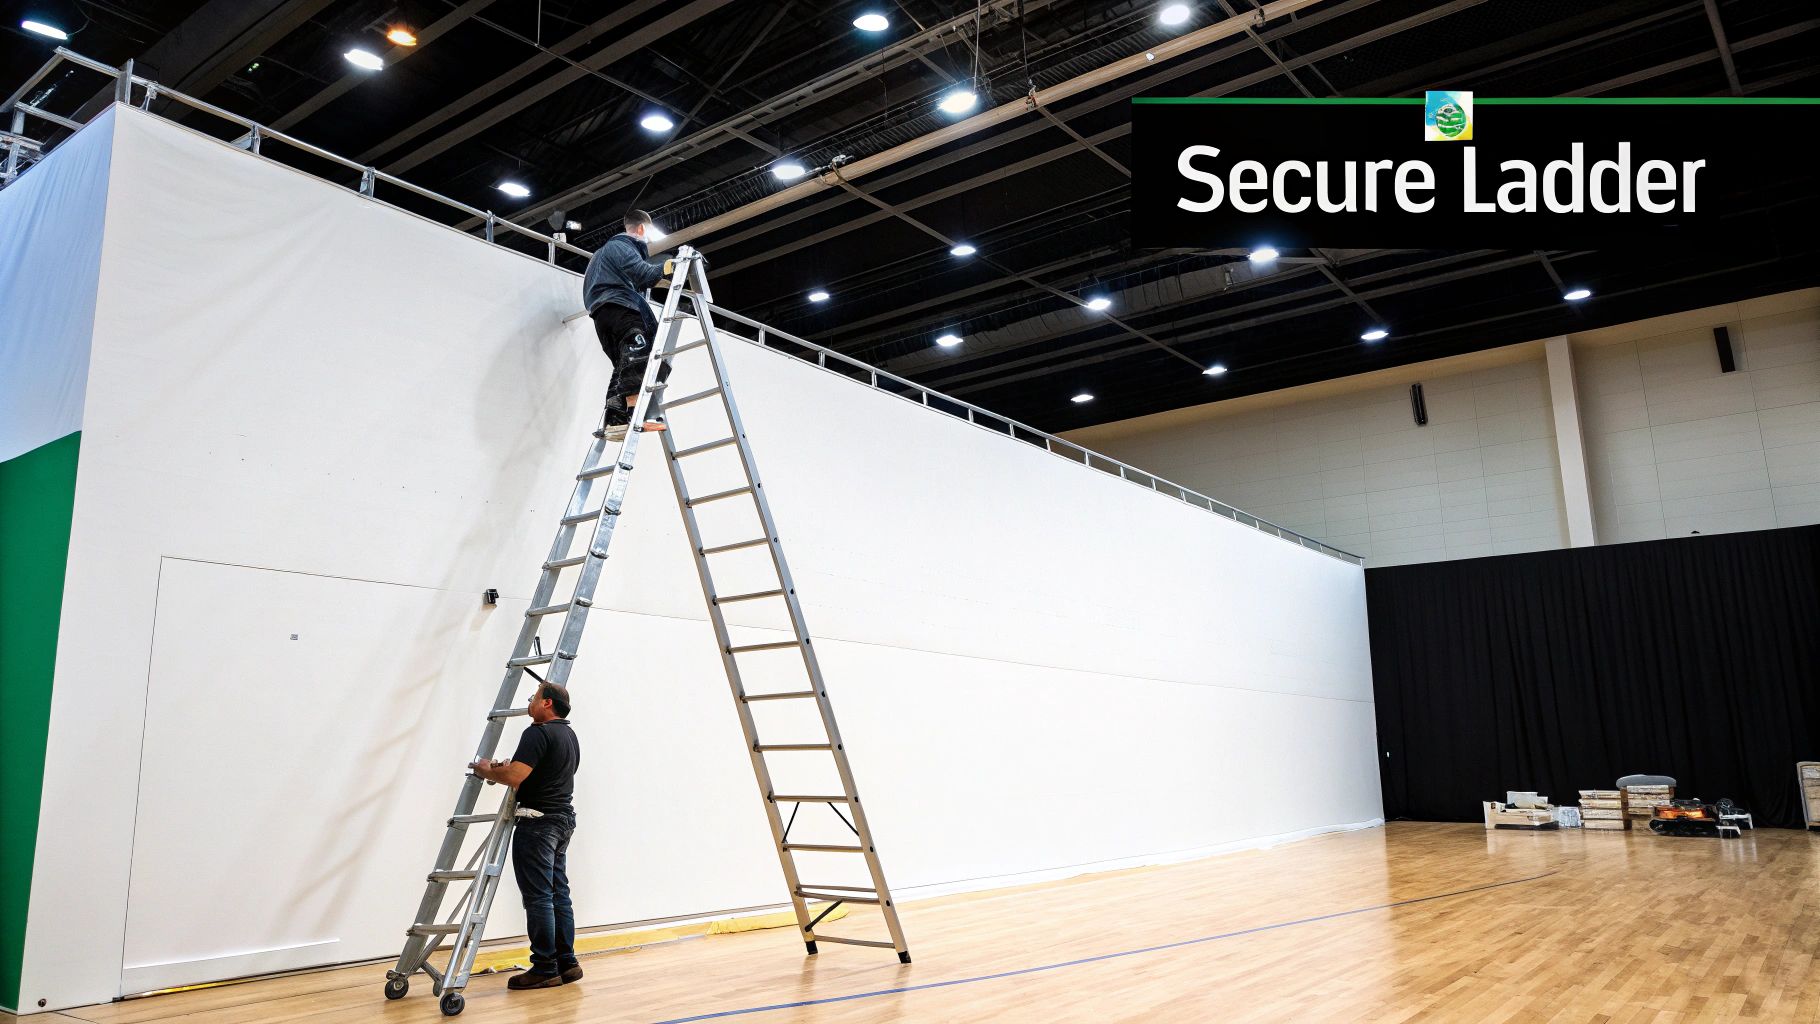
Your most important decision is how you're going to get up there. For truly massive spaces, like a two-storey great room, renting scaffolding is often the best and safest choice. It gives you a large, stable platform to work from. This means you can have your paint tray and tools right beside you, saving countless trips up and down.
But for most standard rooms with ceilings up to 12 or 14 feet, a really solid A-frame or a good-quality extension ladder will do the trick just fine.
Ladder Safety Is Non-Negotiable
A wobbly ladder is an accident waiting to happen. Before you even think about climbing, make sure your ladder is planted on a completely flat, even surface. Kick away any stray drop cloths or debris from its feet. One thing the best painters always insist on is having a spotter—someone on the ground to hold the base steady, especially when you need to reach just a little bit further.
Next, get your personal protective equipment (PPE) sorted before a single can of paint is opened.
- Non-slip footwear is a must. You need a solid grip on those ladder rungs.
- Safety glasses are your best friend. Paint will drip, it's inevitable, and you don't want it in your eyes.
- A dust mask is crucial during prep work, particularly if you’re sanding any patches or old, flaky paint.
Look, taking the time to set up properly and invest in safety gear isn't just a suggestion—it's the bedrock of a successful project. When you feel secure, you can focus on getting that flawless finish instead of worrying about taking a tumble.
In the end, gathering the right equipment might feel like an added cost, but it’s a small fraction of the overall project. It's always smart to budget for everything; getting a sense of the typical house painting cost in Toronto can give you a solid benchmark for the whole job. With the proper gear, you’re not just painting a ceiling—you’re creating a professional and secure work zone to get it done right.
Prepping Your Space for a Flawless Finish
Ask any seasoned painter from Toronto to Mississauga, and they’ll all say the same thing: a great paint job is 80% preparation. This is especially true when you're tackling high ceilings. The way light hits those expansive surfaces means every tiny flaw gets magnified, so your prep work isn’t just a good idea—it’s everything. It's what stands between a so-so finish and one that looks sharp and professional for years to come.
Before you even think about dipping a roller in paint, that ceiling needs to be spotless and smooth. High ceilings are magnets for dust, cobwebs, and airborne grime that you don't notice from the ground. Your best bet is an extension pole with a duster head or a vacuum cleaner with a soft brush attachment to get it all down.
Once it's clean, give the ceiling a thorough once-over. Get up on a ladder and look for hairline cracks, nail pops, or the tell-tale discolouration of old water damage. Trust me, these little issues will scream for attention under a fresh coat of paint if you ignore them now.
Patching and Priming for Perfection
Found a few small cracks or nail holes? A bit of lightweight spackling compound is your best friend here. Use a flexible putty knife to apply it, making sure to feather the edges so it blends right into the ceiling. Let it dry completely, then give it a light sanding until it's perfectly flush with the surface. You shouldn't be able to feel the patch when you run your hand over it.
Whatever you do, don't skip the primer. A good quality primer is a non-negotiable step that does a few crucial things: it seals your fresh patches, gives the new paint a surface it can really grab onto, and creates a uniform base for an even, consistent colour. This is absolutely critical if you're covering an old, dark colour or trying to hide stubborn stains.
A well-primed ceiling is the secret to getting that deep, rich colour you fell in love with on the paint chip. It ensures your topcoat flows on smoothly and gives you the best possible coverage, often saving you from the time and expense of an extra coat.
Creating Clean Lines and Protecting Your Space
With the surface repairs done, the last prep step is to protect everything that isn't getting painted. The care you take here is what really separates an amateur-looking job from a professional one.
- Taping: Grab some high-quality painter's tape to run a clean, crisp line where the ceiling meets the walls. If you have textured ceilings, use a putty knife to press the edge of the tape down firmly. This creates a seal and stops paint from bleeding underneath.
- Covering Fixtures: Tape carefully around the base of any ceiling fans or light fixtures you couldn't take down. I find a combination of tape and some lightweight plastic sheeting works perfectly for this.
- Protecting Floors: Cover the entire floor and any furniture left in the room with canvas drop cloths. They’re much better than plastic sheets, which get incredibly slippery and can be a real hazard when you're working up high on a ladder.
Putting in the effort on this detailed prep work pays off tenfold in the final result. Now that everything is patched, primed, and protected, you’re finally ready for the fun part. If you need some help picking your gear, take a look at our guide on choosing the right paint brushes and rollers for the job.
Painting Techniques for a Flawless Finish
With all your prep work behind you, it's finally time to lay down some paint. This is where the magic happens, but it's also where things can go wrong. A vast, high ceiling is unforgiving—streaks, lap marks, and patchiness show up all too easily. The objective here isn't just to get colour on the surface; it's to create a seamless, uniform finish that looks like it was done by a pro.
The process always starts with "cutting in." This just means painting a clean, crisp border where the ceiling meets the walls. For high ceilings, forget trying to do this from a ladder. Your best friend is an angled sash brush attached to an extension pole. This setup gives you the reach and stability you need to paint a steady, straight line without teetering precariously.
Getting the Rolling Right for Even Coverage
Once your edges are done, it's time for the main event: rolling the ceiling. The absolute golden rule here is to always maintain a "wet edge." This simply means you always overlap your fresh paint onto the still-wet paint from the previous section. If you want to avoid those ugly, tell-tale lap lines, this is the single most important technique to master.
I always tell people to use a “W” or “N” pattern. Start by rolling a big “W” across a manageable area—think about a 3-foot by 3-foot section. Then, without lifting the roller, fill in the shape. This method spreads the paint far more evenly than just going back and forth, which can leave you with thick spots and roller marks.
A common mistake I see is being too timid when loading the roller. An under-loaded roller is a sure-fire way to get streaks. You want the roller to be fully saturated but not dripping with paint. This ensures you're laying down a consistent, even coat with every pass.
This visual breaks down the core painting process into three key stages in a clear, objective structure.
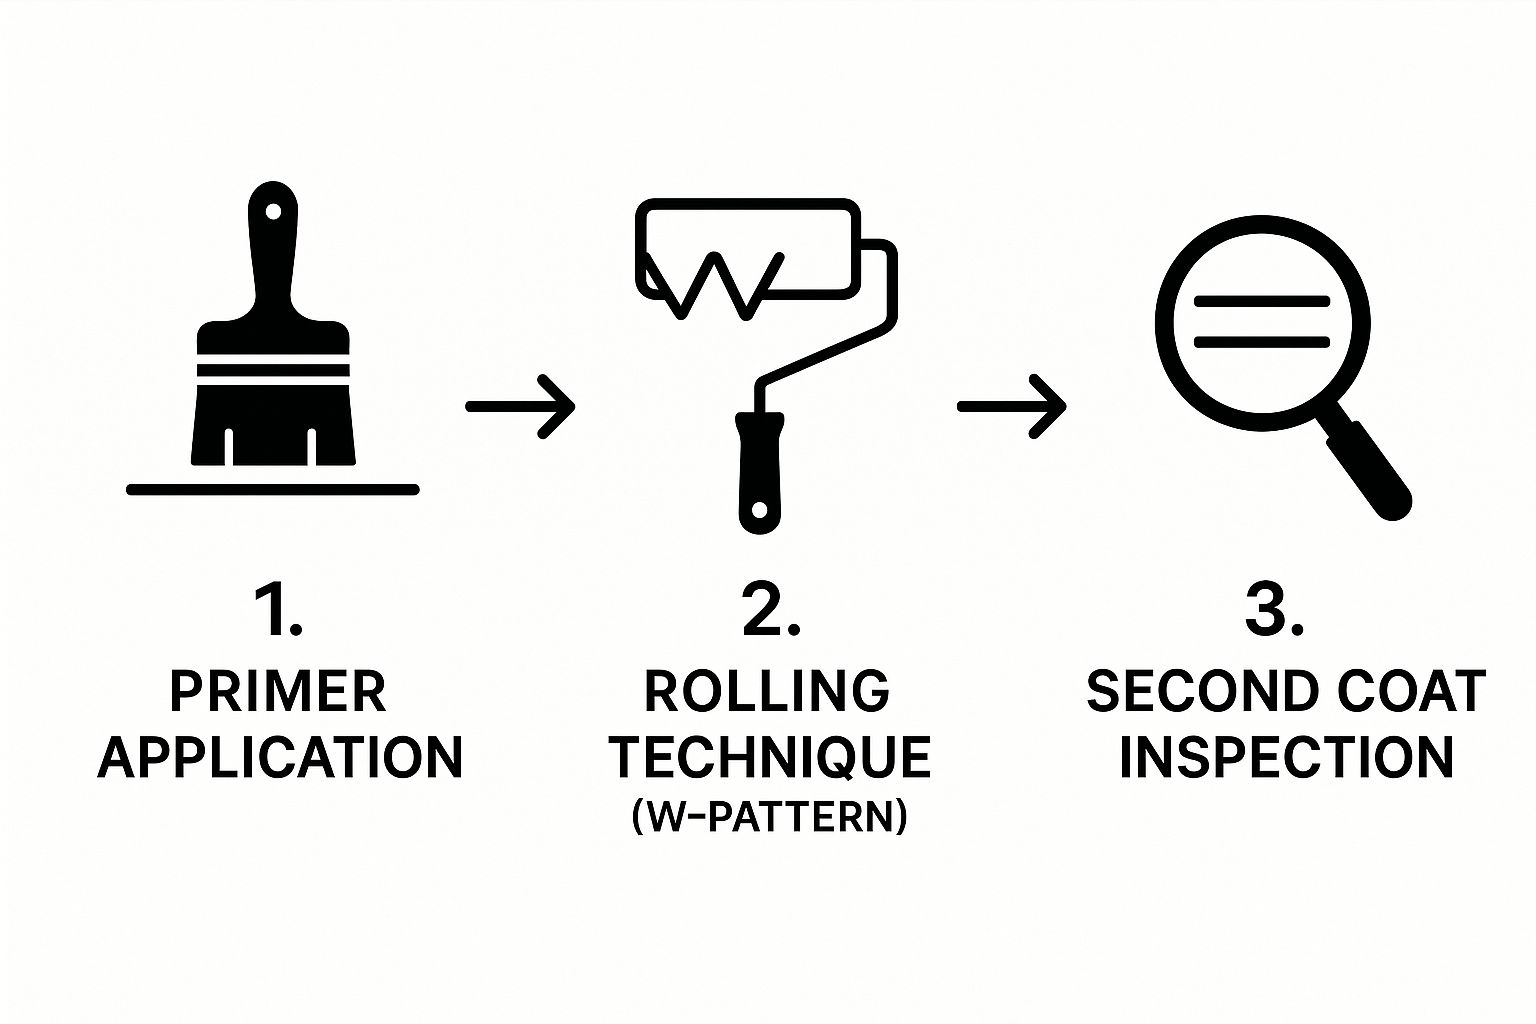
It really shows how applying a good primer, using a systematic rolling pattern, and then carefully inspecting your work before starting the second coat is a foolproof method for a professional finish.
Of course, the extra effort and specialized equipment for high ceilings can add to the project's bottom line. For example, painting a standard ceiling might run you $1 to $2.50 per square foot, but ceilings over 10 feet can increase that cost by about 10% for every extra foot in height.
Keep in mind that these techniques are for standard flat ceilings. If you're dealing with a textured finish, the game changes. For tips on tackling those kinds of surfaces, you can check out our guide on popcorn ceiling removal. Follow these best practices, and you'll be well on your way to a flawless look, no matter what kind of ceiling you're working with.
Tidying Up and Final Inspection

A truly great paint job isn't finished until the last piece of tape is gone and the entire space is spotless. It’s this last phase that really separates a decent DIY attempt from the kind of professional results we deliver across the GTA, from Toronto to Mississauga.
One of the most common questions I get is about painter's tape. The trick is to pull it off while that final coat is still a little damp, but not so wet that it's dripping. If you wait until the paint is bone-dry, you’re almost guaranteed to peel off bits of your new paint along with the tape, leaving a jagged, frustrating edge.
Pull the tape away from your fresh paint at a 45-degree angle. A slow, steady hand here is your best bet for getting that razor-sharp line you've been working towards.
Quality Control and Touch-ups
Now for the moment of truth: the final inspection. Don't just stand in the middle of the room and look up. You need to move around, checking out the ceiling from every possible angle and in different lighting conditions. What you see in the morning sun will be different from what your light fixtures reveal at night.
Here’s what you’re looking for:
- Missed Spots: Those tiny holidays where the roller didn't quite make contact.
- Lap Marks: Faint lines showing where your roller strokes overlapped but didn't blend perfectly.
- Imperfections: Any sneaky drips or uneven textures you didn’t catch earlier.
I always keep a small amount of leftover paint, a little artist's brush, and a mini-roller on standby for these quick fixes. It’s these small touch-ups that elevate the job from "good" to "flawless." This same level of care is crucial for other tricky projects, as we detail in our guide to staircase painting and staining.
Taking the time for a thorough final check is essential, especially when you consider the investment. For challenging high ceilings, the work can easily make up 70% to 85% of the project's total labour costs. As outlined in guides on how professionals calculate painting expenses, that’s a significant chunk. Making sure every detail is perfect ensures you get the best possible return on all your hard work.
Answering Your High Ceiling Painting Questions
Even with the best plan, painting a huge, towering ceiling can bring up a few questions. From our experience helping homeowners across Toronto, Mississauga, and the wider GTA, here are the answers to the questions we hear most often.
Should I Use a Sprayer or a Roller?
This is a classic debate, but for almost any homeowner tackling a high ceiling in a furnished room, a good roller on a sturdy extension pole is your best bet. It gives you so much more control and keeps the mess to an absolute minimum.
Paint sprayers are incredibly fast, which is why pros use them on new construction sites. But in a lived-in home, the prep work is a nightmare. You’d have to mask everything—walls, floors, windows, furniture—to protect it from the fine mist of overspray. Honestly, the masking can take longer than the actual painting.
What's the Best Paint Finish for a Ceiling?
Stick with a flat or matte finish. There's a reason it's the professional standard, especially for ceilings. These finishes don't reflect light, which makes them fantastic at hiding the little imperfections, bumps, and roller marks that are inevitable on any large surface.
Think about it: a high ceiling often gets hit with a lot of natural light from windows. A glossy finish would turn every tiny flaw into a spotlight. A flat finish diffuses that light, giving you a smooth, uniform appearance that looks clean and professional.
How Many Coats of Paint Will I Need?
You should always budget your time and paint for at least two coats. This is non-negotiable for a quality, long-lasting finish.
Your two coats could be one layer of a high-adhesion primer followed by your single topcoat of ceiling paint. Another popular option is using two full coats of a quality paint-and-primer-in-one product. If you're making a dramatic change, like painting a light colour over a very dark one, don't be surprised if you need a third coat to get that flawless, even coverage.
Feeling a bit intimidated by the thought of tackling those high ceilings yourself? For a perfect, professional finish without the hassle and risk, it’s often best to call in the experts. If you're searching for "best painters near me" in the GTA, your search ends here.
Contact Soca Services today for your free estimate. Find out how our experienced team can transform your space safely and beautifully. Learn more at https://www.socaservicespainting.com.