
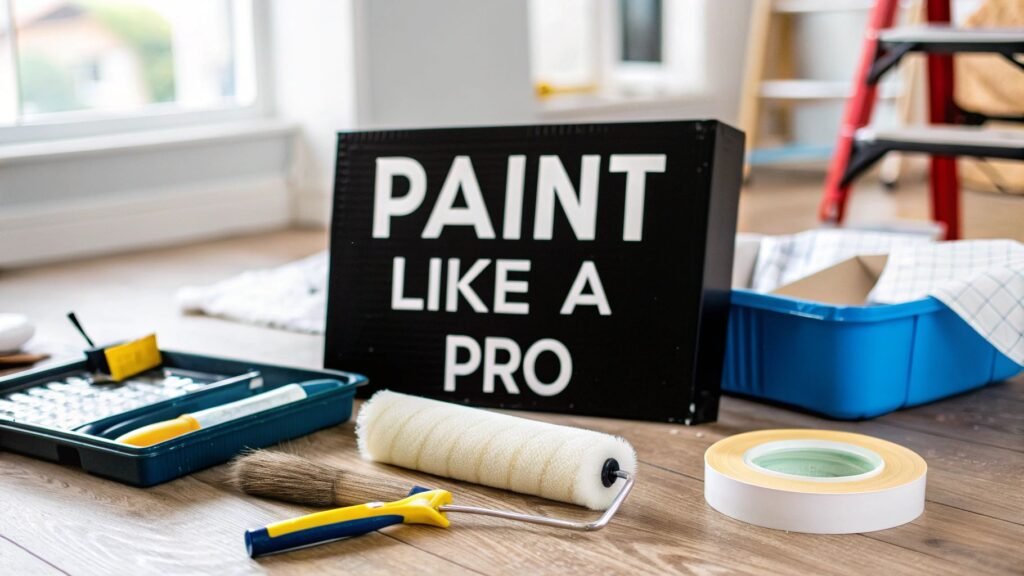
Anyone who’s ever painted a room will tell you the secret to the best finish isn't in the brush strokes. It’s in the prep work. This is where you’ll spend 80% of your time, but it’s what separates a professional-looking job from a messy DIY attempt. It’s all about creating the perfect canvas before you even think about popping open a can of paint. This guide provides an objective structure to help homeowners in Toronto, Mississauga, and the wider GTA achieve flawless results.
Your Foundation for a Flawless Finish
Honestly, the real difference between an amateur paint job and one done by a pro is the meticulous prep that happens beforehand. This is the grunt work that makes a smooth, clean surface possible. If you skip it, you're setting yourself up for bumps, peeling paint, and uneven colour down the road.
Think of your wall as having its own history. Every nail hole from a gallery wall, every scuff mark from moving furniture, and every hairline crack from a settling foundation tells a story. Your job is to erase that history to create a pristine new surface. This is definitely where most of the effort is, but it’s also how you guarantee the results are worth it.
Creating the Perfect Canvas
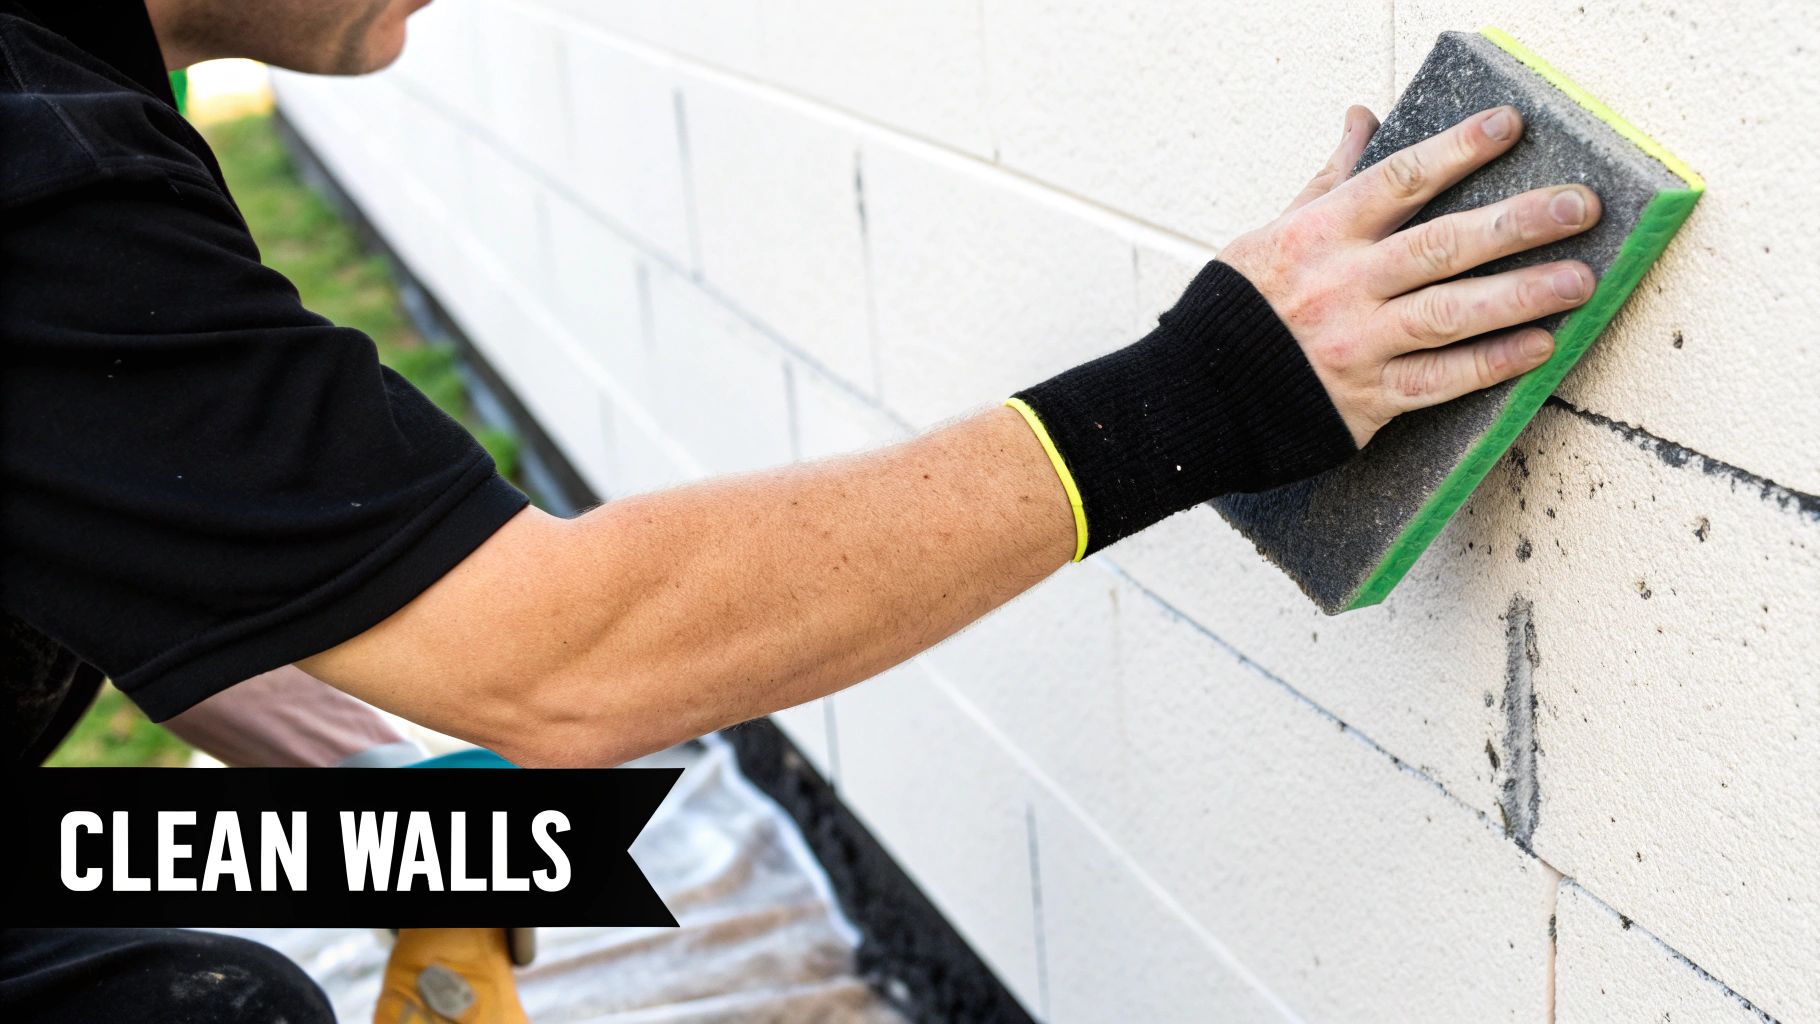
Before you even touch a putty knife, your walls need a good cleaning. Over the years, they accumulate a surprising amount of dust, grime, and oils—especially in high-traffic areas like kitchens and bathrooms. Slapping a coat of paint over that invisible layer is a surefire way to get poor adhesion and, eventually, peeling.
For most rooms, a quick wipe-down with a damp cloth and some mild detergent will do the trick. But for tougher spots, like a kitchen wall near the stove or a bathroom that’s seen its share of hairspray, you'll need to bring out the big guns. A solution of trisodium phosphate (TSP) substitute and water is brilliant for cutting through that stubborn grease and residue.
Once your walls are squeaky clean and bone dry, it's time to play doctor and fix all those little imperfections. This is a non-negotiable step.
- Tiny Nail Holes: For those little pinpricks left by pictures and art, a small dab of lightweight spackling compound on a putty knife is all it takes.
- Dents and Cracks: Got a bigger ding from a piece of furniture or a small stress crack? You’ll need a patching compound or drywall mud. The trick is to apply it in thin, even layers.
- Textured Walls: This can be tricky. If you have textured walls, you'll need to try and mimic the existing pattern. You can use a spray-on texture product or just dab the patch with a damp sponge before it dries completely.
Achieving a Seamless Surface
After your patches have fully cured (always check the product label for the recommended time), it’s time to sand. I know, it sounds tedious, but this step is absolutely essential for a smooth finish. If you skip it, every single patch will stand out like a sore thumb once the paint is on.
Grab a fine-grit sandpaper—something around 120-150 grit—and a sanding block. You’re not trying to sand the entire wall, just feather the edges of your patches so they blend invisibly into the surrounding surface. A good test is to run your hand over the area; if you can’t feel the transition, you’ve nailed it.
Pro Tip: Once you're done sanding, wipe the walls down again with a tack cloth or a slightly damp sponge. You have to get rid of all the dust. Any leftover grit will mix with your paint and give you a rough, bumpy texture.
The final prep step is taping. Those razor-sharp lines you see around trim, windows, and ceilings are what really scream "professional." Invest in a good quality painter's tape, like FrogTape or 3M ScotchBlue. To get a perfect seal, press the edge of the tape down firmly with a putty knife or even an old credit card. This simple action prevents paint from bleeding underneath and gives you that crisp, clean edge.
Of course, if this all sounds like a lot of work, and you're aiming for that flawless look without the hassle, exploring expert interior painting services is always a great option, especially for bigger or more complex jobs.
Picking the Right Paint and Tools
Your walls are prepped and you’re ready to go. Now for the fun part: the trip to the hardware store. It’s easy to feel overwhelmed by the sheer number of paints, brushes, and rollers lining the aisles. But trust me, making the right choices here is every bit as critical as your prep work if you want that flawless, professional look.
Think of it this way: you’re building your custom toolkit for this specific job. The right gear doesn't just make painting easier; it directly affects the final quality. Let's make sure you walk out with exactly what you need, so you can avoid those annoying mid-project store runs.
What’s the Deal with Paint Finishes?
The first big decision you'll face is the paint itself, and the most important choice is the sheen, or finish. This is all about how glossy the paint is. A shinier finish is tougher and easier to clean, but it also loves to show off every little bump and imperfection on your wall.
Here’s a quick rundown of what you’ll find on the shelves, whether you're shopping in downtown Toronto or out in Mississauga.
- Flat/Matte: This finish has almost zero shine. It's a champion at hiding flaws, which makes it perfect for ceilings or low-traffic spots like a formal living room. The downside? It scuffs easily and is a real pain to clean.
- Eggshell: A true crowd-pleaser. Eggshell has a soft, subtle glow that’s way more durable than a flat finish. It’s my go-to recommendation for most living rooms, hallways, and bedrooms in a busy GTA home.
- Satin: With its smooth, almost velvety look, satin is a step up in durability. This makes it the clear winner for high-traffic zones or moisture-prone areas like kitchens, bathrooms, and kids' rooms where you know you'll be scrubbing walls.
- Semi-Gloss/High-Gloss: These are the heavyweights—the most durable and scrubbable of the bunch. Their noticeable shine makes them ideal for trim, doors, and cabinets, helping these features pop while standing up to daily abuse.
To make it even easier, here’s a table breaking down the best use for each finish.
Paint Finish Guide: Which Sheen is Right for You?
Choosing a paint finish is all about balancing looks with real-life needs. A high-gloss sheen might look great on a design show, but a more forgiving eggshell is often the smarter choice for a busy family home.
| Paint Finish | Appearance | Durability/Washability | Best For |
|---|---|---|---|
| Flat/Matte | No shine, hides imperfections well | Low | Ceilings, adult bedrooms, formal dining rooms |
| Eggshell | Soft, low-sheen glow | Medium | Living rooms, hallways, most bedrooms |
| Satin | Smooth, velvety lustre | High | Kitchens, bathrooms, kids' rooms, high-traffic areas |
| Semi-Gloss | Noticeable shine, sleek | Very High | Trim, doors, moulding, cabinetry |
| High-Gloss | Very shiny, reflective | Highest | High-use doors, trim, furniture accents |
Ultimately, the goal is to match the paint’s performance to the room’s function.
Don't Skip the Primer
Next up, primer. It’s so tempting to skip this step to save a bit of time and cash, but believe me, it’s usually a mistake. Primer is the unsung hero of a great paint job. It seals up porous surfaces (like new drywall), stops stains from bleeding through, and gives your topcoat something to grip onto, ensuring a rich, even colour.
So, when is primer an absolute must?
- Making a Drastic Colour Change: Trying to cover a deep navy blue with a light beige? A tinted primer will be your best friend. It will save you from applying three, four, or even five coats of your expensive finish paint.
- Battling Stains: If you’re dealing with old water spots, smoke stains, or your toddler’s crayon masterpiece, a dedicated stain-blocking primer is non-negotiable.
- Painting Fresh Drywall: New drywall is like a sponge; it will soak up your paint unevenly. A coat of PVA (polyvinyl acetate) primer seals the surface, so your paint spreads smoothly and consistently.
The image below gives you a general idea of the coverage you can expect from different paint types, which is super helpful for budgeting.
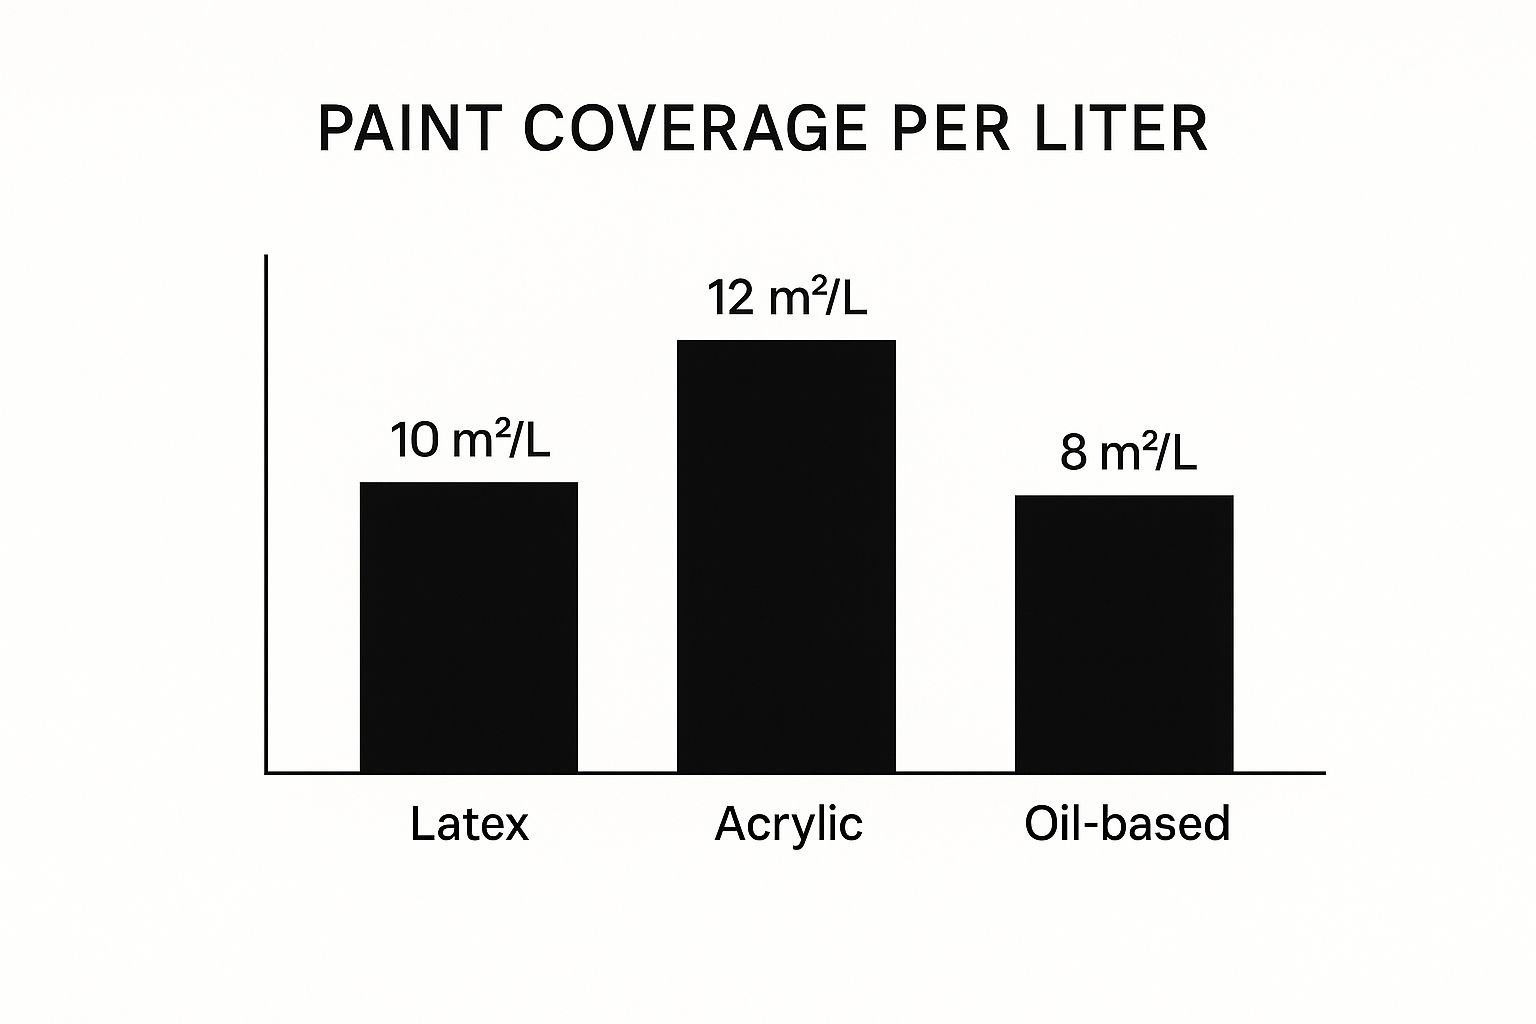
As you can see, planning your paint needs helps you get a handle on the overall investment. For a deeper dive, you can learn more about the average house painting cost in Toronto in our detailed guide.
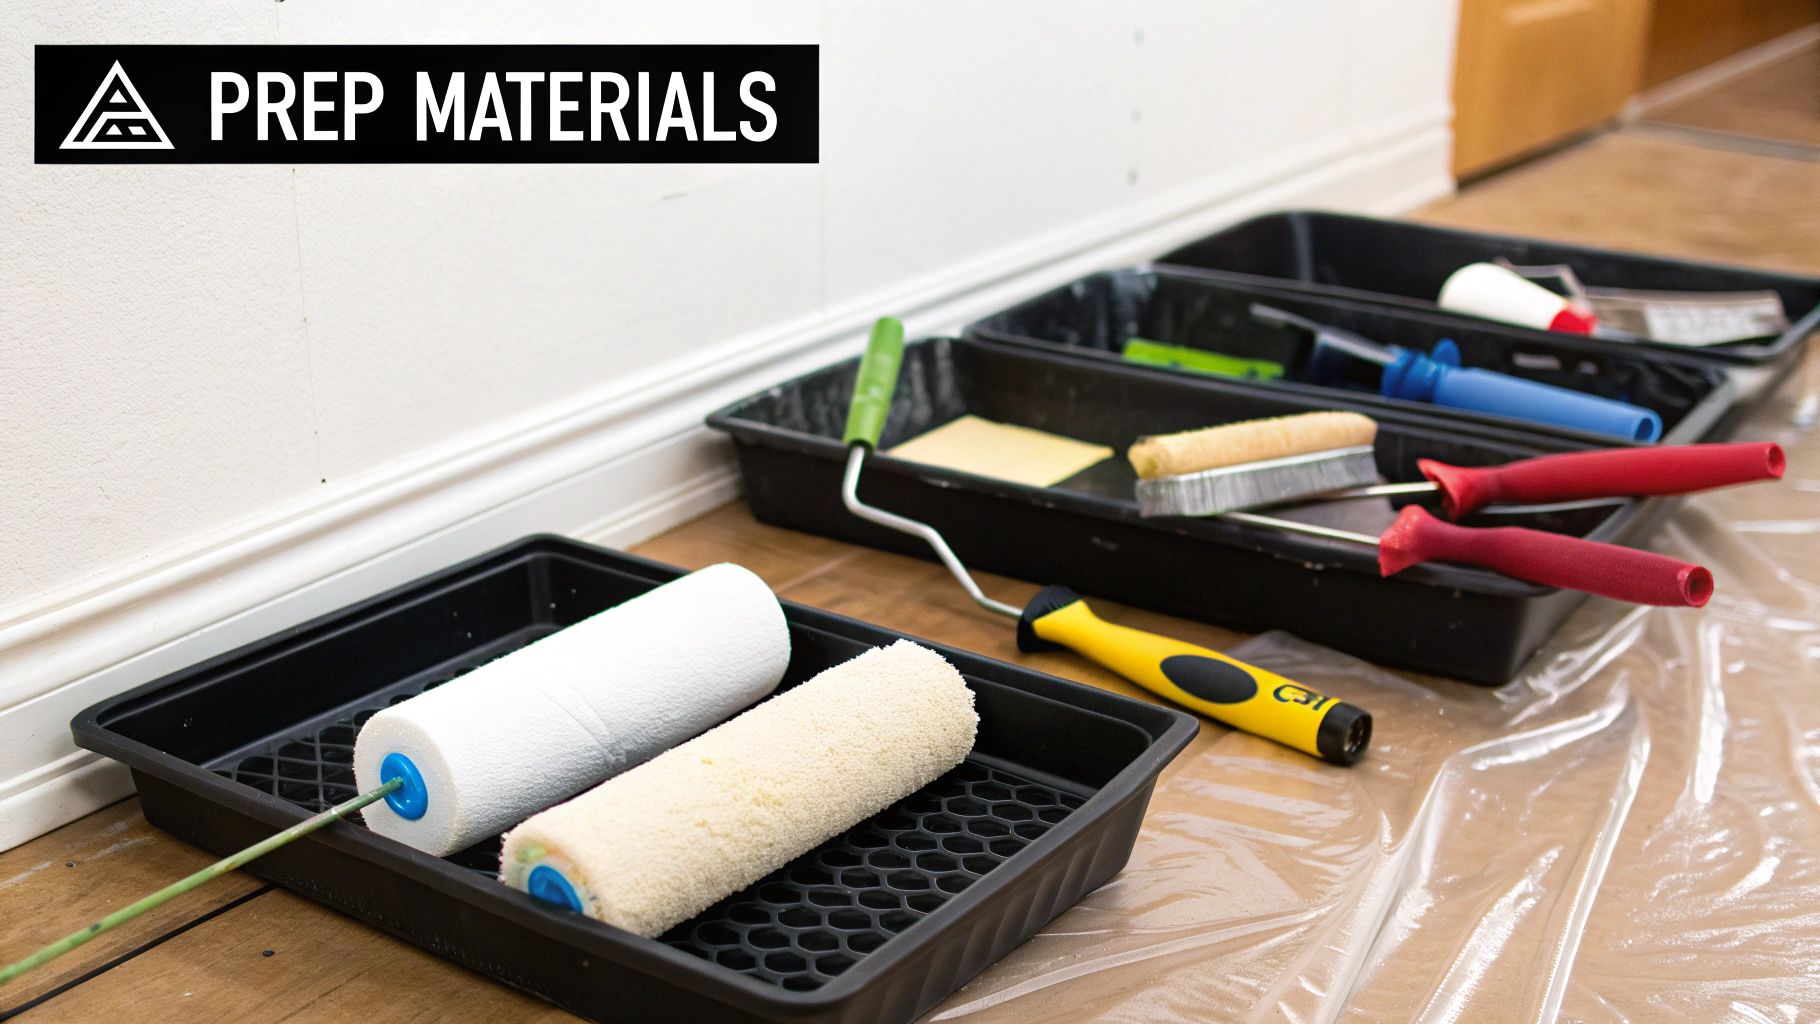
Your Brushes and Rollers Matter
Finally, let’s talk applicators. Not all brushes and rollers are created equal, and this is not the place to cheap out. Good quality tools will reward you with a smoother finish and save you from the headache of picking stray bristles out of your wet paint.
When it comes to brushes, a 2.5-inch angled sash brush is the most versatile tool you can own. It’s perfect for "cutting in"—that is, painting the edges along ceilings, baseboards, and corners. The angled tip gives you incredible control for creating those crisp, clean lines.
For rollers, it’s all about the nap, which is just the thickness of the roller cover.
- For smooth surfaces like drywall, go for a short nap of 6-8 mm.
- For lightly textured walls (think "orange peel"), a medium 10-12 mm nap is your best bet.
- For rough surfaces like brick or stucco, you’ll need a thick 20 mm nap to get paint into all those nooks and crannies.
With the right supplies in hand, you're not just ready to paint; you're ready to paint well. This careful selection of materials is the foundation for a truly professional result.
Mastering Professional Painting Techniques
Now for the fun part. All that prep work is behind you, your paint is mixed, and it's time to get some colour on the walls. This is where you see the real transformation, but it’s also where a good paint job can turn into a great one. The difference almost always comes down to technique.
A smooth, professional finish isn't about speed; it's about being methodical. From the precision work around trim to the big, open walls, a systematic approach is your best defence against drips, roller marks, and other common headaches that scream "DIY."
The Art of Cutting In
Before you even think about picking up a roller, you need to tackle the edges. We call this cutting in—painting a clean, crisp band of colour along ceilings, baseboards, corners, and window frames. While some people swear by painter's tape, a steady hand and a quality brush can give you an even sharper line, and it's much faster.
Your go-to tool here is a good 2.5-inch angled sash brush. The angled tip gives you incredible control for getting into tight spots. When you load it, only dip about a third of the bristles into the paint, then gently tap both sides against the inside of the can. Never scrape it on the rim; that just unloads the brush and causes drips.
Apply the paint with long, confident strokes. Here’s a pro tip: don't try to paint a perfect line right away. Start your stroke a tiny bit away from the edge, then on your next pass, gently push the paint right up to the line. It gives you far more control.
The most critical piece of advice I can give is to maintain a "wet edge." Only cut in a small section at a time—maybe a metre or so—then immediately roll that area. This lets the brushed paint blend seamlessly with the rolled paint, preventing ugly lines later on.
Rolling Walls for a Flawless Finish
With a section cut in, it's time to roll. The biggest challenge here is getting even coverage without leaving "lap marks," which are those noticeable lines where your roller strokes overlap. The secret weapon for this is a technique most pros call the "W" or "M" method.
First, load your roller properly using a screen in your paint bucket. This saturates the roller nap without it becoming a drippy mess. Start rolling a few inches from a corner and paint a large 'W' or 'M' pattern on the wall, about a metre square.
Now, without lifting the roller, fill in the letter with parallel strokes. This technique distributes the paint far more evenly than just going up and down. To finish, give the whole section a final, light roll from ceiling to floor to smooth everything out. If you're unsure what tools to get, our guide on choosing paint brushes and rollers can point you in the right direction.
This kind of methodical work is standard practice for the best professional painters. Interior painting is a huge part of the GTA's robust home renovation market. With a strong home improvement culture and ongoing new construction, knowing how to do this right is a valuable skill.
Applying the Essential Second Coat
I've seen so many projects falter at this last hurdle: impatience. A single coat of paint almost never gives you that deep, rich colour and uniform sheen you see in magazines. The first coat seals the surface, but the second one builds the colour and durability.
Let the first coat dry completely. Seriously, don't rush it. Painting over tacky paint will lift the first layer and create a nightmare you'll have to sand down and fix. Check the can for the recommended recoat time—for most latex paints, it’s somewhere between 2 to 4 hours.
When the wall is fully dry, you're going to repeat the exact same process.
- Cut In Again: Go back over all your edges with your angled brush.
- Roll It Out: Use the same 'W' or 'M' method, section by section, keeping that wet edge.
- Final Inspection: Grab a bright light and shine it across the wall at a low angle. This will reveal any holidays (missed spots) or uneven patches while the paint is still wet enough to fix.
Applying a second coat isn't optional if you want a professional look. It’s what ensures all your hard work pays off with a beautiful, even finish that will last for years.
The Final Touches and Smart Cleanup

The last roller stroke is done, and the colour is finally on the wall. It’s so tempting to pack everything up and call it a day, but what you do next is what separates a decent DIY job from a truly professional finish. These final touches and a smart cleanup strategy are what guarantee your hard work looks polished and lasts for years.
This part of the job is all about finesse, not force. It's about knowing the exact right moment to pull your tape for that razor-sharp edge and understanding that "dry" and "cured" are two completely different things. Plus, a good cleanup routine saves you real money by making sure your tools are ready for the next project.
Achieving That Perfect Crisp Edge
There's a spirited debate online about the best time to remove painter's tape, but ask any pro, and you'll get one answer. For the cleanest lines imaginable, you have to remove the tape while the paint is still wet. If you let it dry completely, the paint forms a solid film over the tape, and when you pull it, you risk tearing chunks of your fresh paint right off the wall.
The trick is to pull the tape back on itself at a steady 45-degree angle. This creates a shearing action that cleanly cuts through the wet paint, leaving a perfect line. Go slow, be methodical, and take your time around corners to avoid any slip-ups.
If you get distracted and the paint does dry, don't panic. Just grab a utility knife and gently score the seam where the tape meets the wall. This breaks that paint seal and helps prevent peeling when you pull the tape away.
Preserving Your Tools for Next Time
Good brushes and rollers aren't cheap, but if you treat them right, they can last for years. Cleaning them the second you’re done is absolutely non-negotiable. Letting paint dry on them is the fastest way to ruin your investment. For most latex paints, all you need is some warm water and a bit of dish soap.
Here’s the process I follow every time:
- Scrape Excess Paint: Before you even touch water, use a putty knife or a 5-in-1 tool to scrape every last drop of paint off your roller and out of your brush. Get it right back in the can—no need to waste it.
- Rinse Thoroughly: Run your tools under warm water. Use your fingers to really work the paint out of the brush bristles and the roller nap. A painter's comb is a fantastic little tool for getting deep into the base of a brush where paint loves to hide.
- Final Wash and Dry: Once the water runs clear, give them a quick wash with soap, rinse again, and shake out all the excess water. I always reshape my brushes by hand and hang them to dry. For roller covers, just stand them on their end so air can get all around them.
This kind of meticulous care is a hallmark of a serious painter. It's the same level of detail required for more advanced jobs, like when you're thinking about spray painting kitchen cupboards, where immaculate equipment is the key to a flawless result.
Paint Storage and Disposal
You’ll almost always have some paint left over, which is great for touching up scuffs down the road. To keep it from going bad, wipe the rim of the can clean, lay a small piece of plastic wrap over the opening, and then hammer the lid on tight. That plastic creates an airtight seal.
For long-term storage, keep the can somewhere cool and dry, and—here's the pro tip—store it upside down. The paint will create its own perfect seal against the lid from the inside. When it's time to get rid of old paint, never, ever pour it down the drain. Check with your local GTA municipality for the nearest hazardous waste drop-off site to dispose of it responsibly.
Understanding Paint Curing Times
This is a big one: you have to understand the difference between dry and cured. A wall might feel dry to the touch within a couple of hours, but it’s nowhere near ready for the realities of daily life. The paint still needs to fully cure, which is the chemical process where it hardens completely and achieves its final durability.
For most latex paints, the full curing process takes 2 to 4 weeks. During this crucial time, your new paint job is still delicate. Be gentle. Avoid scrubbing any marks, don't hang heavy frames, and try not to shove furniture right up against the walls. A little bit of patience now is the final ingredient for a beautiful finish that truly lasts.
Uh Oh, What Went Wrong? Fixing Common Painting Goofs
Even with the best prep work, paint can sometimes do unexpected things. It's incredibly frustrating to stand back and see blisters, drips, or weird roller marks after you've spent hours on a project. But don't panic—most of these common painting problems are completely fixable. The trick is knowing what caused the issue so you can fix it properly without making it worse.
Honestly, these things happen to everyone. Learning how to paint interior walls means learning how to troubleshoot on the fly. Even the best pro painters in Toronto and the GTA will tell you that a perfect job isn't about never making a mistake; it's about knowing how to make it disappear.
Dealing With Pesky Blisters and Bubbles
Seeing little bubbles pop up on a freshly painted wall is a classic sign of trouble. Almost every time, this points back to a problem with either heat or moisture. If the sun is beating down on the wall you're painting, or the room is just too humid, you can trap air and moisture under the paint. As it tries to escape, it pushes the paint film out, creating a blister.
Before you touch it, you have to figure out the root cause.
- Find the "Why": Was the bathroom steamy when you started? Did you accidentally paint over a damp patch near a window? Figure this out first, or you'll be fixing blisters again next week.
- Scrape and Smooth: Let the bubbled area dry completely. Then, take a scraper and gently peel off the blistered paint. You'll want to sand the edges with fine-grit sandpaper to create a smooth, feathered transition to the rest of the wall.
- Prime and Paint: Apply a spot of primer to the now-bare patch, let it dry, and then carefully repaint the area, blending it outwards into the surrounding wall.
The single most important thing here is patience. If you try to fix a blister while the paint is still wet, you'll just turn a small problem into a goopy, noticeable mess. Wait for it to dry!
Smoothing Out Drips and Roller Marks
Nothing screams "DIY job" like ugly drips running down the wall or those distinct "lap marks" from a paint roller. Drips are simple—you just put on too much paint. Roller marks, on the other hand, show up when the paint isn't applied evenly or when an edge starts to dry before you can blend in the next section.
If you spot a drip while the paint is still wet, easy peasy. Just lightly brush it out. But if it's already dried, you'll need to carefully shave it down with a sharp scraper or sand it until it's flush with the wall. Then, just a little touch-up paint should make it vanish.
Fixing roller marks takes a bit more work. You’ll probably have to lightly sand the whole section to knock down the texture, wipe away the dust, and then roll on one more thin, even coat. This is where mastering that "W" technique really pays off—it’s your best defence against lap marks from the start.
When Old Stains Reappear
Is there anything more defeating than watching an old water stain or a kid's crayon masterpiece slowly ghost its way through your fresh new paint? This is a tell-tale sign that the stain wasn't sealed properly before you started. Your standard latex paint just doesn't have the blocking power for stubborn stains.
The only real fix here is a high-quality, stain-blocking primer. You'll need to apply a coat (or maybe two, for really tough stains like smoke or permanent marker) directly over the offending spot. Let the primer cure completely as directed on the can. After that, you can repaint the area, and that stain will be locked away for good.
Keep in mind, sometimes a recurring stain hints at a bigger issue inside the wall, which might mean you need some professional help with drywall repairs to solve the problem for good.
Your Top Painting Questions, Answered
Even the most seasoned DIYer has questions that pop up mid-project. Getting the right answers can be the difference between a job you’re proud of and one that leaves you frustrated. Let's dig into some of the most common questions I hear from people tackling their own interior painting. If you're looking for painters "near me" in the GTA, this section addresses key local considerations.
When is the Best Time of Year to Paint?
People often ask if they can paint in the winter or during a summer heatwave. You can, but it's not ideal.
For those of us in places like Toronto and the GTA, spring and autumn are hands-down the best seasons for painting inside. The mild temperatures and lower humidity are perfect. You can crack open the windows for some much-needed ventilation without making the paint dry too quickly or too slowly. A humid summer day, on the other hand, can seriously mess with drying times, leaving your walls feeling tacky for way too long.
How Many Coats of Paint Do I Really Need?
I get it, you're tired and the first coat looks… okay. But trust me on this: the answer is almost always two coats. It’s tempting to cut corners here, but that second coat is what truly brings the colour to life and gives you that durable, even finish you’re after.
Here's an objective breakdown:
- The first coat is your workhorse. It seals the wall and does the heavy lifting of coverage.
- The second coat is your finishing touch. It perfects the colour, smooths out the sheen, and hides any inconsistencies from the first pass.
Of course, there are always exceptions. If you’re making a dramatic change, like painting a soft beige over a deep navy blue, you might even need a third coat. A good trick to avoid this is to get your primer tinted to a shade similar to your new colour—it makes a world of difference.
If there's one mistake I see people make over and over, it's applying the second coat too early. You have to give that first layer time to cure. For most latex paints, that means waiting at least 2 to 4 hours. If you rush it, your roller will literally pull the first coat right off the wall, leaving you with a streaky mess. Always check the paint can for the manufacturer's recommendation.
Is Primer Actually Necessary?
Primer can feel like just another step, another expense. But skipping it when you shouldn't is one of the fastest ways to ruin a paint job. While it's not essential for every single scenario, there are a few times when it's absolutely non-negotiable.
You absolutely need to prime if you're:
- Painting on new drywall: That fresh drywall is like a sponge; it will soak up your expensive paint unevenly if you don't seal it first.
- Covering a dark or bold colour: A good primer creates a blank canvas, which means you'll use far fewer coats of your new colour to get full coverage.
- Painting over a glossy finish: Paint needs something to grab onto. Primer provides that "tooth," so your new paint won't peel or chip down the road.
- Dealing with stains: If you have old water marks, smoke residue, or a masterpiece from your toddler’s crayon, a stain-blocking primer is your best friend. It locks those stains in so they can’t bleed through your beautiful new paint.
If you're just refreshing a light-coloured wall with a similar shade and the original finish is flat, you can probably skip the primer. But my professional advice? When in doubt, just prime. It's a little extra work for a lot of extra peace of mind.
If the thought of all this prep and painting feels like too much, or you just want a guaranteed professional result, the team at Soca Services provides expert interior painting across Toronto, Mississauga, and the GTA. We take care of everything, from moving furniture to the final cleanup. Learn more about our services and get a free estimate today!