

Spray painting kitchen cupboards is an effective method for achieving a major kitchen facelift without a full-scale renovation. This technique delivers a smooth, factory-perfect finish that is difficult to replicate with a brush or roller, transforming tired cabinets into a fresh, modern feature.
1. Understanding the Benefits of Spray Painting
A kitchen renovation can be a disruptive and expensive undertaking. Spray painting cabinets offers a high-end look for a fraction of the cost, making it an ideal solution for updating cabinets that are structurally sound but aesthetically dated.
The primary advantage is the quality of the finish. A paint sprayer atomizes paint into a fine mist, resulting in an even, glass-smooth surface. This process eliminates the brush strokes and roller texture common with manual application, producing a professional-grade coating.
A Fresh Look That Adds Real Value
A professionally sprayed kitchen can increase a home's appeal and market value. It provides a solution for outdated wood tones or finishes that have deteriorated over time, making the kitchen appear brighter and more spacious.
Key benefits include:
- A Flawless, Professional Finish: Achieves a smooth, even surface without brush marks or roller stipples.
- Serious Durability: Specialized cabinet paints cure into a hard, resilient shell suitable for a high-traffic kitchen.
- A Quicker Turnaround: Spraying is significantly faster than manual painting. A project that might take weeks with a brush can often be completed in a few days.
- Complete Modernization: Effectively covers old wood grain and allows for a complete reinvention of the kitchen's aesthetic.
This process is more than a color change. It creates a durable, high-quality surface that elevates the kitchen's character, making it feel clean, modern, and cohesive.
The Clear Advantage in Cost and Time
When considering kitchen updates, cost and time are major factors. The following table compares the main options.
Spray Painting vs. Traditional Methods: A Quick Comparison
Choosing the right approach depends on budget, timeline, and desired outcome. This table breaks down the key differences between spraying existing cabinets, painting them by hand, or opting for a full replacement.
| Attribute | Spray Painting | Brush/Roller Painting | Full Replacement |
|---|---|---|---|
| Finish Quality | Professional, factory-smooth, no marks | Can show brush strokes or roller texture | New, factory finish |
| Project Cost | Moderate (professional) to Low (DIY) | Low | Very High |
| Durability | High, with proper prep and paint | Good, but can be prone to chipping/wear | High |
| Project Timeline | 2-5 days | 1-2 weeks (multiple coats and drying) | 2-6 weeks (design, order, installation) |
| Disruption | Minimal; doors often taken off-site | Moderate; kitchen unusable for days | Major; kitchen completely out of action |
Spray painting provides a top-tier finish without the extreme cost or disruption of a full replacement. The value proposition is a significant reason for its popularity. Industry data indicates average cost savings of 40-60% over replacement. A professional spray job may range from $1,500 to $3,000, compared to $8,000 to $15,000 or more for new cabinets. You can dive deeper into these kitchen remodelling trends at AzizConstruction.com.
By choosing to spray, you make a smart investment that delivers a significant visual impact while being more manageable for your budget and schedule.
2. Gearing Up: Choosing the Right Paint and Tools
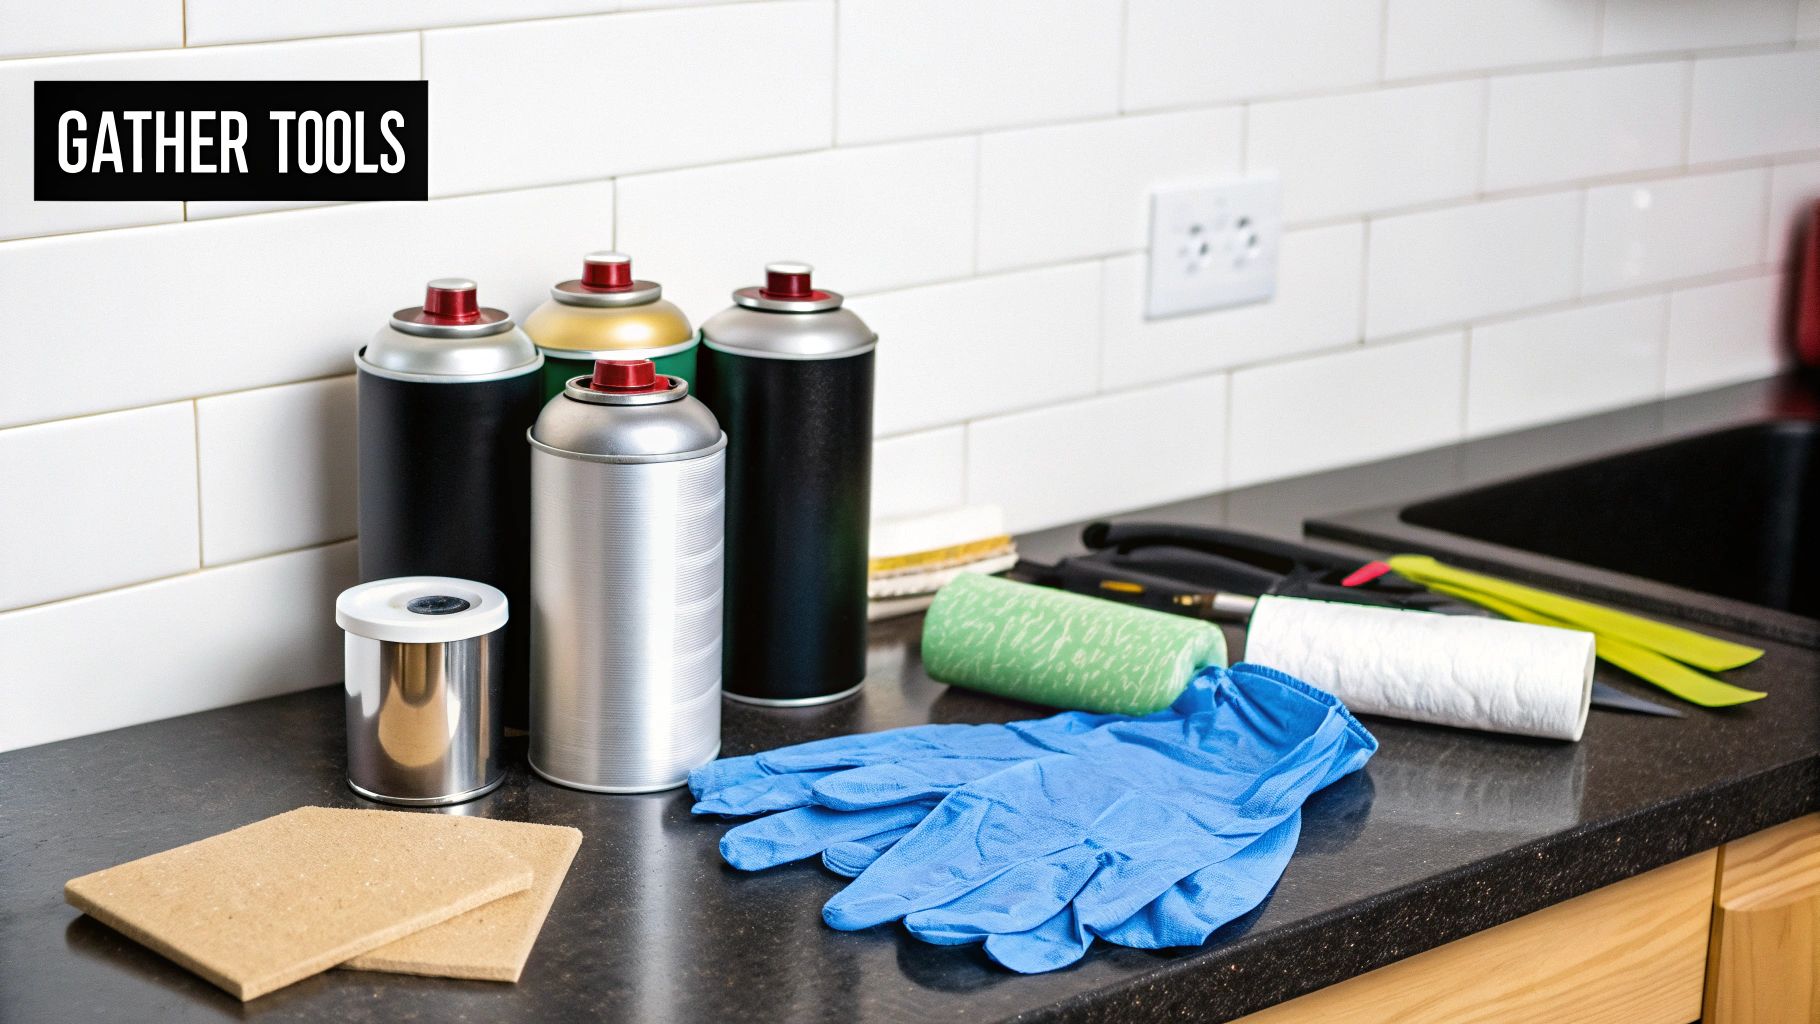
Starting a spray painting kitchen cupboards project without the correct equipment can lead to poor results. A durable, factory-perfect finish depends equally on proper technique and the right tools and materials. This section outlines the necessary equipment to gather before beginning.
The Heart of the Matter: Your Paint Selection
The choice of paint is the most critical decision. Kitchen cupboards are exposed to grease, steam, and frequent contact, requiring a more robust paint than standard wall paint.
While solvent-based lacquers were once the standard, modern technology offers superior alternatives. A water-based acrylic-alkyd hybrid paint is a highly recommended option. These formulas combine the hard-wearing, self-leveling finish of an oil-based paint with the low odor and easy cleanup of a water-based acrylic.
The paint sheen is another important consideration.
- Satin Finish: This is the most popular choice for kitchens. It has a slight luster that is easy to wipe clean, yet it is subtle enough to hide minor surface imperfections.
- Semi-Gloss Finish: For high-traffic family kitchens, this is the most durable option and the easiest to clean. However, its high shine will highlight any dings, dents, or dust, requiring meticulous preparation.
Environmental regulations have also influenced paint choices. The conversation around the environmental impact of spray painting kitchen cupboards has led to a significant industry shift toward low-VOC (volatile organic compounds) and zero-VOC paints. In California, for example, estimates show about 75% of spray painting contractors have adopted these paints, a notable increase from 45% in 2020. You can get more details on these and other painting business trends at HomeServiceBase.com.
Your Weapon of Choice: HVLP vs. Airless Sprayers
The type of spray gun directly affects the final finish and the amount of overspray. The two primary options for this project are HVLP and airless sprayers.
| Sprayer Type | Key Advantages | Key Disadvantages | Recommended User |
|---|---|---|---|
| HVLP (High Volume, Low Pressure) | – Minimal overspray – High transfer efficiency – Excellent for fine-finish work | – Slower application than airless – May require paint thinning – Smaller spray fan | DIYers seeking a flawless, glass-smooth finish with maximum control. |
| Airless | – Very fast coverage – Sprays thick, unthinned paint easily – Ideal for large surfaces | – Creates significant overspray – Can be difficult for beginners to control – Uses more paint | Professionals or individuals painting a very large kitchen where speed is the priority. |
For most homeowners, an HVLP sprayer is the superior choice. The control it offers is invaluable for achieving a perfect look, and the low overspray reduces masking, mess, and cleanup.
The "Don't Forget These" Supply Checklist
In addition to the main items, several smaller supplies are essential for a successful project. Having everything ready beforehand prevents interruptions.
Prep & Safety Essentials:
- Degreaser: A heavy-duty cleaner, such as a Trisodium Phosphate (TSP) substitute, is needed to remove kitchen grime.
- Sandpaper: A variety of grits, including 120, 180, and 220-grit, for scuffing the old finish and smoothing between coats.
- Wood Filler: For patching nicks, scratches, or old hardware holes.
- Tack Cloths: For removing the final layer of dust before spraying.
- Painter’s Tape: High-quality tape for creating sharp, clean lines.
- Masking Paper/Plastic Sheeting: To protect countertops, backsplash, floors, and appliances.
- Respirator Mask: This is a mandatory safety item. A properly-rated respirator is crucial for protecting your lungs from paint particles and fumes.
- Safety Glasses and Gloves: Basic protection for eyes and skin.
With paint selected and tools gathered, you have the foundation for a successful kitchen transformation.
3. The Critical Prep Work for a Flawless Finish
Professional painters agree that the quality of a paint job is determined by the preparation. This is particularly true when you spray paint kitchen cupboards. It is estimated that 80% of a great finish is attributable to the prep work. This stage creates the ideal canvas for a durable and smooth result.
The following steps outline the correct preparation process.
The Art of Labelling and Disassembly
Organization is key to a smooth process. Removing all doors and drawer fronts is necessary for a seamless spray finish, and a systematic approach prevents confusion during reassembly.
Implement a labelling system using numbered painter's tape. Place a piece of tape inside a door (e.g., #1 for the top left) and a matching piece inside the corresponding cabinet frame. This simple step eliminates guesswork later.
After labelling, carefully remove all doors, drawers, and hardware, including hinges, knobs, and pulls. Store the hardware for each door in a separate, labelled bag to prevent loss of small screws and ensure correct placement during reassembly.
A well-organised disassembly is the foundation of a stress-free project. Taking an extra 30 minutes to label everything correctly can save you hours of frustration when it's time to put your kitchen back together.
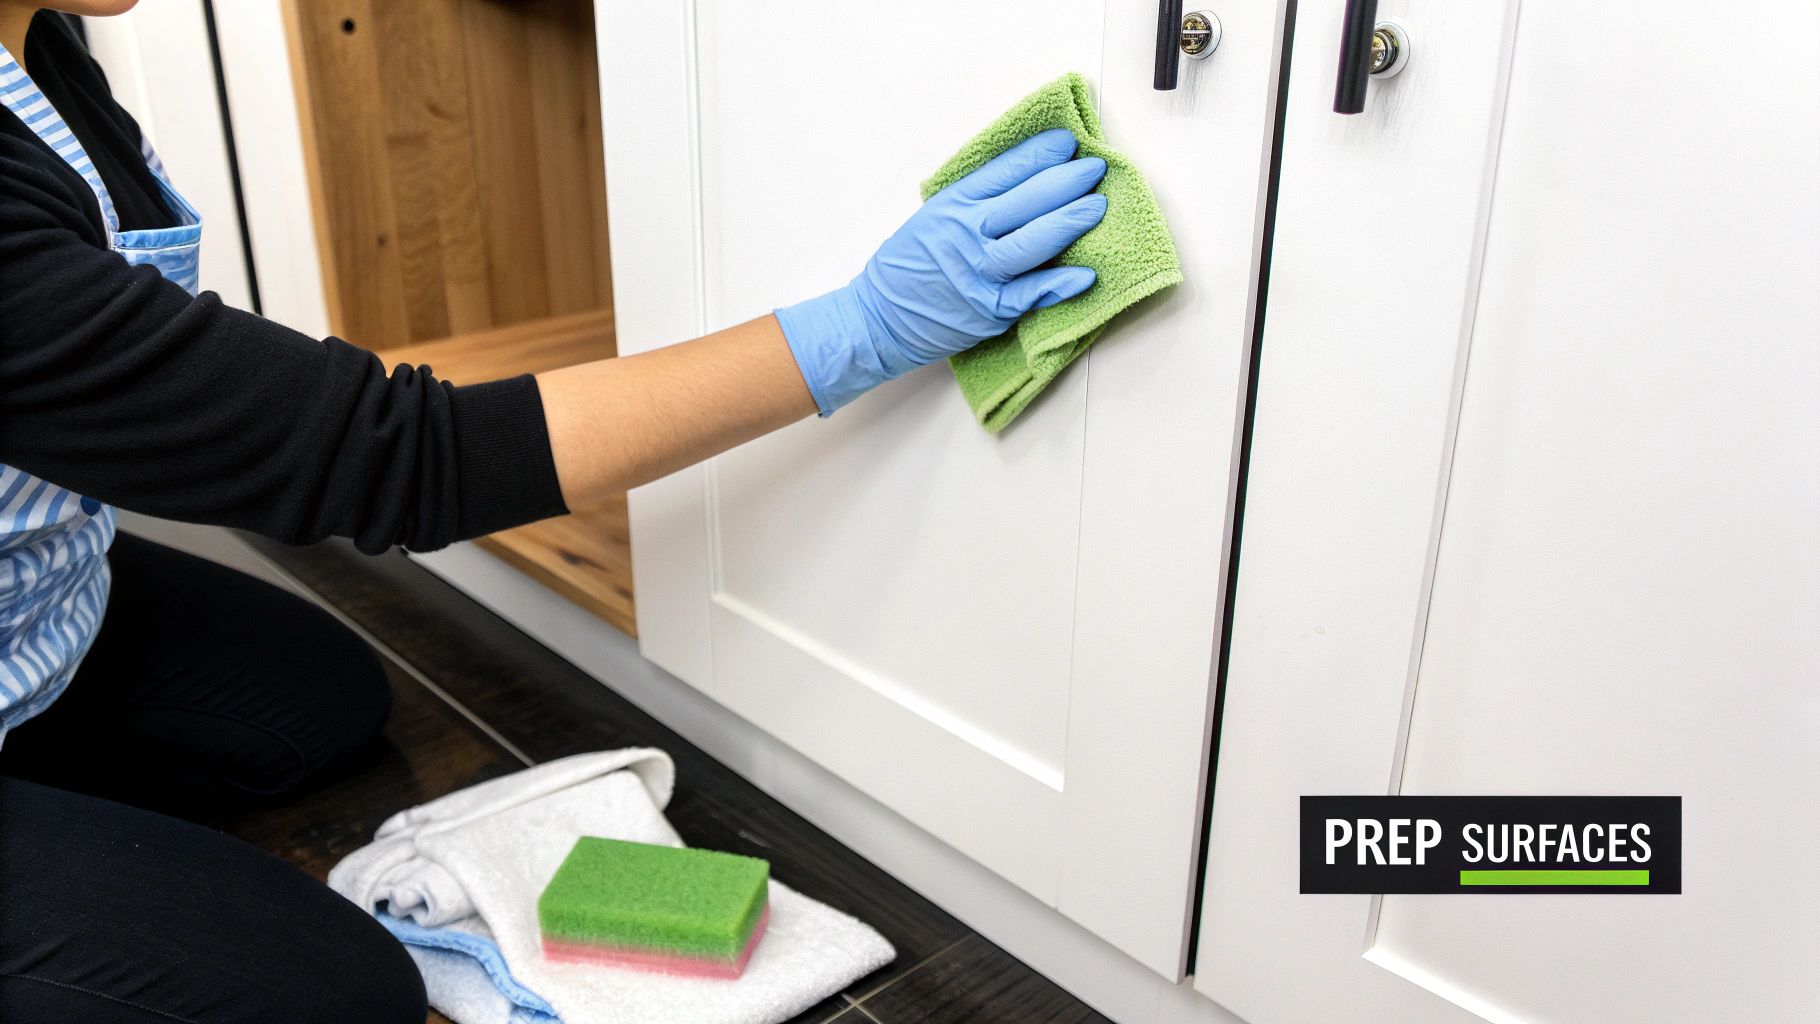
The Essential Deep Clean and Degreasing
Kitchen cupboards accumulate grease, cooking splatters, and oils, which can prevent paint adhesion. A thorough deep clean with a powerful degreaser is required.
A Trisodium Phosphate (TSP) substitute is effective for this task. Mix the cleaner according to the package directions, wear gloves, and scrub all surfaces to be painted. Pay special attention to cupboards near the stove and sink.
After scrubbing, wipe all surfaces with a clean rag dampened with water to remove any cleaning residue.
Creating a Perfect Surface: Sanding and Filling
Once the cupboards are clean and dry, the surfaces must be scuff-sanded to create "tooth" for the primer to adhere to. The goal is not to strip the old finish but to lightly abrade it.
Use a medium-grit sandpaper (120 to 180-grit). A sanding block is effective for flat surfaces, while a flexible sanding sponge is useful for detailed areas. The aim is a uniform, dull appearance. After sanding, use a tack cloth to remove all dust.
Inspect for imperfections such as dings, scratches, or old hardware holes. Apply a quality wood filler with a putty knife, slightly overfilling the area. Once dry, sand it smooth with a finer 220-grit sandpaper until it is flush with the surrounding surface.
Protecting Your Kitchen from Overspray
The final preparation step involves containing the paint mist. The fine particles from a paint sprayer can travel and settle on unprotected surfaces.
- Cover Everything: Use plastic sheeting and painter's tape to completely cover countertops, backsplash, floors, and appliances.
- Seal the Area: When spraying cabinet frames in place, hang plastic sheeting from the ceiling to the floor to create a containment barrier.
- Mask the Insides: Apply painter's tape along the inside edges of the cabinet boxes to create a crisp paint line and prevent paint from getting inside.
Thorough masking simplifies the cleanup process significantly.
4. Mastering Your Spray Painting Technique
Once preparation is complete, the painting process can begin. Achieving a flawless spray finish on kitchen cupboards is a matter of consistent, methodical technique. This section details the steps from priming to final coating.
A high-quality primer is essential. It ensures proper paint adhesion, provides a uniform base for the topcoat, and acts as a barrier to prevent stains or old colors from bleeding through.
Setting Up Your Spray Gun
A properly configured spray gun is critical for a smooth finish and preventing issues like runs, splatters, or an "orange-peel" texture. The objective is to produce a fine, even mist.
First, the paint may need to be thinned. Many cabinet paints, especially acrylic-alkyd hybrids, are thick. Refer to the paint’s technical data sheet, but a general guideline is to add about 10% water or the recommended thinner to achieve the consistency of single cream.
Next, adjust the nozzle and pressure settings. Always test the spray pattern on a piece of scrap cardboard before painting a cabinet.
- Check Your Pattern: A quick spray should produce a long oval shape with soft, feathered edges.
- Fixing "Fingers": Heavy lines at the top and bottom of the pattern indicate that the pressure is too low or the paint is too thick.
- Stopping "Spitting": If the gun expels droplets instead of a fine mist, the nozzle may be partially clogged, or the paint may be too thick.
Taking time to configure the sprayer correctly will prevent significant rework.
The Perfect Spraying Motion
Consistency in movement, distance, and speed is crucial for a uniform finish.
Maintain a distance of about 15-25 centimetres (6-10 inches) from the surface. Getting too close causes paint to pool and run; being too far away can result in a rough texture as paint particles dry mid-air. Keep your wrist locked and move with your arm, holding the gun parallel to the surface.
The most important tip is to always keep the gun moving. Never start or stop spraying while the gun is stationary over the surface. Begin spraying just before the edge of the piece, move smoothly across, and release the trigger only after passing the other edge.
This technique prevents thick blotches at the start and end of each pass.
This visual guide breaks down the essential workflow for painting and curing your cabinets.
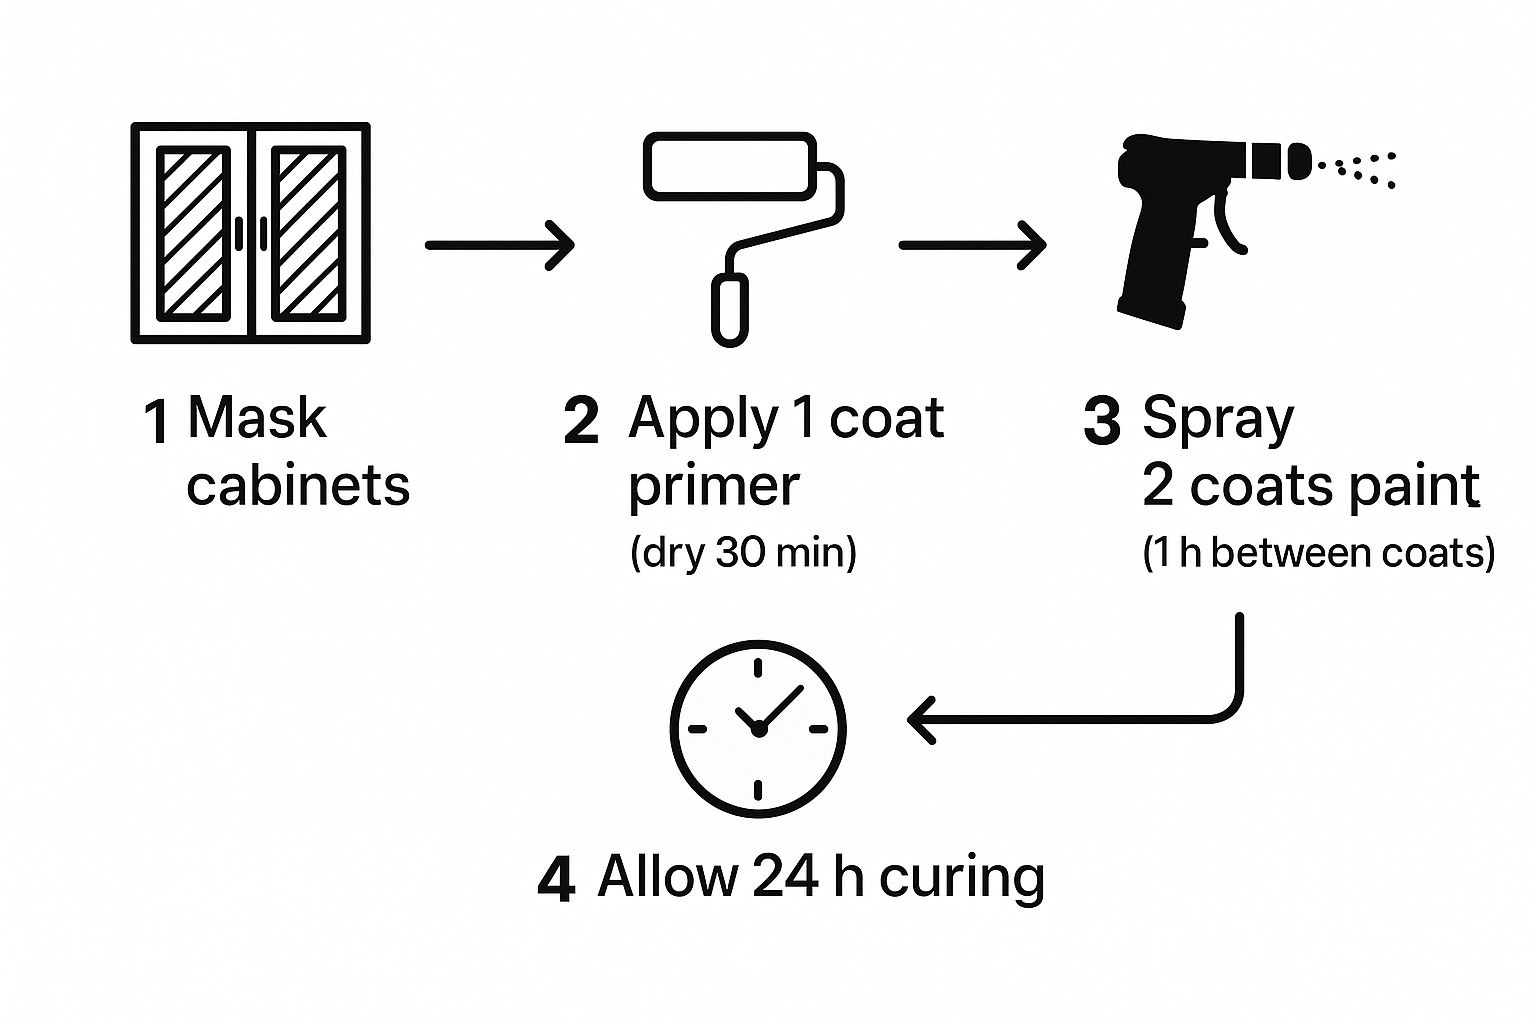
The process highlights the importance of methodical application and adequate drying times for a durable finish.
Building Your Coats for Durability
A durable, professional finish is achieved by applying several thin, even coats rather than one heavy coat. This method creates a harder, more resilient surface.
Follow a systematic pattern for each piece:
- Spray the Edges First: Apply a light, quick coat to all outside edges.
- Move to the Surface: Begin the first pass along the top or bottom of the flat surface.
- Overlap by 50%: Overlap the previous pass by approximately half to ensure even coverage without stripes.
- Work Methodically: Continue this overlapping pattern until the entire surface has a uniform wet coat.
After the primer, apply two coats of your topcoat color. Allow the paint to dry completely between coats as per the manufacturer’s instructions (typically about an hour). For a superior finish, lightly scuff-sand the surface with 220-grit sandpaper between coats to remove any dust nibs and promote adhesion for the next layer.
This efficiency is why professionals favor spraying. The kitchen cabinet spray painting sector is a significant part of the overall U.S. house painting market, which is projected to grow by 5.3% annually. Professionals can complete a kitchen in 3-5 days, compared to weeks for a full replacement. If you're interested in the business side of things, you can find valuable house painting statistics on VanderKolkPainting.com to learn more.
Patience during the drying and coating steps is crucial. Allowing each layer to cure properly will result in a finish that is both aesthetically pleasing and durable.
5. Reassembly and Long-Term Care

After the final coat is applied and the masking is removed, the final stage of the project begins. Patience during this phase is essential to protect the new finish.
While freshly painted surfaces may feel dry to the touch within a few hours, they are not yet fully cured and remain delicate.
The All-Important Curing Process
Paint dries as solvents evaporate, making it non-tacky. Curing is the chemical process where paint polymers cross-link and harden into a resilient shell. This process gives the finish its final durability against scuffs, scratches, and stains.
A useful analogy: dry paint is like set gelatin—it holds its shape but is fragile. Cured paint is like a sheet of acrylic—hard, tough, and durable. Rushing this stage is a common mistake that leads to nicks and chips.
Most professional-grade cabinet paints require several days to a few weeks to fully cure, depending on the product, temperature, and humidity. While some finishes may be sufficiently hard after 48 hours, it is recommended to wait 7 to 14 days before resuming normal kitchen use. Handle the doors and drawers gently during this period.
Careful Reassembly and Getting the Alignment Just Right
Once the paint is fully hardened, the reassembly can begin. The labelling system from the disassembly phase will now prove invaluable.
First, install the hardware. If using new hardware that requires different holes, place a piece of painter's tape over the drilling spot to prevent chipping the paint. Screw in the hardware gently, avoiding overtightening, which could crack the finish.
Next, hang the doors, preferably with a helper.
- Hinges to Doors: Reattach the labelled hinges to their corresponding doors first.
- Hang and Adjust: Have a helper hold the door in position while you screw the hinges to the cabinet boxes.
- Check the Gaps: Use the adjustment screws on modern hinges to align the doors. Step back and check for consistent gaps between all doors and drawer fronts. Adjust as needed to achieve a flawless alignment.
Keeping Them Looking New: Long-Term Cleaning
Proper aftercare will maintain the appearance of your sprayed cupboards for years. The general rule is to be gentle.
For daily cleaning, a soft, damp microfiber cloth is sufficient. For stubborn fingerprints or food splatters, use a small amount of mild dish soap in warm water.
What to Keep Away from Your New Finish:
- Harsh Chemicals: Avoid abrasive cleaners, ammonia-based products, and chemical solvents, as they can dull or strip the paint.
- Abrasive Sponges: Never use scouring pads or steel wool, which will scratch the finish.
- Too Much Water: Do not allow water to pool on surfaces, especially around seams and edges. Wipe up spills promptly.
By allowing for proper curing, being precise during reassembly, and adopting gentle cleaning habits, your refinished cupboards will remain a beautiful and durable centerpiece of your kitchen.
6. Frequently Asked Questions (FAQ)
It is common to have questions before starting a project like spray painting kitchen cupboards. This section addresses some of the most frequent inquiries.
How Long Does a Spray Painted Kitchen Finish Last?
When done correctly, a properly sprayed finish can last 8 to 15 years, comparable to many factory finishes. The longevity depends on three key factors.
First, preparation is paramount. Thorough cleaning and sanding ensure that the primer and paint adhere properly. Second, the quality of the paint is critical. Using a high-grade product, such as a urethane-alkyd enamel, results in a tough, durable shell.
Finally, long-term care matters. Gentle cleaning with mild soap and water, rather than harsh chemicals, will preserve the finish for years.
Can I Spray Paint Any Type of Kitchen Cupboard?
Yes, most cupboard materials can be spray painted, but the preparation method varies depending on the material.
- Solid Wood, MDF, and Wood Veneers: These materials are ideal for spraying. A standard clean and scuff-sand is sufficient preparation for primer and paint.
- Laminate or Thermofoil: These materials have slick, non-porous surfaces that resist paint adhesion. For these, a specialty bonding primer is essential. This type of primer is formulated to adhere to glossy surfaces, creating a solid foundation for the topcoat.
Attempting to paint laminate or thermofoil without the correct primer will result in peeling. Thorough scuff-sanding is also crucial to provide a physical grip for the primer.
Success with laminate or thermofoil is achievable but depends entirely on using a high-adhesion bonding primer. Skipping this step will compromise the entire project.
How Messy Is Spray Painting Indoors?
Without proper containment, spray painting can be very messy due to overspray. However, this is entirely manageable with the correct setup.
The kitchen must be converted into a temporary, sealed spray booth. This involves using plastic sheeting to block doorways and cover every surface not being painted—floors, countertops, backsplash, and appliances.
Using an HVLP (High Volume, Low Pressure) sprayer also significantly reduces mess. These systems are more efficient than airless sprayers, transferring more paint onto the target surface and less into the air, which minimizes overspray and simplifies cleanup.
Is It Cheaper to DIY or Hire a Professional?
A DIY project is significantly cheaper. The primary costs are for paint, primer, a possible sprayer rental, and supplies like sandpaper and plastic.
Hiring a professional costs more but includes their expertise, high-end equipment, and often a warranty. This option provides a guaranteed flawless result without the manual labor. The decision depends on the balance between your available time and budget. With patience and careful adherence to the steps, a professional-level finish is achievable through a DIY approach.
Ready to transform your kitchen with a flawless, durable finish? The experts at Soca Services are here to bring your vision to life with professional painting services in the Toronto area. Learn more about how we can help at https://www.socaservicespainting.com.
Article created using Outrank