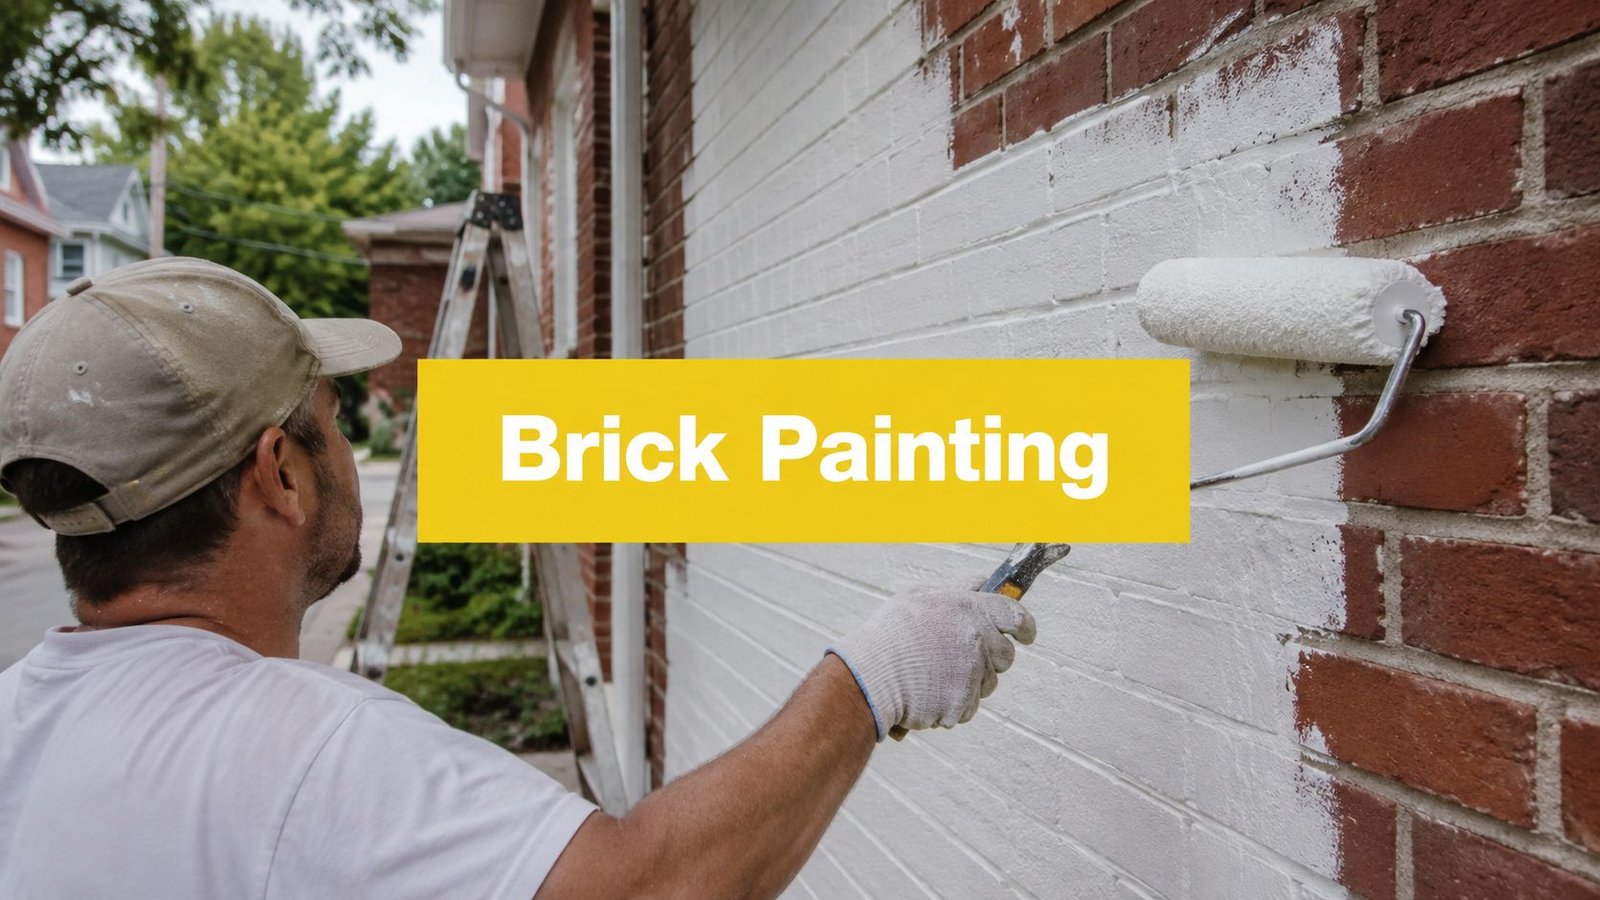
You've got a brick house in Toronto that looks tired, the colour feels dated, and now you're staring at the wall wondering if a fresh coat is a smart upgrade or a long-term headache. That's the right question to ask. In a freeze-thaw city, painting outdoor bricks is never just about colour, it's about moisture, prep, and whether the wall can still dry the way it should.
For homeowners in Toronto, Vaughan, North York, and King City, the wrong paint system can trap moisture and turn a cosmetic project into peeling, efflorescence, and repair work. The right approach can improve curb appeal and simplify maintenance, but only if the brick is sound, dry, and treated like masonry, not like drywall. A brick facade deserves a different process than vinyl or wood siding, and that difference is where most jobs succeed or fail.
Why Painting Outdoor Bricks Is Different in Toronto
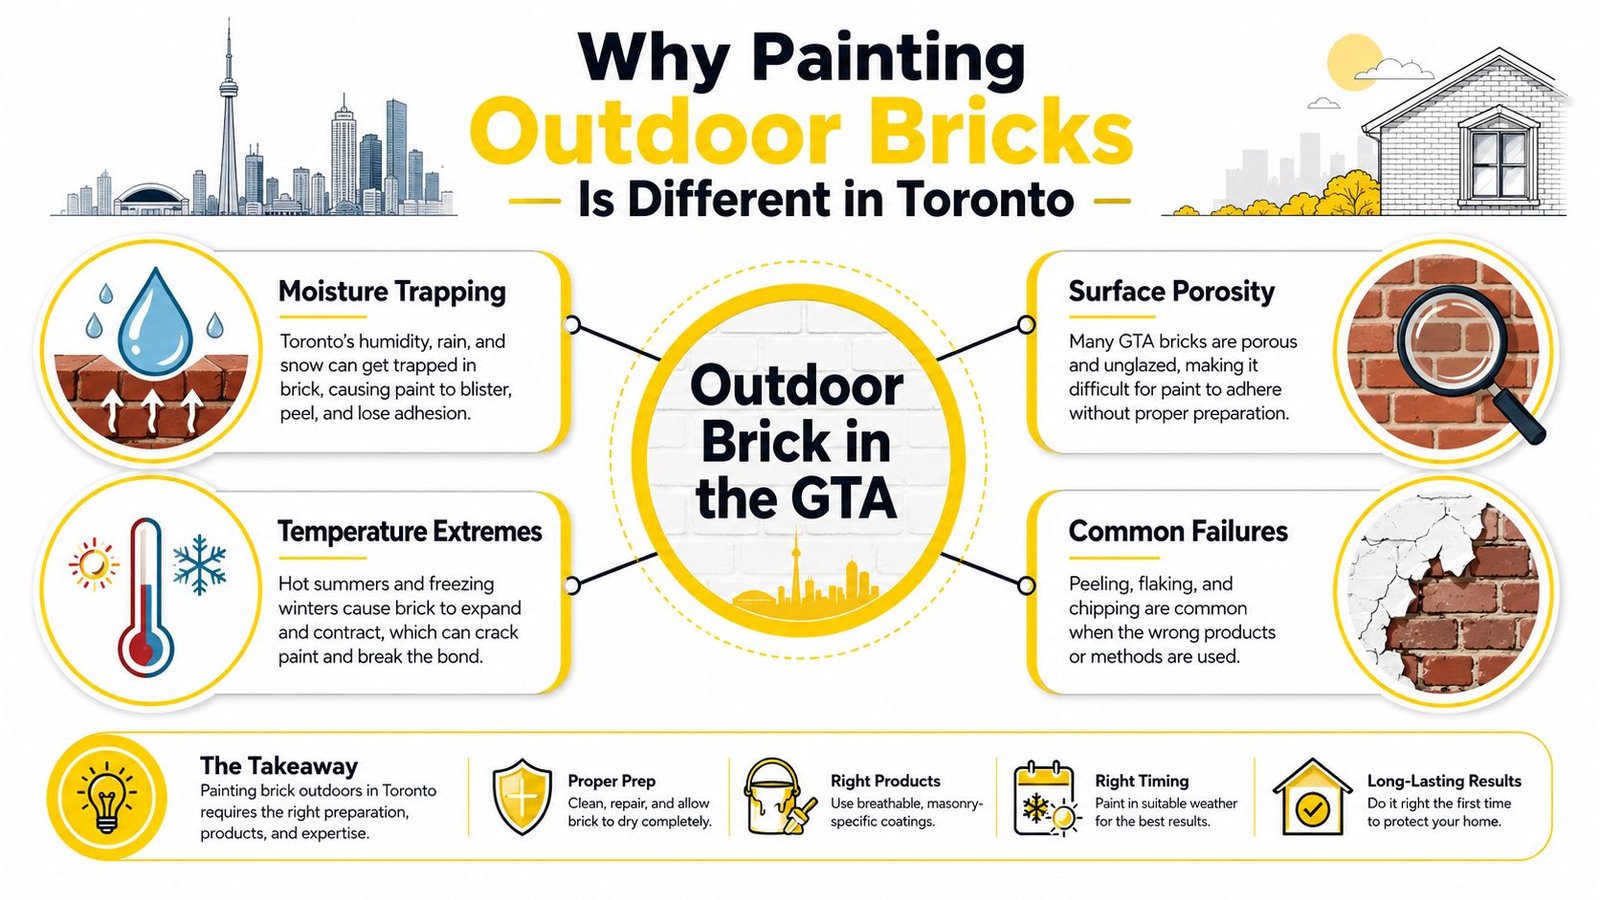
Homeowners often call after a harsh Toronto winter when the front elevation looks chalky, the mortar lines are dusty, and one side of the house keeps showing white stains. That is usually the point where the project stops being a colour decision and becomes a moisture decision. On Toronto brick, especially older masonry, the wall has been taking in water for decades, then releasing it slowly through the seasons.
A brick surface is not smooth, sealed siding. It is porous, textured, and full of tiny pathways for moisture movement. That is why brick painting sits near the higher end of exterior work, and why Canadian costs typically land around C$2.50 to C$5.00 per square foot. For a 2,000-square-foot brick exterior, the usual range works out to roughly C$5,000 to C$10,000 before major repairs or specialty finishes, as noted in the pricing benchmark, which also places brick near the upper end because of prep and labour intensity.
Practical rule: if the budget focuses only on colour, the job is under-scoped. On brick, the actual cost sits in cleaning, repair, primer, and the finish system.
A King City heritage home and a downtown North York semi can both need paint, but they do not need the same logic. Older brick often has more movement, more patchwork repair history, and more hidden moisture behaviour. In a Toronto winter, that matters because freeze-thaw stress punishes any coating that cannot breathe or that was applied over damp masonry.
The climate problem most DIY jobs ignore
Masonry failure patterns are hard to ignore once you have seen enough of them. A 2024 BIA technical note reported spalling on roughly 18% of painted brick walls inspected in mid-Atlantic and Midwest climates within 8–12 years of painting, while the humid Southeast showed surface paint failure on 31% of walls within 6 years; dry Southwest climates such as Phoenix and Albuquerque had failure rates under 5% (BIA technical note summary). Ontario does not match the Southwest. It behaves much closer to the climate stress profile that makes prep and moisture management matter, especially on shaded walls and north-facing elevations.
That does not mean painted brick is wrong. It means the wall has to earn the coating. Toronto conditions punish rushed jobs, especially on shaded walls, north-facing elevations, and older homes where previous repairs already changed how the brick dries.
For homeowners comparing finishes, the takeaway is simple. A colour change can look easy on a swatch board, but the wall itself decides whether the finish will last. If the brick cannot dry, the coating will not behave.
A useful design reference is Soca Services' limewash paints guide, especially for readers deciding between a traditional painted finish and a more breathable decorative approach. For a practical comparison of repair scopes, compare residential concrete services alongside the masonry work the wall may need before coating. The finish choice should follow the wall's condition, not the other way around.
Inspecting and Repairing the Brick Before You Touch a Brush
A brick wall never hides its problems for long. If the mortar is friable, the faces are starting to flake, or the joints have already been patched badly, paint just seals in the mess and makes the failure more expensive later. That's why the inspection comes before the colour sample.
What to check on the wall
Start with the mortar joints, because they often tell the story first. Look for cracks, gaps, loose sand, and any places where the joint has receded far enough that water can sit. Then scan each brick face for spalling, broken corners, and powdery surfaces, since those areas usually need masonry repair before coating.
A simple tap-test helps. Sound brick feels solid under a light tap, while loose or compromised sections often sound duller. If you find movement, that's the point to slow down and assess whether the problem is local patching or a broader repointing job. Older Toronto facades often need more than a quick cosmetic fill.
If the wall is already shedding mortar, paint won't stabilise it. Fix the substrate first, then talk about colour.
Efflorescence and mildew matter too, but they mean different things. Efflorescence is that white crystalline residue left by salts moving through masonry. Mildew points to surface moisture and poor drying. Both need attention before a finish goes on, because neither improves under paint.
For a practical comparison of repair scopes, compare residential concrete services from Atlanta Concrete Solutions is a useful external reference because it shows how masonry repair planning often starts with substrate condition, not topcoat choices. That same mindset applies to brick facades in Toronto.
A Vaughan bungalow case that went wrong
A bungalow in Vaughan I saw a while back had a patchy front wall that looked good enough from the street. The owner wanted a fast repaint, but the north side had open joints and soft spots near the grade line. The paint went on anyway, and within two winters the finish was peeling in sheets because the wall had never been made sound.
That's the part homeowners don't always price in. A paint crew can hide a few defects for a season, but the failures come back through the coating. If you can catch the repair work before painting, the whole system lasts longer and looks better.
Safe DIY repairs and when to call a mason
You can usually handle small exterior filler work, light sanding, and removing loose debris yourself if the brick is otherwise stable. Repointing, larger cracks, repeated water entry, and any wall that feels soft or moves under pressure are different. Those should go to a mason before the painting starts.
A good repair list should end with one of two outcomes. Either the wall is ready for coating, or it needs structural masonry attention first. There's no useful middle ground.
Cleaning and Letting the Wall Actually Dry
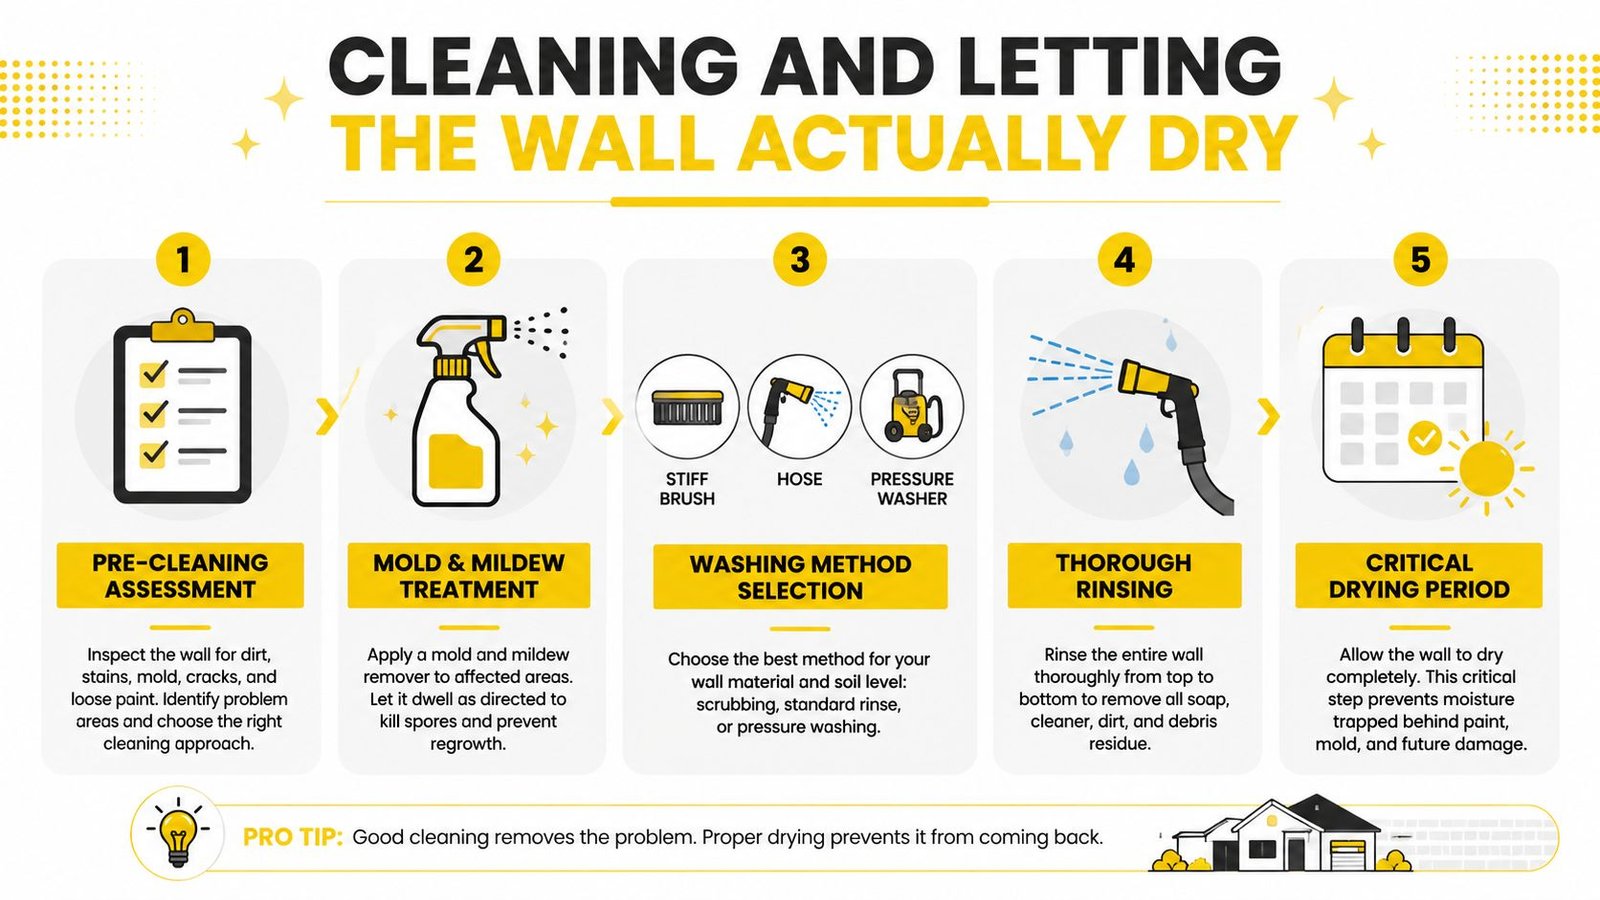
Brick that looks clean can still be wet inside. That's the trap. People wash the wall on Saturday, buy primer on Sunday, and wonder why the finish starts to fail after the first season of weather.
Wash for cleanliness, not saturation
Start with a stiff brush, a garden hose, or a pressure washer used carefully. The goal is to remove dirt, soot, mildew, and loose residue without driving water deeper into the masonry. Multiple professional guides recommend washing off dirt and mildew before priming, and the Brick Industry Association stresses that brick should be clean, dry, and sound before coating (BIA guidance).
If mildew is present, treat it before you rinse. If the surface has chalky dust or powder from weathering, scrub that off too. Old Toronto brick often carries decades of grime, and paint won't bond properly to contamination.
Drying time is not negotiable
One guide advises at least 24 hours of drying after cleaning, and another recommends waiting until moisture content is below 18% before applying paint (drying guidance). That's the part homeowners skip most often, especially in spring when the weather looks decent but the wall is still holding moisture from overnight temperature swings.
Shaded and north-facing walls need extra patience. They dry slowly, and Toronto spring weather can fool you into thinking the surface is ready just because the top feels dry to the touch. It may not be.
Read the wall, not the calendar. If the brick still feels cool and damp in the morning, it's not ready.
A good curb-appeal checklist for exterior work is available in Cultivate House Detailing's curb appeal cleaning to-dos, and it lines up with what matters before painting. Clean the surface, rinse it well, and give it time.
The short version is this. A washed wall isn't a paint-ready wall until the moisture is out of the brick. In Toronto, that distinction saves a lot of expensive rework.
For a related drying reference, Soca Services also explains cure timing in how long paint takes to dry, which is useful when you're planning coats and return visits.
Choosing the Right Masonry Primer and Paint System
Most bad brick jobs don't fail because the colour was wrong. They fail because the system was wrong. Brick needs coatings that bond well, tolerate moisture movement, and still let the wall breathe enough to avoid trapping water.
Primer first, then the finish system
A true masonry primer does three things. It helps the finish bond to porous brick, blocks stain bleed, and supports breathability. That is very different from a generic exterior primer, which may be fine on wood trim but isn't the right call for masonry that absorbs and releases moisture differently.
Independent how-to guides consistently point to masonry or brick primer followed by a two-coat finish system (Sherwin-Williams brick guide). That sequence matters more than the label on the can.
System choices that make sense
For many Toronto homes, 100% acrylic topcoats are the standard choice because they're durable and flexible enough for exterior exposure. On walls with hairline cracking or lots of minor surface irregularity, elastomeric coatings can make sense, but only when the wall is properly prepared and the moisture situation is under control. Specialty breathable masonry paints are also worth considering when long-term drying behaviour is the priority.
Sherwin-Williams and Benjamin Moore both carry masonry-oriented products that contractors use on these types of projects. The brand matters less than matching the chemistry to the wall and the climate.
| Masonry Paint Systems Compared | Best For | Breathability | Durability Expectation |
|---|---|---|---|
| Masonry primer plus 100% acrylic topcoat | Sound brick with normal weather exposure | Good | Strong general-purpose exterior system |
| Masonry primer plus elastomeric finish | Hairline cracks and slightly uneven surfaces | Moderate, depending on product | Useful where flexibility matters most |
| Breathable masonry paint system | Older walls where moisture movement is a bigger concern | High | Better fit when drying behaviour is the main issue |
Breathability is not a marketing word on brick. It's the difference between a coating that works with the wall and one that fights it.
Recent guidance also leans toward masonry-specific systems that can be inspected annually for flaking or mildew, which reflects a maintenance mindset rather than a one-off cosmetic approach (Composite Paint masonry guide). That's the right way to think about Toronto exteriors.
For a closer look at finish selection, Soca Services' paint for brick exterior guide is a useful companion piece. On a real job, the answer comes down to the wall condition, the exposure, and how much ongoing maintenance the owner wants to take on.
Tools and Application Techniques That Actually Work on Brick
The first question people ask is usually whether to brush, roll, or spray. The better question is how to get paint into a rough, absorbent surface without leaving weak spots. Brick punishes thin coverage, and it shows every missed joint.
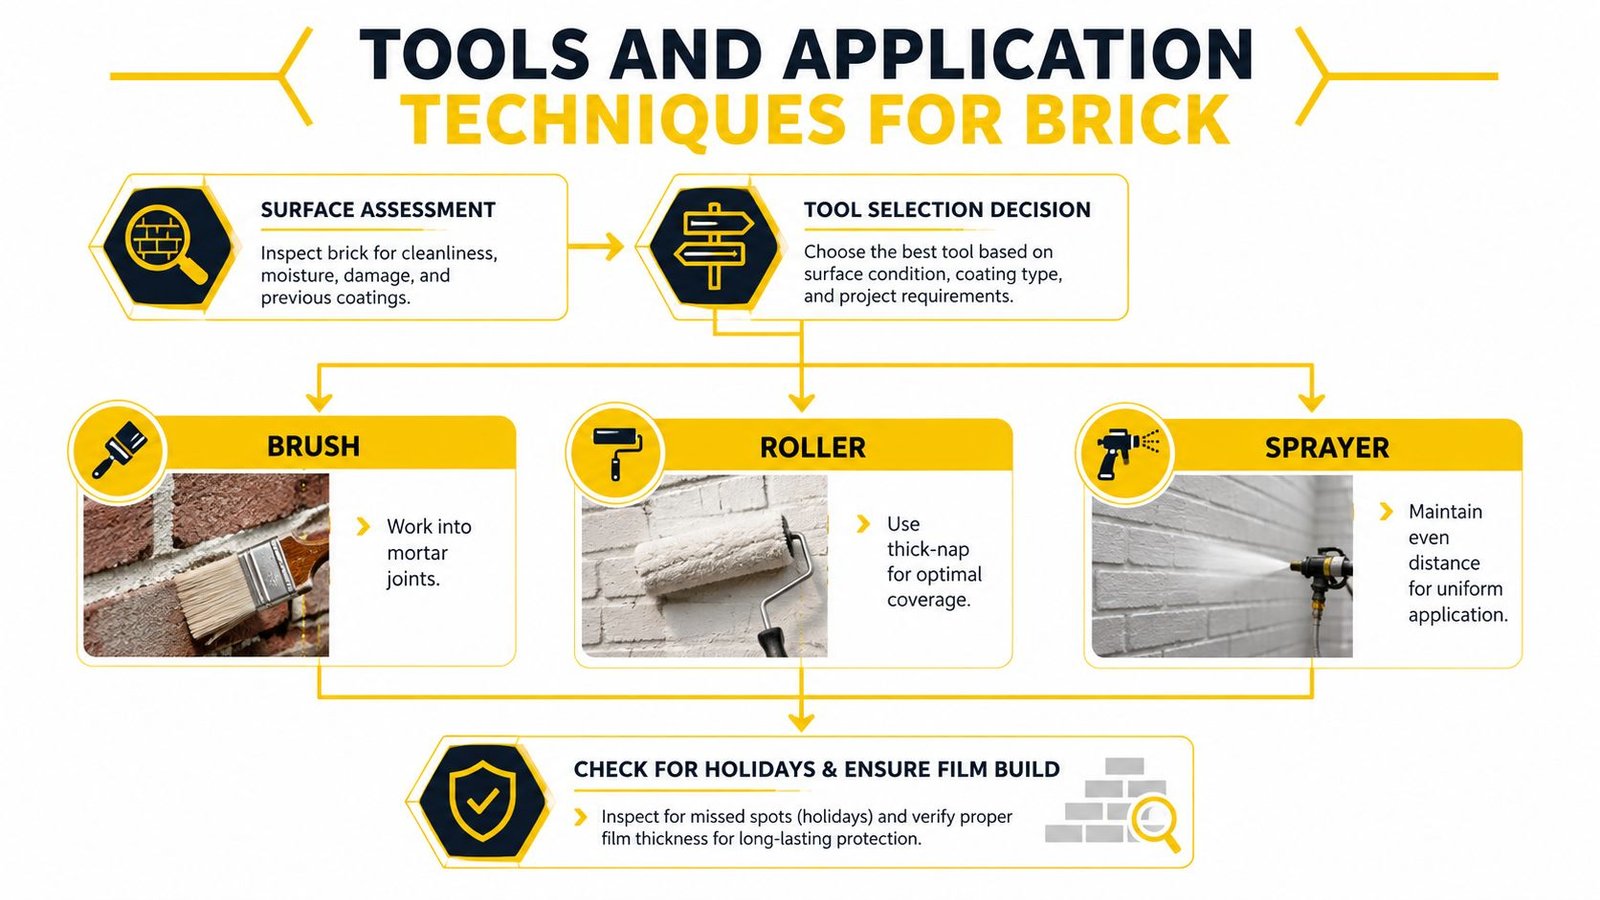
How each tool performs on masonry
A thick-nap roller is useful because it pushes material into the pores better than a short nap. A brush is still important for mortar joints, edges, and any detail work around windows or trim. An airless sprayer saves time on large facades, but it only works well when it's followed by back-brushing or back-rolling so the coating bonds into the texture.
That back-brushing step is where many DIY jobs fall short. The sprayer lays material on fast, but brick needs the coating worked in. Professionals do that because the surface wants more than a surface film.
Weather and working rhythm
Painting brick works best in stable conditions. One technical guide says to apply paint only when air and surface temperatures are between 10°C and 32°C, relative humidity is below 85%, and no rain is forecast; other homeowner guides give a similar outdoor range of 50°F to 90°F (Promain brickwork guide). In Toronto, that means keeping an eye on wind, sun, and shade across the wall, not just the weather app.
A practical rule is to work in shaded sections and stay ahead of drying edges. If the sun hits one part of the wall hard while you're still brushing another section, you'll start to see lap marks and uneven film build. That's especially true on south-facing and west-facing elevations.
A smooth application rhythm usually goes like this:
- Prime evenly, then inspect the wall under angled light for missed joints.
- Apply the first finish coat, working top to bottom in manageable sections.
- Back-brush or back-roll immediately, so the paint settles into the texture.
- Let the coat set, then apply the second finish coat within the product's recoat window.
- Check for holidays, thin spots, and mortar lines that need touch-up.
For larger façades, Soca Services' best paint sprayer for home use guide gives a useful sense of how sprayers fit into residential work. The tool matters, but only if the prep and finish system are right.
One other exterior finish decision
Homeowners who are already deciding between surface finishes elsewhere on the property often compare paint or stain for your deck for the same reason. They're trying to balance appearance, maintenance, and how the material handles weather. Brick deserves that same line of thinking.
For full-service exterior work, including brick and aluminum siding painting, Soca Services Painting is one option Toronto owners and property managers can consider when they want the prep, application, and clean-up handled by a crew that works in this climate.
Costs in the GTA and When to Hire Soca Services
A brick repaint can look straightforward until the quote starts reflecting the actual work. Cleaning, repairs, primer, finish coats, access, and drying time all affect the price. Toronto homeowners should compare the full scope, not just the paint bucket.
What Toronto pricing usually includes
For brick painting in this market, pricing is usually discussed in square-foot terms, and the total depends heavily on condition, height, and access. A typical exterior repaint on a sound wall can sit in a wide midrange, while older brick with repairs, staging, or specialty coatings moves higher quickly. A practical cost to paint exterior house guide helps show how brick fits into the broader exterior budget alongside trim, siding, and other surfaces.
A three-storey North York home with awkward rear access often costs more to handle safely than a simple front elevation in Vaughan. Ladders, staging, protection, and time all add up. So does the repair work around windows, sills, and old mortar joints.
DIY math that gets ignored
DIY usually looks cheaper on paper because the labour is “free.” In reality, the owner is paying for primer, two finish coats, brushes, rollers, masking supplies, cleaning materials, and sometimes rental gear. The weekend cost matters too, even if people only notice it after the job starts stretching out.
If the first pass fails because the brick was still holding moisture or the prep was rushed, the redo can wipe out the savings fast. That is why a professional crew often makes more sense on older masonry, tall houses, or homes with shaded walls that need careful moisture management.
Hire out the risk, not just the painting. On brick, the expensive part is usually what happens before the first coat.
A practical way to decide is to look at scope, not pride. Hire help if the wall has recurring mildew, open mortar joints, peeling old paint, access problems, or signs of trapped moisture. DIY can still make sense on smaller, sound areas where the owner can control drying time and weather windows.
Where Soca Services earns its keep
A professional crew matters most when the job needs inspection, careful prep, and a finish system suited to Toronto weather. That includes older brick homes in North York, mixed masonry facades in Toronto, and properties in King City or Vaughan where appearance and longevity both matter.
A good paint job should leave the owner with less maintenance, not more uncertainty. If the wall needs more than a quick cosmetic lift, hiring a contractor who understands masonry often saves money over the life of the finish.
Maintenance, Common Problems, and a Five-Year Care Plan
Painted brick isn't a set-it-and-forget-it surface. If you want it to last, treat it like a maintenance item and inspect it before small problems become visible from the street. That's the mindset that keeps a repaint from turning into a patchwork repair.

What to look for each year
Walk the wall once a year and check for peeling, blistering, new cracks, mildew, and white salt deposits. If the paint is starting to lift at the bottom courses, that usually means moisture is entering from somewhere and the surface is telling you about it early. Catching that early can mean a touch-up instead of a larger repaint.
Keep an eye on north-facing and shaded walls, because they hold moisture longer. Also check around window heads, sills, and any repaired mortar areas where movement tends to show up first.
Five years is a review point, not a promise
A five-year recoat assessment is a smart planning point for Toronto exteriors, even if the wall still looks decent. That doesn't mean every brick wall needs full repainting on that schedule. It means the owner should inspect adhesion, colour fade, and any moisture-related change before waiting too long.
If mildew keeps returning, the issue may not be the paint itself. It may be drainage, shade, or a wall that never dried fully in the first place. If efflorescence keeps showing up, the masonry is still moving moisture and needs attention.
The maintenance rhythm is simple:
- Inspect annually after winter.
- Spot-clean mildew early so it doesn't spread.
- Repair peeling edges before they grow.
- Watch efflorescence for moisture clues.
- Review the coating at five years and decide whether touch-up or repainting makes more sense.
For owners who want a professional eye on the wall before a small issue turns into a bigger one, Soca Services Painting handles exterior painting and brick facades with the prep and finish discipline this climate demands. If your Toronto, Vaughan, North York, or King City property needs a fresh assessment, visit Soca Services Painting to book a free estimate and talk through the right system for your brick.