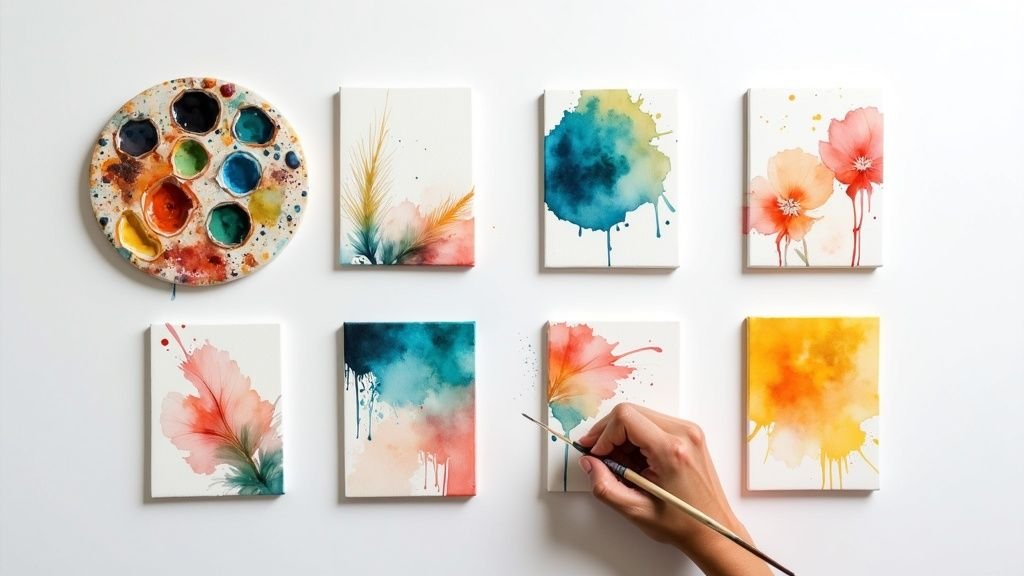
Starting your painting journey can feel both exciting and overwhelming. With so many methods and styles, where do you begin? This guide is designed to demystify the process by focusing on 8 core painting techniques for beginners. Each one is a building block that will not only help you create your first successful pieces but also give you the confidence to develop your unique artistic voice. We'll break down the essentials, from creating soft, blended backgrounds to adding expressive texture, with practical, step-by-step advice.
Whether you're looking for the best painting resources near me in Toronto, Mississauga, or anywhere in the GTA, these foundational skills are your first step towards mastering the canvas. For those new to the medium, a structured approach can be incredibly beneficial. For an extensive overview and easy-to-follow instructions on various foundational skills, consider this easy guide to acrylic painting techniques for beginners, which provides a comprehensive starting point.
This article offers an objective dive into the practical application of essential skills. You will learn not just what each technique is, but how to implement it effectively, avoid common mistakes, and achieve specific visual effects. For homeowners and property managers, understanding these fundamentals provides insight into the craftsmanship required for a professional paint job. The best painting companies throughout the GTA demonstrate how a deep understanding of these techniques results in a flawless, high-quality finish, reminding us that all great painting starts with mastering the fundamentals. We will explore everything from the Wet-on-Wet method for seamless colour blending to the Impasto technique for creating bold, tangible textures, providing you with a complete toolkit to begin your creative exploration.
1. Wet-on-Wet Technique
The Wet-on-Wet technique is one of the most foundational and forgiving painting techniques for beginners, particularly in watercolour and fluid acrylics. The core principle involves applying wet paint onto a surface that is already wet, either with water or another layer of wet paint. This method encourages colours to bleed, blend, and diffuse into one another organically, creating soft edges and ethereal transitions that are difficult to achieve with dry brushwork.
This technique is celebrated for its ability to produce atmospheric effects with minimal effort. Think of the misty, dreamlike skies in J.M.W. Turner’s watercolour landscapes or the soft, blended backgrounds in contemporary abstract paintings. Its value lies in letting the medium do the work for you, making it an excellent starting point for understanding paint behaviour. Whether you're in a studio in the GTA or working from home near Mississauga, this is a versatile approach.
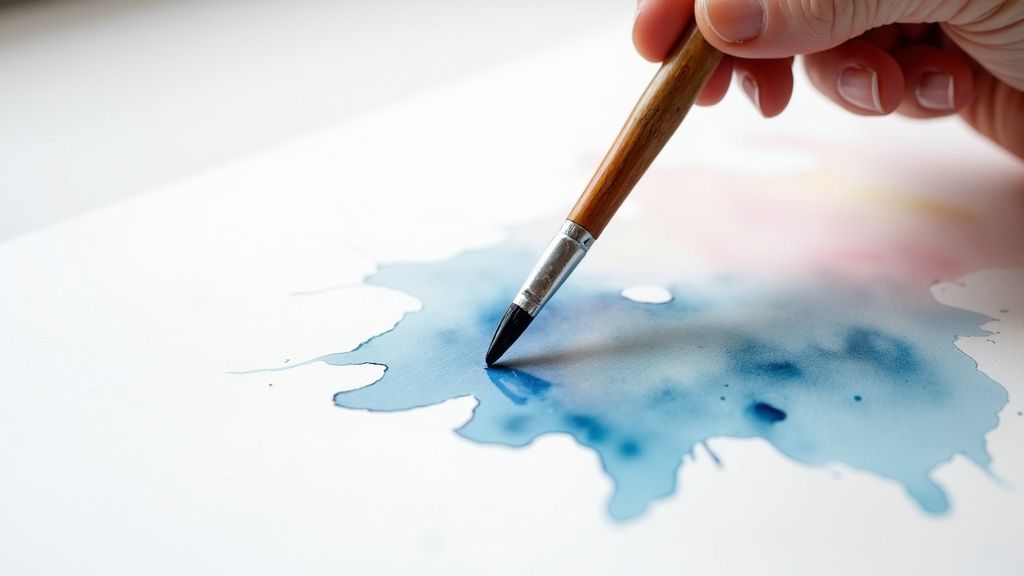
How to Master the Wet-on-Wet Technique
To successfully implement this technique, preparation and timing are key. The goal is to control the beautiful chaos that ensues when colours meet on a wet surface.
Actionable Steps:
- Prepare Your Surface: Using a large, clean brush or a sponge, apply a thin, even layer of water to your watercolour paper or canvas. The surface should have a consistent sheen, not puddles of water.
- Ready Your Colours: Mix your chosen colours on your palette before you start painting. The wet surface will begin to dry quickly, so you need to work efficiently.
- Apply Paint: Gently touch your loaded brush to the wet surface. Watch as the colour blooms and spreads. Apply your next colour nearby and observe how they interact and merge.
- Control the Flow: Tilt your paper or canvas to guide the paint flow. This can help create natural-looking gradients for elements like skies or water. Keep a paper towel handy to blot excess water from the edges.
Key Insight: The success of the wet-on-wet technique hinges on water control. Too little water and the colours won't blend; too much and they will become a muddy, uncontrollable mess. Experiment on a scrap piece of paper to find the ideal level of dampness.
Common Mistakes and How to Avoid Them
- Overworking the Paint: Avoid the temptation to excessively brush the colours once they are on the paper. This can lead to muddy results and lift the paper fibres. Let the water do the blending.
- Using Low-Quality Paper: For watercolours, using paper less than 140 lb (300 gsm) will likely cause it to buckle and warp. Invest in good-quality watercolour paper for the best results.
- Ignoring Drying Times: The paint and paper will dry at different rates. Be patient and allow areas to dry completely if you want to layer sharper details on top of your soft background.
This technique is a cornerstone for any artist looking to create soft, atmospheric effects, making it one of the most essential painting techniques for beginners to learn. For an excellent visual demonstration of this technique in action, the video below provides a clear, step-by-step tutorial.
2. Dry Brush Technique
The Dry Brush technique is a versatile and expressive method that stands in stark contrast to the fluid nature of wet-on-wet. This approach involves using a brush that is relatively dry, loaded with thick paint and very little water, to apply colour to a dry surface. The result is a broken, textured stroke that highlights the grain of the canvas or paper, perfect for creating effects like weathered wood, wispy clouds, or the texture of fabric.
This technique is valued by beginners and masters alike for the incredible control it offers. It’s a cornerstone of realism and expressive styles, seen in the vibrant, energetic marks of Vincent van Gogh and the detailed, textural landscapes of Andrew Wyeth. For any artist in the GTA looking to add depth and a tactile quality to their work, mastering dry brushing is an essential step. It is one of the most direct painting techniques for beginners to learn to control their brushwork.
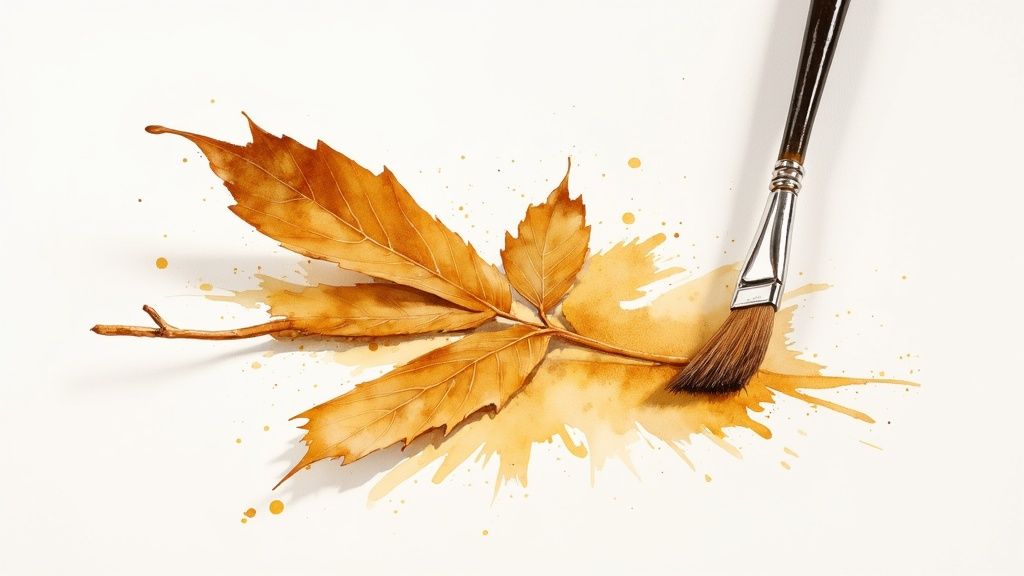
How to Master the Dry Brush Technique
Success with the dry brush technique is all about paint consistency and application pressure. The aim is to scuff the paint across the surface, catching the raised textures.
Actionable Steps:
- Prepare Your Brush: Dip your brush into the paint. Then, wipe or dab most of the paint off onto a paper towel or a scrap piece of paper until only a small amount remains and the bristles start to separate.
- Load the Paint: Use thicker paint directly from the tube or with minimal water added. A fluid, watery consistency will not work for this technique.
- Apply with Light Pressure: Holding the brush at a low angle, lightly drag it across your painting surface. Use quick, confident strokes. The paint will only catch on the peaks of the paper or canvas texture, creating the desired effect.
- Build Up Layers: Apply multiple thin layers to build up colour and texture gradually. Allow each layer to dry before adding the next to avoid smudging and maintain the crisp, textural quality.
Key Insight: The key to a successful dry brush effect is having less paint on your brush than you think you need. It is always easier to add more paint in another layer than it is to remove too much. Experiment with different levels of dryness to see the range of textures you can create.
Common Mistakes and How to Avoid Them
- Overloading the Brush: Putting too much paint on your brush will result in a solid, flat stroke rather than a textured one. Always blot the excess before touching the canvas.
- Using the Wrong Brush: Soft, floppy brushes are not ideal. Stiff-bristled brushes, like hog hair for oils or firm synthetics for acrylics, provide better control and enhance the textured effect. Knowing about the best paint brushes and rollers is a great first step.
- Pressing Too Hard: Heavy pressure will force the paint into the valleys of the canvas, defeating the purpose of the technique. Use a light, skimming touch to catch the surface texture.
Dry brushing is an invaluable skill for adding a final layer of detail and visual interest, making it one of the most impactful painting techniques for beginners to add to their artistic toolkit.
3. Glazing Technique
The Glazing technique is a classic layering method revered for its ability to create unparalleled depth, luminosity, and complex colour. The principle involves applying thin, transparent layers of paint over a completely dry underlayer. Each subsequent glaze modifies the colour beneath it, allowing light to pass through and reflect off the lower layers, resulting in a rich, jewel-like quality that is difficult to achieve with direct painting.
This technique was mastered by Renaissance artists like Leonardo da Vinci and is fundamental to traditional oil painting, though it is equally effective with acrylics and watercolours. Its value lies in building up colour and form slowly and deliberately, offering immense control. It’s one of the most transformative painting techniques for beginners looking to move beyond single-layer applications and add professional-level sophistication to their work. Whether you're in a studio in Toronto or painting in your Mississauga home, this method elevates any piece.
How to Master the Glazing Technique
Patience is the most crucial element for successful glazing. Unlike Alla Prima (wet-on-wet), this technique is a slow, methodical process where each step builds upon the last.
Actionable Steps:
- Establish an Underpainting: Start with a dry, completed painting or a monochromatic underpainting (a "grisaille"). This underlying image will provide the structure and values for your glazes.
- Thin Your Paint: Mix a small amount of your chosen colour with a significant amount of glazing medium (for oils or acrylics) or water (for watercolours). The consistency should be transparent, like stained glass, not opaque.
- Apply a Thin Layer: Using a soft, clean brush, apply a very thin, even coat of your glaze over the desired area. The goal is to tint the underlying layer, not to cover it.
- Wait for it to Dry Completely: This step is non-negotiable. The layer must be 100% dry to the touch before you apply the next. Applying a new glaze to a wet or tacky layer will lift the paint and create a muddy mess. Repeat with subsequent layers to deepen colours and model form.
Key Insight: The power of glazing comes from the interaction of light with multiple transparent layers. Each glaze acts as a coloured filter. A blue glaze over a yellow underpainting will appear green, but with a luminosity that is very different from mixing blue and yellow paint on a palette.
Common Mistakes and How to Avoid Them
- Impatience: The most common error is not allowing layers to dry completely. This compromises the integrity of the painting and ruins the luminous effect. Plan your painting sessions around drying times.
- Applying Thick Layers: Glazes should be transparent. If your glaze is opaque or even semi-opaque, you have too much pigment and not enough medium. Your brushstrokes should tint, not conceal.
- Overworking the Glaze: Apply the glaze in smooth, deliberate strokes and then leave it alone. Brushing back and forth over a wet glaze can create streaks and lift the underlying paint.
Glazing is a gateway to understanding colour theory and light in a profound way, making it one of the most rewarding painting techniques for beginners to learn and master. For an excellent visual demonstration of this technique in action, the video below provides a clear, step-by-step tutorial.
4. Blocking In / Underpainting Technique
The Blocking In or Underpainting technique is a foundational method used by artists to build a painting in structured layers. It involves creating a simplified, often monochromatic, first layer that establishes the basic composition, shapes, and values (lights and darks) of the final piece. This approach serves as a roadmap, providing a solid framework before any detail or complex colour is added.
This technique is invaluable for beginners as it breaks the painting process into manageable stages, building confidence and preventing common compositional errors. Think of the foundational burnt umber sketches of classical portraits or the value studies contemporary realists create before applying colour. Its primary value is in problem-solving early, allowing you to focus on form and light without the distraction of colour. This methodical approach is taught in art classes from Mississauga to downtown Toronto for its effectiveness in creating cohesive, well-structured paintings.
How to Master the Blocking In Technique
A successful underpainting sets the stage for a strong and convincing final artwork. The key is to simplify what you see into large, interconnected shapes and values.
Actionable Steps:
- Sketch Your Composition: Lightly draw your main subject onto the canvas using charcoal, graphite, or thinned paint. Focus on accurate proportions and placement.
- Mix a Neutral Colour: Prepare a thinned-down neutral colour, like burnt umber or a mix of black and white. You want the paint to be fluid but not transparent.
- Block In Major Shapes: Using a medium-sized brush, fill in the largest shapes of your composition. Ignore all small details and focus only on the main forms of your subject and background.
- Establish Three Main Values: Identify the lightest, darkest, and mid-tone areas of your scene. Apply your neutral paint to establish these values, creating a simplified map of light and shadow across the canvas.
Key Insight: The goal of underpainting is not to create a finished drawing but to establish mass and structure. Step back from your canvas frequently to assess the overall balance and composition. Making major corrections at this stage is far easier than trying to fix them later.
Common Mistakes and How to Avoid Them
- Adding Detail Too Early: The most common mistake is getting caught up in details like eyes or textures. The underpainting should remain loose and focused on the big picture.
- Making the Underlayer Too Thick: Apply the paint thinly. A thick underpainting layer can take a long time to dry and may create unwanted texture that interferes with subsequent layers. This is similar to understanding the purpose of primer in house painting, where the base coat prepares the surface for the finish. You can learn more about how foundational layers work on socaservicespainting.com.
- Using Too Many Values: Stick to a simplified value structure (e.g., light, medium, dark). Introducing too many tones at this stage overcomplicates the process and defeats the purpose of creating a clear roadmap.
This disciplined method is one of the best painting techniques for beginners aiming to create realistic and compositionally sound artwork, providing a reliable foundation for every piece. The video below offers a great visual guide to setting up a monochromatic underpainting.
5. Impasto Technique
The Impasto technique is an expressive and tactile method where paint is applied so thickly that the texture of brushstrokes or palette knife marks is visible on the surface. Unlike techniques that aim for smooth, flat finishes, impasto celebrates dimension and physicality, allowing artists to add depth and a sculptural quality to their work. This approach is perfect for beginners looking to explore texture and understand how paint consistency can dramatically affect a painting's final appearance.
This technique is famously associated with the swirling, emotional energy in Vincent van Gogh's masterpieces, but its appeal is timeless. Contemporary artists use it to create powerful, textured surfaces that catch the light in unique ways. Its value lies in its directness and expressive potential, making it one of the most engaging painting techniques for beginners to experiment with, whether in a professional studio in the GTA or at a home easel in Mississauga.
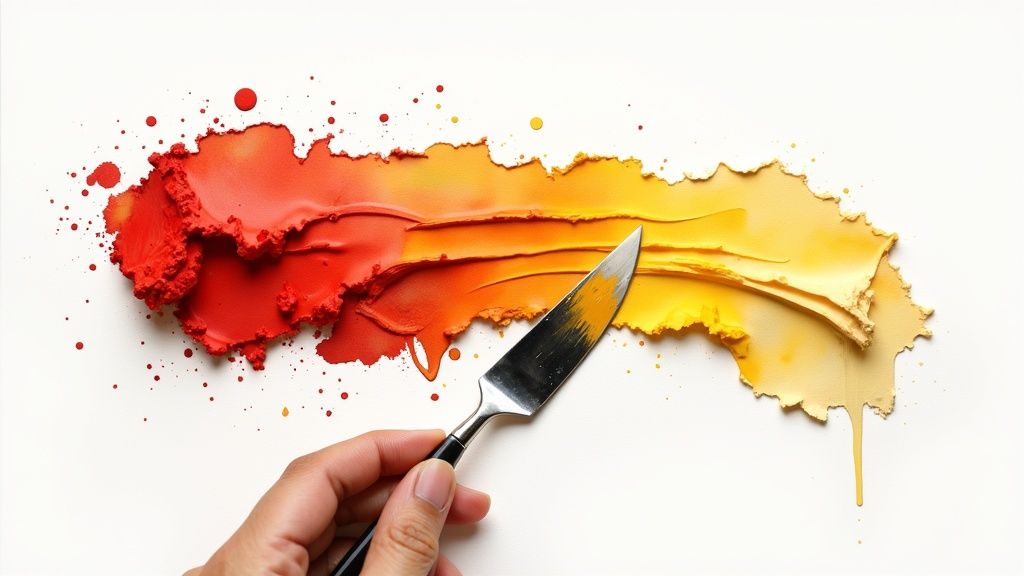
How to Master the Impasto Technique
Successfully using impasto involves embracing bold application and understanding how to build texture without creating a muddy mess. The goal is to create deliberate, impactful marks that add character and energy to your painting.
Actionable Steps:
- Prepare Your Surface: A sturdy, well-primed surface is crucial to support the weight of thick paint. A stretched canvas or wood panel is ideal. Ensuring your surface is properly prepared is a key step in any painting project. You can discover how to prep walls and other surfaces for painting on socaservicespainting.com.
- Ready Your Paint: Use heavy-body acrylics or oil paints. You can also mix a commercial impasto medium or gel medium into your paint to increase its thickness and volume without altering the colour.
- Apply with Confidence: Load a stiff-bristled brush or palette knife with a generous amount of paint. Apply it directly to the canvas using dabs, smears, or broad strokes. Don't be timid; the technique relies on bold marks.
- Build in Layers: Instead of applying one extremely thick layer, build up your texture gradually. Allow the initial layers to become tacky or partially dry before adding more on top. This provides better control and stability.
Key Insight: The magic of impasto is in the way light interacts with the textured surface. Observe your work from different angles to see how light and shadow play across the peaks and valleys you've created. This is what brings the painting to life.
Common Mistakes and How to Avoid Them
- Overworking the Paint: Continuously blending or fussing with thick paint on the canvas can quickly lead to muddy, undefined colours. Apply the stroke and leave it alone.
- Using a Flimsy Surface: A standard, thin canvas or paper cannot support the weight of heavy impasto and will sag or warp. Always choose a rigid and properly primed support.
- Ignoring Drying Times: Thick applications of paint, especially oils, can take a very long time to dry completely (weeks or even months). Be patient and avoid touching or varnishing the surface prematurely.
This technique is an excellent way for artists in Toronto and beyond to add a dynamic, three-dimensional quality to their work, making it a powerful skill for any beginner’s toolkit.
6. Scumbling Technique
Scumbling is a sophisticated yet accessible dry-brush painting technique where a thin layer of opaque or semi-opaque paint is lightly applied over a dry underlying layer. This method allows parts of the lower layer to show through, creating a broken, textured, and often luminous effect. It’s a fantastic way for beginners to build depth, suggest texture, and add subtle colour variations without completely obscuring their previous work.
This technique has been famously used by Old Masters like Rembrandt and Turner to create atmospheric light and complex surfaces. Its value lies in its ability to soften edges, add highlights, and create a sense of vibration and life in a painting. Whether you're painting a rugged landscape in a Mississauga art class or adding texture to an abstract piece in your Toronto studio, scumbling introduces a unique tactile quality.
How to Master the Scumbling Technique
Success with scumbling depends on using a very dry brush and a light touch. The goal is to deposit just enough pigment to catch the raised texture of the canvas or the underlying paint, creating a delicate, shimmering effect.
Actionable Steps:
- Ensure a Dry Base: Your underlying paint layer must be completely dry. Scumbling on a wet or tacky surface will result in muddy blending rather than a textured overlay.
- Load Your Brush Sparingly: Use a stiff-bristled brush (an old, worn one works perfectly). Dip the very tip into your paint, then wipe most of it off on a paper towel until the brush seems almost dry.
- Apply with a Light Touch: Holding the brush parallel to the surface, lightly drag or scrub it using quick, multi-directional, or circular motions. Let the bristles just graze the painting.
- Build Layers Gradually: Apply the scumbled layer thinly. It’s easier to add more paint than to remove it. Step back frequently to assess the effect before adding another layer. Light colours scumbled over dark ones often produce the most dramatic results.
Key Insight: The key to effective scumbling is minimal paint and light pressure. The aim isn't to cover the layer below but to add a delicate, broken veil of colour on top. Less is truly more with this technique.
Common Mistakes and How to Avoid Them
- Using Too Much Paint: Loading the brush with too much paint is the most common error. This leads to opaque, heavy marks instead of the intended textured effect. Always wipe your brush thoroughly.
- Pressing Too Hard: Applying heavy pressure will press the paint into the recesses of the canvas, defeating the purpose. Use a feather-light touch to skim the surface.
- Working on a Wet Surface: Patience is crucial. Applying this technique to a wet layer will cause the colours to mix and become muddy, losing the distinct textural quality of scumbling.
Scumbling is one of the best painting techniques for beginners looking to add professional-looking depth and complexity to their work. The video below demonstrates how to control your brush to achieve beautiful, textured effects.
7. Colour Mixing and Palette Technique
Beyond any single brushstroke, the art of colour mixing is arguably the most critical of all painting techniques for beginners. This foundational skill involves understanding colour relationships, accurately mixing hues on a palette, and maintaining an organised workspace. It is the bedrock upon which all successful paintings are built, transforming a limited set of tubes into an infinite spectrum of possibilities.
Mastering this technique allows an artist to achieve harmony, depth, and realism. Think of the subtle, lifelike skin tones in a professional portrait or the vibrant yet cohesive palettes in a colourist landscape painting. Its value lies in giving you complete control over your work’s mood and message. For anyone learning to paint, from a hobbyist in a Mississauga studio to a professional artist in the GTA, a strong grasp of colour theory is non-negotiable.
How to Master Colour Mixing and Your Palette
Success in colour mixing comes from practice and a methodical approach. The goal is to move from guessing to intentionally creating the exact colours your painting needs, ensuring consistency and efficiency.
Actionable Steps:
- Start with a Limited Palette: Begin with primary colours (a warm and cool version of red, yellow, and blue), plus white. This forces you to learn how to mix secondary and tertiary colours instead of relying on pre-mixed tubes.
- Organise Your Palette: Arrange your colours consistently. A common method is to place them around the edge of your palette in rainbow order, leaving the centre clear for mixing.
- Mix More Than You Need: Always mix a larger batch of a colour than you think you’ll need. It is incredibly difficult to perfectly recreate a specific hue mid-painting.
- Test Your Colours: Before applying a mixed colour to your final piece, test it on a scrap piece of paper or canvas to see how it looks when dry, as some paints change value as they dry.
Key Insight: True colour mastery isn't about owning every tube of paint; it's about understanding how to create any colour from just a few. This knowledge is liberating and is a hallmark of the best painters, distinguishing amateurs from professionals.
Common Mistakes and How to Avoid Them
- Mixing on the Canvas: Avoid mixing colours directly on your canvas unless you are intentionally aiming for a specific, less controlled effect. This often leads to muddy, overworked areas. Use your palette for clean, precise mixing.
- Adding Black to Darken: Using pure black to create shadows can make colours look flat and lifeless. Instead, try mixing in a colour’s complement (the colour opposite it on the colour wheel) or a dark neutral like burnt umber.
- Ignoring Colour Temperature: Not all reds, yellows, or blues are the same. Failing to understand the difference between warm (e.g., cadmium red) and cool (e.g., alizarin crimson) versions of a colour will limit your mixing potential and result in inaccurate hues.
This technique is essential for any artist wanting to create compelling and harmonious artwork. For those interested in applying these principles on a larger scale, you can find inspiration in our guide to exterior paint colour combinations on socaservicespainting.com. Understanding how colours work together is a universal skill.
8. Layering (Alla Prima Alternative) / Building Depth Through Multiple Sittings
In contrast to the spontaneous nature of single-session painting, layering is a methodical technique where a painting is developed gradually over multiple sittings. This approach involves applying a layer of paint, allowing it to dry completely, and then adding subsequent layers. It is fundamental for beginners using oils or acrylics who want to achieve depth, richness, and control in their work.
This technique is the backbone of traditional and academic painting, valued for its ability to create complex colours and luminous effects. Think of the deep, glowing skin tones in classical portraits or the detailed realism in contemporary landscapes refined over weeks. Its strength lies in providing time for reflection and correction, allowing an artist to build a piece with intention and precision. Whether you’re learning in a Toronto studio or from your home in Mississauga, this is a key skill for creating professional-looking art.
How to Master the Layering Technique
Successful layering is a testament to patience and planning. The goal is to build the painting from general shapes and colours to specific details and textures, ensuring each stage is thoughtfully executed.
Actionable Steps:
- Plan and Underpaint: Start with a clear plan for your composition. In your first session, focus on an underpainting (a monochromatic or limited-colour base layer) to establish the basic values and forms.
- Block in Colours: Once the underpainting is dry, begin your second session by blocking in the main local colours. Keep this layer relatively thin and focus on covering the major areas of your canvas.
- Allow Proper Drying Time: This is the most critical step. Ensure each layer is completely dry before adding the next to prevent muddying colours. For detailed information, you can learn more about paint drying times on socaservicespainting.com.
- Refine and Detail: In subsequent sessions, add increasingly refined details. Use techniques like glazing (thin, transparent layers) to adjust colour and scumbling (thin, opaque layers) to soften edges or add texture. The final session is for highlights and sharp details.
Key Insight: Work from "fat over lean" when using oil paints. This means each successive layer should have a slightly higher oil content than the one beneath it. This principle ensures the painting dries properly and prevents the upper layers from cracking over time.
Common Mistakes and How to Avoid Them
- Rushing the Process: Applying a new layer before the previous one is fully dry is the most common error. This mixes the wet paints, leading to muddy, unintentional colours. Be patient.
- Applying Thick, Opaque Layers Too Early: Heavy, opaque paint application in the initial stages can obscure your underpainting and make it difficult to build luminous, transparent effects later on. Start thin and build up.
- Inconsistent Colour Mixing: Mixing slightly different colours for the same area in different sessions can create a disjointed look. Keep detailed notes of your colour recipes or mix larger batches to use across sittings.
This structured approach is one of the most reliable painting techniques for beginners aiming for polished, in-depth results, building confidence and technical skill with each session. For a closer look at building a painting with layers, the video below offers a fantastic demonstration.
Comparison of 8 Beginner Painting Techniques
| Technique | Implementation Complexity 🔄 | Resources & Time ⚡ | Expected Outcomes ⭐📊 | Ideal Use Cases 📊 | Key Advantages 💡 |
|---|---|---|---|---|---|
| Wet-on-Wet Technique | Low–Moderate — quick timing and flow control 🔄 | Low — minimal materials, short working window ⚡ | ⭐⭐⭐⭐ — Soft blends, smooth transitions, atmospheric effects 📊 | Landscapes, skies, water scenes | Forgiving blending; easy gradients; great for mood and atmosphere 💡 |
| Dry Brush Technique | Moderate — requires brush control and pressure 🔄 | Low — uses little medium, fast drying; needs stiff brushes ⚡ | ⭐⭐⭐ — Pronounced texture and visible strokes; detail emphasis 📊 | Texture, foliage, fine detail, expressive marks | Builds brush control; strong tactile texture with minimal materials 💡 |
| Glazing Technique | High — careful planning, thin layers, color theory 🔄 | Moderate–High — many thin layers; long drying between coats ⚡ | ⭐⭐⭐⭐⭐ — Luminous depth, subtle color complexity, polished finish 📊 | Skin tones, fabrics, achieving glow and depth | Produces professional depth and color richness; correctable via layers 💡 |
| Blocking In / Underpainting | Low–Moderate — compositional and value setup; methodical 🔄 | Low–Moderate — quick initial stages, then drying before detail ⚡ | ⭐⭐⭐ — Strong composition and value foundation; fewer later errors 📊 | Portraits, complex compositions, figure work | Prevents misaligned details; provides clear roadmap for later stages 💡 |
| Impasto Technique | Moderate — handling thick paint and tools; sculptural feel 🔄 | High — large paint usage, long drying, sturdy supports needed ⚡ | ⭐⭐⭐⭐ — Bold tactile surface, visible brush/palette-knife marks 📊 | Expressive work, abstracts, textured focal areas | Immediate visual impact; hides minor errors; highly expressive 💡 |
| Scumbling Technique | Moderate — control of dry over-dry layers; subtlety needed 🔄 | Low–Moderate — requires dry underlayer; minimal paint per pass ⚡ | ⭐⭐⭐ — Broken, mottled texture; softens edges and adds highlights 📊 | Finishing touches, atmospheric effects, highlights | Adds sophistication and soft transitions; effective finishing tool 💡 |
| Color Mixing & Palette Technique | Moderate — learning theory and consistent practice 🔄 | Low–Moderate — study time; basic palette tools suffice ⚡ | ⭐⭐⭐⭐⭐ — Cohesive harmony, accurate colors, fewer muddy mixes 📊 | Every painting; foundational for beginners and pros | Directly improves overall quality; saves paint and ensures harmony 💡 |
| Layering / Multiple Sittings | Moderate–High — planning, notes, and staged execution 🔄 | High — multiple sessions, drying time, organized workspace ⚡ | ⭐⭐⭐⭐ — Controlled depth, refined details, improved corrections 📊 | Complex subjects, portraits, detailed landscapes | Allows reflection and refinement; combines techniques for polished results 💡 |
Bringing It All Together: Your Next Steps in Painting
You have now journeyed through a comprehensive roundup of foundational painting techniques for beginners. From the fluid blending of wet-on-wet to the textured drama of impasto, and from the subtle luminosity of glazing to the raw energy of scumbling, each method represents a powerful tool in your artistic toolkit. We have explored how to lay a solid groundwork with underpainting, build richness through layering, create definition with dry brushing, and master your palette through effective colour mixing. The objective of this guide was not just to list these methods, but to provide a structured path toward artistic competence.
The core takeaway is that technique is the bridge between your vision and the canvas. Understanding these distinct approaches liberates you from guesswork, allowing you to make intentional, confident brushstrokes. You are no longer just applying paint; you are sculpting with colour, building atmosphere, and telling a story. Remember that these techniques are not isolated islands. The true magic happens when you start combining them. A painting might begin with a blocked-in underpainting, develop through careful layering, feature glazed colours in the shadows, and be finished with impasto highlights to catch the light. This synthesis is where your unique artistic voice begins to emerge.
From Theory to Practice: Your Action Plan
Advancing from a beginner to an accomplished painter is a process of deliberate practice. Merely reading about these techniques is not enough. The next crucial step is to internalize them through hands-on application. Here is a structured plan to guide your efforts:
- Isolate and Conquer: Dedicate your next few painting sessions to a single technique. Create small study pieces focusing only on mastering the dry brush effect, for instance. Paint simple spheres to practise glazing and layering, observing how light interacts with each transparent coat. This focused practice builds muscle memory and deep understanding.
- Combine and Create: Once you feel comfortable with two or three techniques individually, challenge yourself to integrate them into a single, simple composition. For example, use the blocking-in method for your initial sketch, apply the main colours with a wet-on-wet approach for soft transitions, and then add final details using a dry brush. This teaches you how techniques can work in harmony.
- Seek Inspiration and Analyse: Look at the work of professional artists, both historical masters and contemporary painters from the GTA and beyond. Try to deconstruct their work. Ask yourself: "How did they achieve that soft glow? Was it glazing?" or "What gives that sky such a sense of movement? Could it be a scumbling technique?" This analytical eye will dramatically accelerate your learning.
Embracing the Artistic Journey
Ultimately, mastering these painting techniques for beginners is about building a versatile artistic vocabulary. It provides you with the means to express a wider range of ideas and emotions, transforming a blank surface into a compelling work of art. The best artists, whether they are creating gallery pieces or transforming a commercial space in Mississauga, rely on a deep understanding of these fundamentals. Their command of technique allows them to execute their vision with precision and impact.
Your journey is a marathon, not a sprint. There will be frustrating moments and "happy accidents" alike. Embrace them both as part of the learning process. The skills you cultivate through this practice will not only improve your paintings but also sharpen your observational abilities and creative problem-solving skills. Keep your brushes moving, stay curious, and never be afraid to experiment. The canvas is waiting for your unique mark.
When you witness how professional techniques can elevate a space, it’s inspiring. If you're looking to bring that same level of artistic mastery and flawless execution to the walls of your home or business, trust the experts at Soca Services Painting. Their team applies a deep understanding of colour, texture, and application to deliver exceptional results throughout the Toronto area. Learn more about their professional painting services at Soca Services Painting.