Interior painting is mostly about prep, product choice, and clean execution, not just putting colour on the wall. GTA homeowners usually want the same three things: a finish that looks even, a crew that keeps disruption low, and pricing that makes sense for the space. In older Toronto homes, plaster repair often drives the job more than the paint does. In condos, the bigger issue is usually access, elevator bookings, and working within building rules.
At Soca Services Painting, we approach interior painting like a trade, not a quick cosmetic job. That means checking wall condition first, matching the sheen to the room, protecting floors and furniture properly, and being realistic about timelines. If you are comparing quotes in Toronto, Mississauga, Vaughan, Markham, Richmond Hill, or downtown condo towers, this guide will help you see what is standard, what costs extra, and where cutting corners usually shows up later.
What Interior Painting Actually Involves
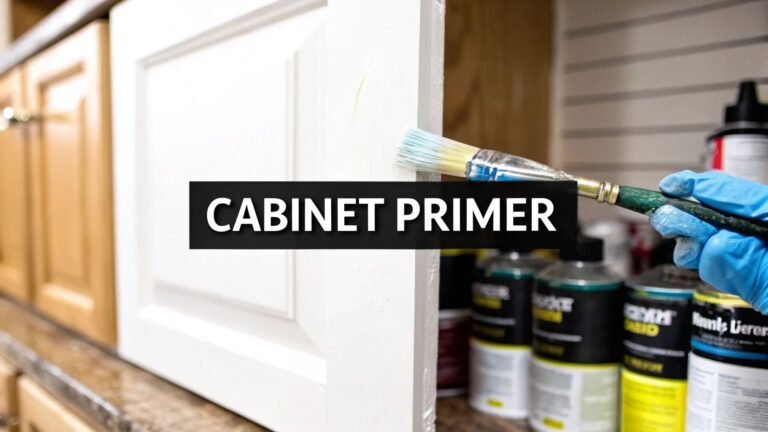
A proper interior paint job includes inspection, prep, priming where needed, two finish coats in most cases, and cleanup. Most problems homeowners notice later, like flashing, peeling, lap marks, rough patches, and visible repairs, usually start in the prep stage rather than with the final coat.
On a standard GTA project, the work usually starts with protecting floors, masking fixtures, moving lighter furniture, removing switch plates, sanding problem areas, filling dents and nail holes, caulking gaps, spot priming repairs, then applying finish coats. If the walls are dark, stained, patched heavily, or changing from oil to latex, extra priming may be needed.
There is also a big difference between repainting a newer drywall home in Oakville and repainting a 1920s or 1930s Toronto house with plaster walls. Plaster can have hairline cracks, loose areas, old patchwork, and uneven texture that become more obvious after fresh paint. In those homes, we spend more time opening cracks, stabilizing loose material, patching properly, sanding, and using the right primer before the finish coats go on.
Condos are their own category. The painting itself may be straightforward, but building logistics are not. Many Toronto condo corporations require owners to review building rules before starting work, and condo renovation guidance commonly points owners to requirements around notification, contractor rules, and service elevator procedures. In practice, that often means booking the service elevator ahead of time, confirming work hours, and making sure the crew carries the insurance the building expects.
Choosing the Right Paint and Finish for Each Room
The right paint is the one that matches the room’s traffic, moisture, surface condition, and cleaning needs. For most GTA homes, flat ceilings, low-sheen walls, and tougher trim paint still make the most sense, but the exact sheen depends on how perfect the walls are and how much wear the room gets.
Benjamin Moore, Sherwin-Williams, and Behr all offer interior systems in multiple sheen levels. Benjamin Moore’s finish guidance notes that flatter finishes help hide surface flaws, while more washable finishes are better for busier areas. Sherwin-Williams makes the same basic point in its sheen guides: higher sheen generally means more durability and easier cleaning, but it also reflects more light and shows more imperfections. That matters a lot in older Toronto homes where side lighting from tall windows can expose every patch and sanding line.
From a working painter’s perspective, eggshell or matte is usually the safest wall choice for living rooms, bedrooms, and hallways. Satin can work in kitchens, bathrooms, kids’ rooms, and heavy-use corridors, but it will show more roller lines and wall defects. For trim, doors, and casings, pearl, satin, or semi-gloss are common because they clean better and stand up to hand traffic. Benjamin Moore specifically notes that its flattest ceiling products help mask imperfections on ceilings, which is useful in older homes with patched plaster overhead.
| Room or Surface | Best Finish in Most Cases | Why It Works | Brand Notes |
|---|---|---|---|
| Ceilings | Flat | Helps hide joints, patches, and roller marks | Benjamin Moore ceiling paints are positioned as very low sheen; Sherwin-Williams and Behr also offer flat ceiling products |
| Living rooms and bedrooms | Matte or eggshell | Good balance of appearance and light washability | Benjamin Moore matte and eggshell are common choices; Sherwin-Williams eggshell or low-lustre wall finishes are also widely used |
| Hallways and family rooms | Matte, eggshell, or satin | Higher traffic means easier cleaning matters more | If walls are imperfect, stay lower sheen even if it means gentler cleaning |
| Kitchens | Eggshell or satin | Better resistance to splatter and wiping | Use a higher-quality washable line from Benjamin Moore, Sherwin-Williams, or Behr for better scrub resistance |
| Bathrooms and powder rooms | Bathroom-rated matte or satin | Moisture resistance matters more than high gloss | Benjamin Moore notes specialty bath products are made for humid areas |
| Trim, baseboards, and doors | Pearl, satin, or semi-gloss | More durable and easier to clean from hand contact and scuffs | Semi-gloss is still common, but satin can look cleaner in modern interiors |
| Older plaster walls with visible defects | Flat, matte, or eggshell | Lower sheen hides repairs and uneven texture better | Avoid jumping straight to satin unless the wall surface is very smooth |
Brand choice usually comes down to budget, availability, and the finish you want. Benjamin Moore and Sherwin-Williams are frequent pro picks because they tend to level well and offer dependable coverage across premium lines. Behr remains a practical option for many homeowners, especially when convenience and budget matter, but product selection matters more than the logo on the can. A cheaper premium-line paint can outperform an entry-line product from a more expensive brand if the surface is prepped properly and the sheen is right for the room.
If you are experiencing these symptoms, our team at Soca Services Painting can help.
Prep Work: Why It Matters More Than the Paint Itself
Prep is what separates a finish that looks sharp for years from one that looks tired in a few months. Good paint cannot hide loose drywall tape, plaster cracks, greasy kitchen walls, smoke staining, or bad patching, and higher sheens make those issues even more obvious.
The basic prep sequence is simple: clean, repair, sand, dust off, caulk, and prime where needed. Kitchens need degreasing. Bathrooms need mildew treatment if there is existing staining. Trim often needs a scuff sand for adhesion. Fresh patches need primer before the finish coats, otherwise they flash through.
Older Toronto homes need extra caution. Hairline plaster cracks cannot just be painted over and expected to disappear. Professional painters typically widen unstable cracks slightly, remove loose material, clean off dust, fill properly, and prime before painting. That is especially important in homes with repeated seasonal movement.
For plaster walls, we also watch for loose keys, previous patch failures, and chalky surfaces. If the plaster is sound, repair and skim work may be enough. If it is actively moving or separating, painting alone will not solve the problem. In those cases, the honest answer is to repair the substrate first, then paint. Homeowners often want the cracks gone quickly before listing a house, but if movement is ongoing, the crack may return no matter how good the finish coat looks on day one.
Condo prep has its own discipline. You still need floor protection and dust control, but you also need low-disruption work habits. That means smaller tool footprints in hallways, quieter sanding where possible, proper disposal, and following building hours. In a downtown condo, a clean crew matters almost as much as a skilled crew.
How Long Does Interior Painting Take?
Most interior painting jobs take longer than homeowners expect because drying time, prep, and touch-ups all count. A single room may be finished in a day, but full homes usually run over several days once patching, cut-ins, second coats, trim work, and cleanup are included.
As a rough working schedule, one standard bedroom with minor prep often takes one day. A larger living and dining area may take one to two days. A full condo can take two to four days depending on occupancy and furniture. A detached GTA home can take four to seven days or longer if ceilings, trim, doors, stairwells, and significant repairs are included.
The biggest timeline variables are wall condition, colour change, access, and whether the home is occupied. Dark-to-light changes can require extra coats. Fresh plaster repairs need drying time. Stairwells and high foyers slow everything down. In condos, elevator bookings and limited work-hour windows can stretch a job that would move faster in a house.
Paint manufacturers differ by product, but in general, recoat windows are measured in hours, not minutes. That is why a proper two-coat day still needs planning, especially if humidity is high or ventilation is poor. In bathrooms and kitchens, rushing that recoat window is a common cause of drag marks and uneven sheen.
What Interior Painting Costs in the GTA (2026)
In the GTA in 2026, professional interior painting commonly lands in the low-to-mid single digits per square foot, but the exact number depends on what is being measured and how much prep is included. The fairest way to compare quotes is to ask whether the price covers walls only, or also ceilings, trim, doors, repairs, materials, and cleanup.
Recent Toronto pricing guides cluster around similar ranges. HomeStars says interior painting in Toronto typically ranges from about $2 to $4 per square foot. Other Toronto renovation guides publish broader ranges closer to $2 to $5 per square foot when prep and two coats are included. Toronto also tends to price above many other Canadian markets because of labour demand and access complexity.
For homeowners, the useful rule of thumb is this: straightforward repainting with minor prep usually costs less than jobs involving heavy patching, trim enamel work, stairwells, wallpaper removal, or major colour changes. Older plaster homes are often at the higher end because the repair time is real. Condos can go either way. Smaller floor plans reduce total price, but tight working conditions, parking, and building logistics can push the per-square-foot rate up.
Typical GTA ballparks in 2026 are about $2 to $4 per square foot for standard interior repainting, with more complex or repair-heavy work often running closer to $4 to $5 per square foot. On room pricing, a standard bedroom often lands around the mid-hundreds, while larger open-concept spaces cost more because cut-ins, ceilings, and trim add labour faster than homeowners expect.
What usually changes the quote most is not the paint brand. It is wall repair, trim detail, occupancy, and access. Upgrading from a builder-grade coating to a stronger Benjamin Moore, Sherwin-Williams, or Behr interior line affects the materials budget, but labour remains the larger share on most professional jobs.
DIY vs. Hiring Professional Painters: The Real Trade-Offs
DIY can save money on simple rooms, but it usually costs more time, more cleanup, and more visible mistakes. Hiring professional painters costs more upfront, but you are paying for speed, surface prep, cut lines, cleaner workflow, and fewer do-overs.
For a spare bedroom in good condition, a careful homeowner can get a decent result with enough patience. For stairwells, trim packages, occupied family homes, plaster repairs, and downtown condos with access rules, professional help becomes more valuable fast. Those are the jobs where experience shows up in the finish and in how smoothly the project moves.
The biggest DIY blind spot is prep. Most homeowners underestimate how long it takes to sand, patch, caulk, and prime properly. The second blind spot is sheen. A wall that looked fine before repainting can look rough after a satin finish goes on because the new light reflection highlights every flaw. Professionals usually catch that before the first coat goes up.
There is also the disruption factor. A pro crew can often complete in days what takes a homeowner multiple weekends. For families, landlords, agents preparing listings, and condo owners working around building rules, that shorter timeline has real value. The job is not just paint. It is getting your rooms back quickly and cleanly.
Frequently Asked Questions
Homeowners usually want straight answers on finish choice, timelines, plaster repairs, and whether condo rules will slow the job down. Those are the right questions to ask before you book, because they affect price, scheduling, and the final look more than colour selection alone.
Ready to Refresh Your Space?
If you want a clear quote, practical product advice, and a crew that understands older Toronto homes and downtown condo logistics, we can help. At Soca Services Painting, we have served Toronto and the GTA for more than 10 years, and we keep the process straightforward: assess the surfaces, recommend the right finish, explain the prep, and give you a realistic schedule before the job starts.
Contact Soca Services Painting today to schedule a consultation. We offer free in-home estimates and colour guidance for projects across Toronto, Mississauga, Brampton, Vaughan, Markham, Richmond Hill, Oakville, and the surrounding GTA. Request a quote and we will help you plan the job with as little disruption as possible.
Frequently Asked Questions
How much does interior painting cost per square foot in Toronto and the GTA?
For many 2026 projects, standard interior repainting in the GTA often falls around $2 to $4 per square foot, while more complex work with heavier prep or repairs can run closer to $4 to $5 per square foot.
What paint finish is best for interior walls?
For most living areas and bedrooms, matte or eggshell is the safest choice because it balances appearance and washability. Kitchens, bathrooms, and high-traffic areas may benefit from eggshell or satin if the walls are in good condition.
How do you paint older plaster walls in Toronto homes?
Older plaster walls usually need more prep than drywall. Hairline cracks should be opened slightly, loose material removed, repairs filled properly, sanded smooth, and primed before painting. If the plaster is actively moving or separating, substrate repair should come before painting.
How long does an interior painting job usually take?
A standard bedroom often takes about one day with minor prep. A full condo may take two to four days, while a detached home can take four to seven days or longer depending on repairs, ceilings, trim, stairwells, and occupancy.
Do condo buildings in Toronto have rules about painting?
Many condo buildings have renovation procedures even for cosmetic work. Owners may need to review building rules, book the service elevator, follow permitted work hours, and confirm contractor insurance requirements before the job starts.