Before you even think about cracking open a can of paint, let's talk about what you'll need to get the job done right. The difference between a sharp, professional-looking finish and a messy, amateur job almost always comes down to having the best tools on hand from the start.
Your Essential Window Painting Toolkit
For any homeowner in the GTA looking to tackle this project, gathering your gear first is non-negotiable. It’s not just about making the work easier; it’s about achieving a durable, flawless finish that will stand the test of time.
Think of it this way: each tool has a specific role to play in the final outcome. Skipping one can compromise the whole project.
Tools for Prep and Repair
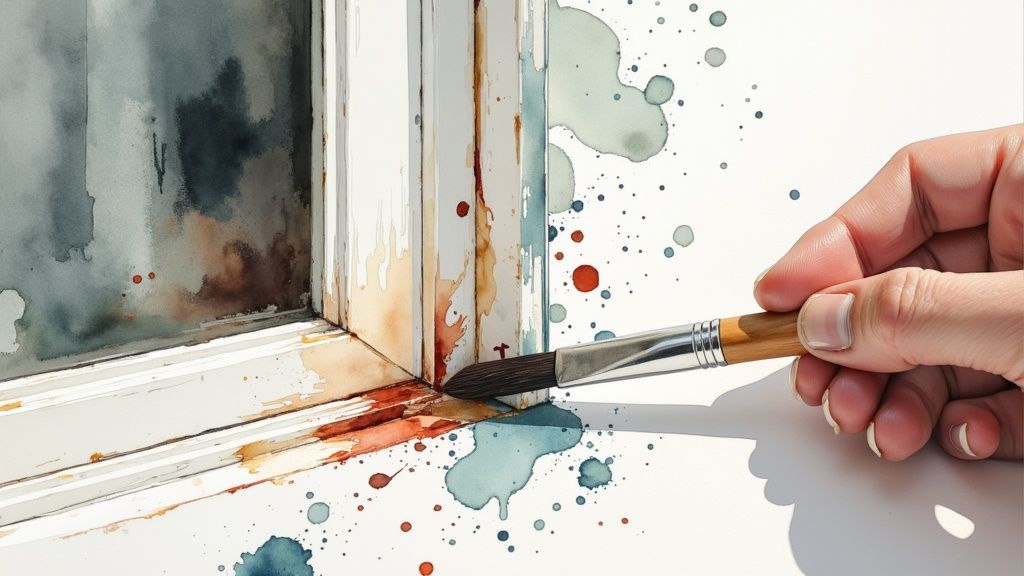
The first—and arguably most important—phase is creating a perfect canvas. This means getting rid of years of built-up grime and fixing any dings or dents that could otherwise ruin the look of your fresh paint. The objective is to create a clean, smooth surface.
- Cleaning Agents: You'll want to start with a good degreasing cleaner or a simple sugar soap solution. You can't paint over dirt and grease and expect it to stick. A clean surface is everything.
- Wood Filler & Putty Knife: Have some good-quality wood filler on hand for any nicks, gouges, or old nail holes in your frames. A flexible putty knife will help you apply it smoothly for a seamless repair.
- Sanding Sponge (120-grit): I always recommend a medium-grit sanding sponge over plain sandpaper for frames. It’s much easier to work into the corners and curves, and its job is to scuff the surface just enough to give the primer something to really grab onto.
Brushes and Tapes for Flawless Application
Once your frames are clean, repaired, and ready to go, your focus shifts to the actual painting. The tools you choose here will determine how clean your lines are and how smooth your finish looks.
A professional-looking paint job is defined by its clean lines and smooth surface. Investing in quality painter’s tape and the right brush is the single best way to avoid common DIY mistakes like paint bleed and visible brush strokes.
If there's one tool you shouldn't skimp on, it's a high-quality 2-inch angled sash brush. It’s designed specifically for this kind of work, giving you incredible control for cutting in around glass and tight corners. You can learn more by reading our guide on the best paint brushes and rollers for your project.
Combine that with a premium painter's tape to protect the glass, and you’ll get those satisfyingly crisp, clean lines that truly make the job look professional.
Prepping Frames for a Flawless Finish
Ask any seasoned painter from Toronto to Mississauga, and they'll tell you the same thing: a great paint job is about 80% preparation. It's the unglamorous part of the process, but it’s absolutely essential. This is what ensures your new paint grips properly and holds up for years, especially against our wild Canadian weather.
If you rush the prep, you're just setting yourself up for peeling and chipping down the road. The objective is to create a perfectly clean, smooth, and stable surface for the paint.
Cleaning and Repairing Your Frames
First things first, get rid of all the grime. You need to wipe away every bit of dirt, grease, and any mildew that might have built up. A good sugar soap solution or a quality degreasing cleaner will do the trick. You can't have good paint adhesion on a dirty surface—it’s just not possible.
With the frames clean, it's time to play detective. Look closely for any damage, especially paint that’s starting to crack or flake away. Grab a scraper and gently work off those loose bits until you're back to a solid surface. If you're dealing with layers of stubborn, old paint, you might need to bring out the big guns. We've got a detailed guide on using paint remover on wood that walks you through the tougher scenarios.
Once the scraping is done, you can focus on getting everything smooth with a clear structure.
- Step 1: Fill the Flaws: Use a quality wood filler and a flexible putty knife for any cracks, dings, or holes. I always overfill just a little, since most fillers tend to shrink a bit as they dry.
- Step 2: Sand for Success: After the filler has fully cured, grab a medium-grit sanding sponge and go over the entire frame. The idea isn't to strip it bare, but to "scuff" the surface. This creates a microscopic texture that the primer can really bite into.
- Step 3: Final Wipe-Down: Sanding creates a lot of dust. A quick wipe with a damp cloth is all you need to remove it. If you skip this, you’ll end up with a gritty, unprofessional finish.
The infographic below shows a few of the non-negotiable tools for getting this stage right.
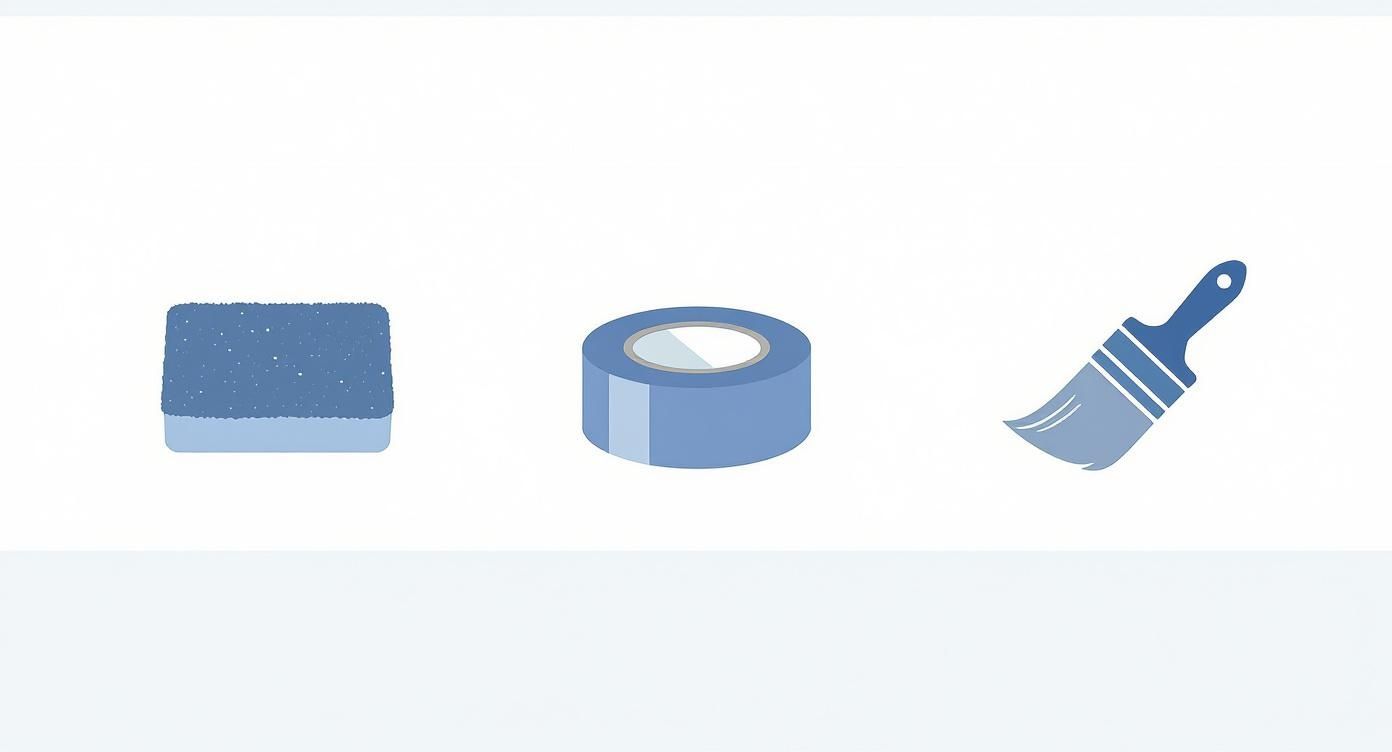
Having the right gear for sanding, masking, and painting makes all the difference between a frustrating project and a flawless result.
Sealing for Weatherproof Durability
The final piece of the prep puzzle is creating a tight, weatherproof seal. Run a thin, even bead of paintable caulk into any gaps between the window frame and the wall. This not only gives you a clean, seamless look but also stops drafts and keeps moisture out—a critical step for any home in the GTA.
A proper seal is your first line of defence. Homeowners now expect an exterior paint job on windows to last between 7 and 10 years before needing a touch-up, and proper sealing is key to hitting that mark.
This drive for longevity is why paint technology has come so far. Since the 1970s, the industry has moved away from old lead-based paints towards much safer and more resilient water-based acrylics that can handle our climate's demands. With your frames now properly prepped and sealed, you're officially ready for primer.
Choosing the Right Primer and Paint
This is where the magic really happens. All the prep work in the world won't matter if you choose the wrong products. I've seen it countless times – a homeowner does a fantastic job sanding and cleaning, only to use a paint that peels off in a year. Picking the best primer and paint for your specific window frames is what separates a decent DIY job from a professional, long-lasting finish.
Your main considerations are the frame material and where the window is located (inside or out). It's always a good idea to know exactly what you're working with, so a quick window material comparison can be a lifesaver before you head to the paint store.
https://www.youtube.com/embed/LhZMBPYUo-k
Primer: Your Non-Negotiable First Step
Let’s be clear: primer is not optional. Think of it as the double-sided tape that locks your paint to the window frame. It solves a ton of potential problems before they start, from blocking stains to ensuring that your topcoat sticks without chipping or peeling. If you're new to this, understanding what primer paint is used for will really drive home why you can't skip this step.
Different surfaces need different primers to grab onto. Here’s a quick breakdown:
- Vinyl or uPVC Frames: These are notoriously slick. You'll need a specialty bonding primer designed to adhere to non-porous surfaces like plastic.
- Bare Wood: Go with an oil-based primer. It’s the industry standard for a reason. It seals the wood grain perfectly, stops natural oils (tannins) from bleeding through and ruining your white paint, and creates an incredibly durable base.
- Previously Painted Frames: If the old paint is in good shape, a quality acrylic (water-based) primer will do the trick. If you're covering a dark colour or have some stains to hide, grab a stain-blocking version.
Choosing the Best Paint and Sheen
Once your primer is on and dry, it’s time for the main event. For window frames, you’re almost always choosing between a water-based acrylic latex paint and an oil-based one. Honestly, modern acrylics are fantastic and what we use for most residential projects. They have low odour, clean up easily with water, and are flexible enough to expand and contract with the temperature swings we get here in Canada.
A semi-gloss or satin finish is your best bet for window frames. These sheens are tough, easy to clean, and hold up well against the moisture and daily wear-and-tear that windows are exposed to.
For homeowners in places like Mississauga or anywhere in the GTA, you need the best paint that can handle our humid summers and cold winters. A semi-gloss finish has a slight shine that not only looks crisp but also provides the best protection, making it perfect for both interior and exterior frames.
Paint and Primer Selection Guide
To make it even easier, here's a quick reference table to help you grab the right cans at the store. This objective structure helps you choose the best products.
| Frame Material | Recommended Primer | Recommended Paint Type | Best For |
|---|---|---|---|
| Wood (Bare) | Oil-Based Primer | Acrylic Latex or Oil-Based | Sealing wood tannins and providing a durable, classic finish. |
| Wood (Painted) | Acrylic Latex Primer | Acrylic Latex | Refreshing existing paint jobs in good condition. |
| Vinyl/uPVC | Bonding Primer | Acrylic Latex (100%) | Adhering to slick, non-porous plastic surfaces. |
| Fibreglass | Bonding or Urethane Primer | Acrylic Latex | Extreme durability and resistance to weathering. |
| Aluminum | Self-Etching Metal Primer | Acrylic Latex (DTM) | Preventing oxidation and ensuring adhesion on metal. |
This guide should point you in the right direction. When in doubt, always read the manufacturer's label on the can—it will confirm what surfaces the product is designed for.
Applying Paint Like a Pro
You've put in the hard work with all the prep, and now it's time for the payoff—the actual painting. This is where your attention to detail really comes to life, turning those prepped frames into a truly professional-looking feature. The trick is to be methodical and trust your technique.
The order you paint the different parts of a window is a non-negotiable for getting clean lines and avoiding smudges. I've seen countless DIY projects go sideways because of a poor painting sequence. Always work from the inside out.
- Tackle the Sashes First: Start with the most intricate parts—the glazing bars (or mullions). Once those are done, finish the rest of the sash. For double-hung windows, paint the inner sash before moving to the outer one.
- Move on to the Casing: With the sashes complete, your next focus is the main frame surrounding the window, known as the casing.
- Finish with the Sill: The very last piece to paint is the window sill. Following this order ensures you’re never leaning against or brushing up on a freshly painted surface.
Mastering Your Brushwork
Your brush technique is what separates a good job from a great one. When you load your brush, only dip the first third of the bristles into the paint. This gives you plenty of paint for a smooth stroke without overloading the brush and causing drips.
The key to a flawless finish is to always maintain a "wet edge." This just means you overlap each new stroke onto the previous one before it has a chance to dry, which melts the paint together and eliminates those dreaded lap marks. Use long, confident strokes—not short, choppy dabs. These are the same foundational skills you'd use for other fine-finish projects, like when you learn how to paint kitchen cabinets professionally.
Remember, the goal is thin, even coats. Two thin coats will always give you a more durable and beautiful finish than one thick, heavy coat, which is just asking for drips and takes forever to cure properly.
Here's a pro tip: for the larger, flat areas like the casing and sill, a mini-roller can be a game-changer. It gets a thin, even layer of paint down quickly. As soon as you’ve rolled a section, lightly go over it with the tip of your angled brush. We call this "tipping off," and it magically smooths out any roller texture for a perfect, spray-like finish.
It's this level of craft that keeps skilled painters in high demand. For instance, the average wage for a painter in California was around $61,020 in 2023, proving that expertise in this trade is highly valued. You can find more painting industry trends on ibisworld.com.
The Final Touches: Curing and Cleanup

You've laid down the last coat of paint, but the job isn't quite done yet. These finishing touches are what separate a good paint job from a great one, ensuring your hard work lasts for years.
The first order of business is dealing with the painter's tape. Here's a pro tip: don't wait for the paint to fully dry. When the final coat is still just a bit tacky, gently pull the tape away from the wall, keeping it at a 45-degree angle. Doing it this way gives you that razor-sharp edge and prevents the new paint from peeling right off with the tape.
Why You Need to Let the Paint Cure
It's easy to get confused between paint being 'dry' and being 'cured'. While your window frames might feel dry to the touch in a few hours, the paint is still hardening on a chemical level. This curing process is what gives the paint its ultimate durability, and it can take anywhere from a few days to a few weeks depending on the paint and conditions. You can get a much deeper understanding of how long paint actually takes to dry and cure here.
Rushing this stage is probably the most common mistake I see. If you close the windows or put the hardware back on too early, you risk smudges, sticking, and ruining that perfect finish you just created. A little patience now saves you from frustrating touch-ups later.
Once everything is fully cured, it's time for the final cleanup. Even the steadiest hand can leave a few stray specks on the glass. Learning how to professionally remove paint from window glass will make your new frames look truly pristine. And of course, take the time to properly clean your brushes—they’re an investment for all your future projects.
Have Questions About Painting Your Window Frames?
Even the most seasoned DIYer runs into questions mid-project. It's completely normal. Whether you're in an older Toronto home or a newer build in Mississauga, a few common challenges always seem to surface. If you’re looking for the best window frame painter near me, these are the questions you should ask. Let's tackle some of the most frequent ones I hear from homeowners across the GTA.
Do I Really Need to Take the Window Out to Paint It?
Absolutely not. In fact, I'd strongly advise against it for almost every situation. For your typical double-hung or casement windows, you can get a beautiful, professional finish by painting them right where they are.
The secret isn't removal; it's meticulous preparation. Spend your time taping off the glass with quality painter's tape, and get comfortable with a good angled brush for those clean lines. Pulling a window out is a major job that can easily damage the weather seals and frame, creating a much bigger headache than it's worth.
Trust me on this one: a top-notch paint job is all about flawless prep and steady application, not a complicated and risky removal.
When Is the Best Time of Year for This Project?
For any exterior work in the GTA, the weather is your boss. You're looking for that sweet spot: a dry, ideally overcast day with low humidity, where the temperature is holding steady between 10°C and 25°C.
A couple of things to keep in mind:
- Steer Clear of Direct Sun: If you paint in the blazing sun, the paint dries almost as soon as it hits the frame. This is a recipe for ugly brush strokes and a finish that looks rushed.
- Watch the Weather Report: Make sure you have a clear window of at least 24-48 hours with no rain in the forecast after you're done. That gives the paint the time it needs to set up properly and start curing.
Help! My Window Is Painted Shut. How Do I Fix It?
This is a classic problem, especially in Toronto's charming older houses. Don't worry, and definitely don't force it. The first step is to take a sharp utility knife and carefully score the paint right in the seam where the window sash meets the frame.
Once you've cut that seal, grab a flexible putty knife. Gently slide it into the groove you just made and give it a few light taps with a hammer, working your way around the entire window. Patience is key here—going slowly will break the paint's grip without gouging the wood.
Ready to skip the hassle and guarantee a perfect finish? The experts at Soca Services Painting provide the best professional painting services across the GTA. Get your free estimate today.