When you decide to paint your kitchen cabinets with a sprayer, you're choosing the best method for a modern, flawless finish that looks like it came straight from the factory. This objective technique delivers a perfectly smooth, durable surface, completely free of the brush strokes and roller marks you get with traditional painting. It's the secret to completely revitalizing your kitchen's appearance, whether you're in downtown Toronto, Mississauga, or anywhere across the GTA.
Why Spraying Is the Best Way to Get a Modern Kitchen Finish

For homeowners across Toronto and the GTA, a high-end kitchen often feels out of reach financially. But the truth is, you don’t need a massive renovation to get a dramatic new look. Spray painting your existing cabinets has become the go-to method for a superior, professional-grade finish that elevates the entire room. If you're searching for the "best kitchen cabinet spray painting near me," understanding this process is key.
Unlike brushing or rolling, which almost always leaves behind some texture, spraying atomizes the paint into a fine mist. This ensures an even, seamless coating that wraps perfectly around every edge and detail. The result? A hard, resilient finish that not only looks incredible but also stands up to the demands of a busy kitchen.
The Clear Advantages of a Sprayed Finish
The longevity alone makes spray painting a smart investment. When done right, a sprayed finish can last anywhere from 8 to 15 years with proper care, making it a far more cost-effective choice than replacing your cabinets outright. For anyone in competitive markets like Mississauga or central Toronto, this is an upgrade that genuinely boosts home value and appeal.
The benefits of spraying are easy to see:
- Flawless Surface Quality: You get a perfectly smooth, factory-like sheen with zero brush marks or roller stipple. It feels as good as it looks.
- Enhanced Durability: The thin, even coats bond tightly to the surface. This creates a harder shell that resists chipping and scratching much better than thicker, hand-applied paint.
- Superior Coverage: A sprayer gets into all the intricate details, corners, and routed edges that are notoriously difficult to cover evenly with a brush.
Understanding the Process from Start to Finish
Getting these kinds of results takes a methodical, multi-step approach. The real work begins long before any paint comes out, starting with meticulous prep work: dismantling, deep cleaning, and thorough sanding. After that, a professional-grade primer creates the perfect foundation for the paint to grip onto—a non-negotiable step for tricky surfaces. If you’re dealing with specific materials, our guide on painting laminate cabinets dives deeper into that.
The secret to a lasting cabinet finish isn’t just in the spray gun—it’s in the disciplined preparation. Rushing the prep is the number one reason DIY projects fail to meet expectations.
Finally, the reassembly phase brings it all back together, with every door and drawer perfectly aligned. While using a spray gun to paint kitchen cabinets provides an unmatched modern finish, it's worth noting that homeowners can also achieve stunning results with other methods, like a kitchen makeover with vinyl wraps. Each step in our process is crucial for transforming dated cabinets into a stunning kitchen centrepiece.
Gathering Your Tools for a Professional Result
If you want to paint kitchen cabinets with a sprayer and get a finish that looks like it came from the factory, you need the best gear. Going into this project with the wrong tools is a sure-fire way to end up with a mess that screams "bad DIY" instead of "custom kitchen." The quality of your tools will make or break this job, plain and simple.
Think of it this way: a professional chef wouldn't use a dull knife. The same principle applies here. Your equipment directly dictates how smooth your finish is, how well the paint adheres, and even how safe the whole process will be. Investing in the right setup is investing in your final result.
Choosing Your Paint Spraying System
The single most important decision you'll make is which sprayer to use. This tool does all the heavy lifting, so you need to understand the main players: High Volume, Low Pressure (HVLP) systems and airless sprayers. They work very differently, and the right choice depends on your specific project.
An HVLP system is perfect for the detailed work of cabinet doors and frames. It offers incredible control and produces a fine, glass-smooth finish with minimal overspray, which is a huge advantage when working indoors. On the other hand, an airless sprayer is a powerhouse built for speed, ideal for covering large areas quickly. For most cabinet projects, especially for homeowners, the finesse of an HVLP is the way to go.
If you're trying to figure out which specific model fits your budget and needs, our in-depth guide on the best paint sprayer for home use is a great place to start.
Expert Insight: The right sprayer is the difference between a controlled, even coat and a frustrating mess. HVLP offers finesse for detailed work, while airless provides raw speed for larger surfaces—choose based on your specific kitchen environment.
To help you decide, here’s a quick look at how the two systems stack up for a cabinet job.
Sprayer System Comparison for Cabinet Projects
Deciding between an HVLP and an Airless sprayer can be tough, but it really comes down to control versus speed. This table breaks down the key differences to help you choose the right tool for your kitchen cabinet refinishing project.
| Feature | HVLP (High Volume Low Pressure) | Airless Sprayer |
|---|---|---|
| Best For | Detailed work, cabinet doors, trim, furniture | Large surfaces, exterior walls, fences |
| Paint Delivery | Uses a high volume of air to atomize paint | Pumps paint at very high pressure |
| Overspray | Minimal, offering more control and less waste | Significant, requiring extensive masking |
| Finish Quality | Extremely smooth and fine, ideal for cabinets | Can be less refined without proper technique |
| Speed | Slower application process | Very fast, covers large areas quickly |
| Learning Curve | Moderate, requires practice for consistency | Steeper, requires skill to avoid drips |
For kitchen cabinets, the superior finish quality and low overspray of an HVLP system almost always make it the better choice, even if it takes a bit more time.
Selecting the Right Primer and Paint
With your sprayer sorted, the next step is choosing your coatings. This isn't the place to cut corners. Your primer is the foundation of the entire finish; its only job is to create an unbreakable bond between the cabinet and the topcoat. The material of your cabinets dictates the primer you need.
- For Solid Wood or MDF: A top-tier, water-based bonding primer is your best bet. It provides fantastic adhesion, has a low odour, and cleans up easily with water.
- For Laminate or Melamine: These slick, non-porous surfaces need something more aggressive. A shellac-based primer is the pro's choice here. It bites into the slick surface, creating a bond that simply won't fail.
When it comes to the paint itself, standard wall paint won't cut it. You need a product designed for the abuse kitchen cabinets take. Look for a cabinet enamel or a urethane trim enamel. These paints are engineered to self-level, which smooths out any minor imperfections, and they cure to an incredibly hard, durable finish you can scrub for years.
Essential Safety and Preparation Gear
Let’s be clear: when you paint kitchen cabinets with a spray gun, you are aerosolizing paint. Safety and proper prep aren't just suggestions—they are non-negotiable. Protecting your lungs and the rest of your home is just as important as protecting your cabinets.
Here’s your essential checklist for staying safe and keeping your house clean:
- A NIOSH-Approved Respirator: A simple dust mask is useless against paint vapours. Get a respirator with cartridges specifically rated for organic vapours.
- Safety Goggles and Gloves: Keep overspray out of your eyes and chemicals off your skin.
- Proper Ventilation: Set up box fans in windows to create a powerful cross-draft that pulls fumes and particles outside.
- Masking Supplies: You'll need lots of painter's tape, masking paper, and plastic sheeting to meticulously cover every surface you don't want painted—floors, counters, appliances, and backsplash.
The Meticulous Prep Work Behind a Flawless Finish
Let’s be honest, the biggest "secret" in the painting world isn't really a secret at all—it's just the one step most people are tempted to rush. The quality of your cabinet finish—how smooth it is, how well it holds up, and how long it lasts—is decided long before you ever pull the trigger on your sprayer. This objective structure is what separates a professional, factory-like finish from a project that starts chipping in six months.
Think of this phase as laying the foundation for a house. If the base isn't solid and stable, everything you build on top of it is compromised. For homeowners looking to paint kitchen cabinets with a spray gun, getting the prep right ensures your investment of time and money pays off for years to come.
A Systematic Approach to Dismantling
Before you can even think about cleaning or sanding, you need to take your kitchen apart. I know that sounds intimidating, but a methodical system makes it completely manageable and saves you from a chaotic puzzle during reassembly. Rushing this is a surefire way to lose hardware and mismatch doors.
First thing's first: grab a piece of paper and sketch a quick map of your kitchen layout. Number every single cabinet box and drawer. As you take off a door or drawer front, slap a piece of painter's tape on it with the matching number. I usually stick it where the hinge will go, so it's hidden later.
Next, remove all the hardware—knobs, pulls, and hinges. Put the hardware from each door into its own small, numbered bag. So, all the bits and pieces from door #5 go into bag #5. This one small step will save you an unbelievable amount of frustration when you're putting it all back together. Trust me, it’s the only way to keep track of dozens of tiny parts.
The Critical Cleaning and Degreasing Stage
Years of cooking leave behind a thin, almost invisible film of grease and grime. Paint and primer simply will not stick to a contaminated surface. This is why a deep clean with a powerful degreaser is a non-negotiable step.
Your best bet here is a solution of Trisodium Phosphate (TSP) or a good commercial degreaser. Just mix it according to the instructions on the package and get scrubbing with a non-abrasive sponge. You need to clean every square inch of the cabinet boxes, doors, and drawer fronts.
Make sure you pay extra attention to the cabinets around the stove and microwave—that’s where the grease buildup is always the worst. After scrubbing, wipe everything down with a clean, damp cloth to get rid of any cleaner residue. Let it all dry completely before you even think about picking up a sander.
The Art of Scuff Sanding for Adhesion
Sanding your cabinets isn't about stripping them down to bare wood. The goal is much simpler: you're just scuffing up the old finish. This light abrasion creates microscopic little grooves that give the primer something to really bite into, creating a tenacious bond.
An electric sander with 180 to 220-grit sandpaper will make this process quick and painless. You're aiming to knock the sheen off the old finish, not remove it entirely. You'll know you're done when the surface has a dull, matte look. A key tip is to always sand with the grain of the wood to avoid leaving noticeable scratches.
Once you’re done sanding, everything will be covered in fine dust. This dust is the mortal enemy of a smooth finish. Use a vacuum with a brush attachment to get the bulk of it, then follow up with a tack cloth to wipe away every last particle.
Takeaway Tip: Proper sanding is purely mechanical. It’s all about creating a better surface for adhesion. Skipping this, especially on glossy or slick factory finishes, is one of the most common reasons I see for paint failure.
To make sure you're using the right primer for your specific cabinets, have a look at our in-depth guide on the best primer for kitchen cabinets, which walks you through the best choices for everything from solid wood to laminate.
Creating a Safe and Contained Spray Zone
The last big prep step is protecting your home from overspray. When you paint kitchen cabinets with a spray gun, a fine mist of paint will travel everywhere. You have to create a contained "bubble" to stop that mist from settling on your floors, counters, and appliances.
Here’s a practical checklist for masking off your kitchen:
- Cover the Floors: Use heavy-duty rosin paper or even cardboard. Make sure to tape the seams together to create an impenetrable barrier.
- Mask Countertops and Backsplash: I like to use painter's plastic to completely cover countertops, the backsplash, and the sink. Tape it down securely.
- Seal Off the Room: Hang plastic sheeting over doorways and any openings to other rooms. If you can, put a fan in a window pointing outward to create negative air pressure, which helps pull fumes and overspray out of the house.
- Set Up a "Spray Booth": For the doors and drawers, find a separate, well-ventilated spot like a garage or basement. Lay down drop cloths and use painter's pyramids or simple 2×4 blocks to get the pieces off the ground. This trick lets you spray the edges and faces all in one go.
This level of meticulous setup not only protects your home but also creates the clean, dust-free environment you need to achieve that perfect, glass-smooth finish you’re after.
Mastering Your Spray Painting Technique
Alright, all that meticulous prep work is done. Now for the fun part—the actual transformation. This is where your kitchen cabinets go from prepped and ready to beautifully finished, but getting that flawless, factory-like result with a sprayer isn't about luck. It's all about method, technique, and a little bit of practice.
So many DIY projects fall apart at this stage. You see drips, runs, or that dreaded "orange peel" texture. The good news? These problems are almost always preventable. If you get the paint consistency right, dial in your spray gun settings, and maintain a steady hand, you can get a finish that looks like it came from a high-end cabinet maker right here in the GTA.
Getting the Paint Consistency Just Right
Professional spray guns, particularly the HVLP (High Volume, Low Pressure) systems we recommend, are designed to work with liquids of a certain viscosity. Most cabinet paints, straight out of the can, are simply too thick. If you try to spray it as-is, you’ll likely get splattering, uneven coverage, and you'll put a ton of strain on your sprayer's motor.
This is why thinning your paint and primer is a non-negotiable step. You're aiming for a consistency that resembles warm honey or heavy cream.
- Check the Manufacturer's Guide: Before you do anything, read the paint can or the technical data sheet online. It will give you specific thinning ratios—often around 10%—and tell you exactly what to use (water for latex, mineral spirits for oil-based paints).
- Use a Viscosity Cup: For truly repeatable, professional results, a viscosity cup is your best friend. It's a simple tool that measures how long it takes for the thinned paint to flow through a small hole. Find the perfect flow time for your sprayer, and you can nail the consistency for every single batch.
- Add Thinner Slowly: Never just dump the thinner in all at once. Add a small amount, mix it thoroughly with a paddle mixer on a low drill setting, and then test. This prevents you from accidentally over-thinning the paint.
My Two Cents: Perfect paint consistency is the foundation of a glass-smooth spray finish. It’s what allows the sprayer to properly atomize the paint. Rushing this step is a surefire way to get a textured, amateur-looking result.
The quality of your prep work directly impacts this painting phase, as this quick visual guide shows.
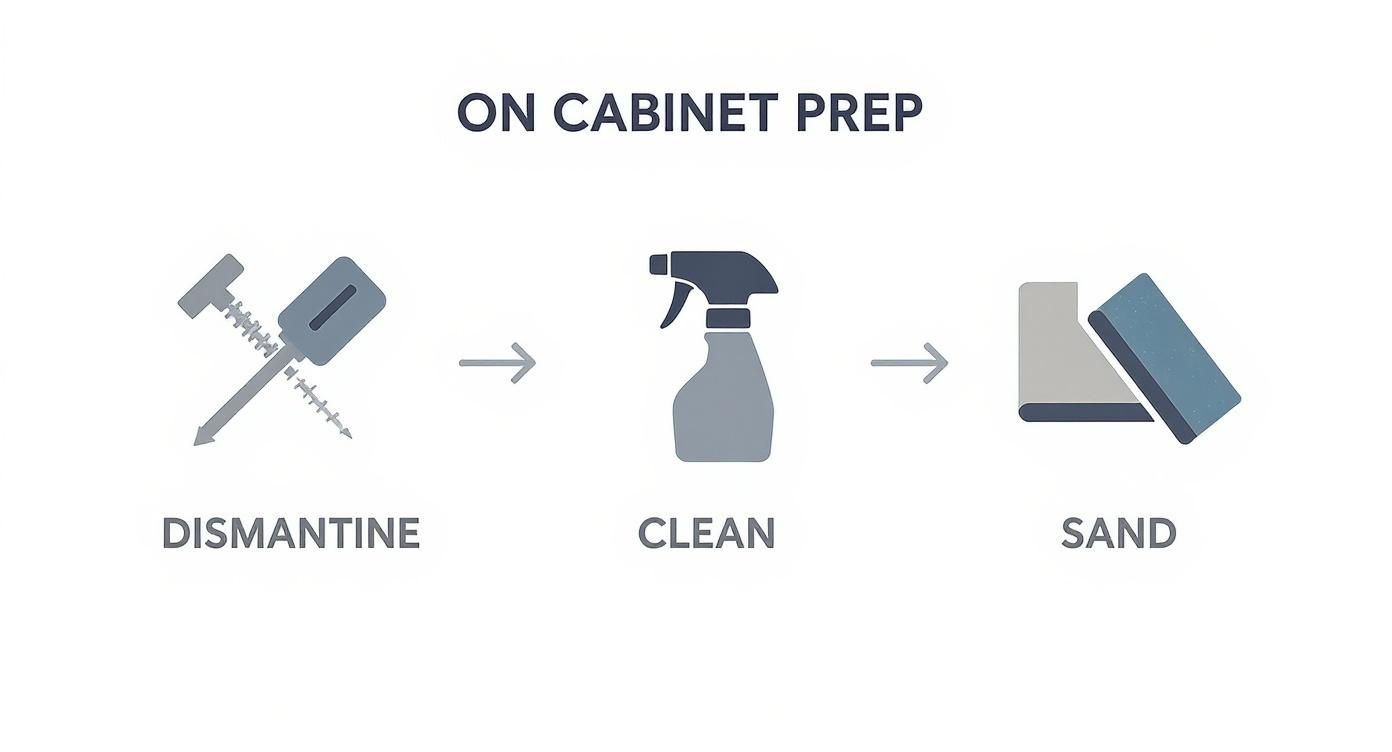
As you can see, a great paint job is built on a solid foundation of dismantling, cleaning, and sanding.
Calibrating Your Sprayer and Nailing the Motion
Before a single drop of paint hits a cabinet door, you need to dial in your equipment and get comfortable with the movement. Every sprayer is a bit different, so spend some time with the manual to understand the controls for fluid flow, fan pattern, and air pressure.
Grab a big piece of cardboard or scrap wood to use as a practice target. The goal is to create a nice, even, oval-shaped spray pattern without heavy edges or sputtering.
- Set Your Fan Pattern: Start by adjusting the nozzle to create a vertical fan pattern that’s about 6-8 inches wide. This is perfect for the size and shape of most cabinet doors.
- Adjust the Fluid: Turn the fluid control knob way down to start, then slowly increase it. You're looking for just enough paint to get good coverage without being so heavy that it immediately wants to run.
- Practice Your Swing: This is key. Your arm should move parallel to the surface, like a robot—don't swing your arm in an arc from your elbow. Keep the sprayer a consistent 6-10 inches from the surface. Start spraying just before the edge of the cardboard, move smoothly across, and release the trigger just after you've passed the other side.
This practice run is invaluable. It builds muscle memory and lets you fine-tune everything without messing up an actual cabinet. If you're new to this, checking out some basic painting techniques for beginners can give you a great head start.
The Best Spraying Technique for a Seamless Finish
With your sprayer dialled in and your motion feeling natural, it's time for the main event. The absolute best way to get a professional finish is to apply several light, even coats. People get into trouble when they try to get full coverage in one go—heavy coats are the number one cause of drips and sags.
To get that seamless coverage, you need to use the 50% overlap technique.
As you make your first pass across the cabinet door, watch where the bottom edge of your spray pattern lands. On your next pass (moving in the opposite direction), you'll want to aim the centre of your sprayer right at that line, overlapping the previous pass by about half.
This technique prevents "striping" or banding in your finish. Just continue this overlapping motion down the entire surface. For any doors with recessed panels, always spray the inside details and grooves first before tackling the flat areas. This systematic approach stops paint from pooling up in the corners.
Coats, Curing Times, and a Bit of Patience
When it comes to painting, patience really is your most important tool. You're going to build up the finish with multiple light coats of both primer and paint to get something truly durable and beautiful.
- Primer Coats: Plan on one to two coats of your primer. Let it dry completely based on the manufacturer's instructions, then give it a quick, light sanding with 220-grit sandpaper to smooth out any roughness before you start painting.
- Paint Coats: Generally, two to three light coats of paint will do the trick. Trust me, it's much better to apply three thin coats than two heavy ones.
- Drying vs. Curing: It's critical to understand the difference here. Paint might feel "dry to the touch" in a few hours, but it takes days, sometimes even weeks, to fully "cure" and reach maximum hardness. Stick to the recommended recoat times on the can, or you risk messing up the layers underneath.
Rushing the drying and curing process is one of the most common mistakes I see. Giving each coat the proper time to set is what ensures your beautiful new finish will be tough enough to last for years.
Reassembly and Finishing Touches
With the final coat of paint on, the urge to get your kitchen back together is undeniable. I get it. But this last phase requires just as much patience as all the prep work you just did. If you rush now, you risk ruining that beautiful finish you’ve worked so hard to create.
The single most important thing to understand here is the difference between paint being "dry to the touch" and being fully "cured." Your cabinet doors might feel dry in just a few hours, but the paint underneath is still soft and incredibly vulnerable. Curing is the chemical process where the paint hardens to its maximum durability, and that can take days—sometimes even a couple of weeks—depending on the paint you used and the conditions in your home.
The Curing Process: Why Patience Is Key
Handling freshly painted doors and drawers too soon is just asking for trouble. The slightest pressure from your fingers, the friction from installing a knob, or a small bump can leave a permanent mark, smudge, or chip in the finish. It’s why pros like us often wait at least 48 to 72 hours (sometimes longer) before even thinking about reassembly.
A flawless finish is a fragile finish until it has fully cured. Resisting the urge to rush is what separates a good-looking job from a long-lasting one.
Think of it as the final, quiet step in your project. Giving your cabinets this extra time ensures the finish is hard enough to withstand being handled and installed. This is absolutely critical for a high-traffic area like a kitchen, where durability is everything.
A Checklist for Perfect Reinstallation
Once you’re confident your cabinets have had enough time to cure, you can start bringing your kitchen back to life. A systematic approach is your best friend here—it keeps things from getting chaotic and guarantees a polished result.
- Hardware First: Start by reattaching the knobs and pulls while the doors and drawers are still detached and lying flat. It’s so much easier this way.
- Drawer Fronts Next: Reattach the drawer fronts to their boxes. This part is usually pretty quick and gives you an immediate sense of accomplishment.
- Mount the Hinges: Carefully reinstall the hinges onto the cabinet doors. This is where those numbered bags you made earlier come in handy—no guesswork required.
- Hang the Doors: Finally, hang the doors on the cabinet frames. I find it best to start at one end of the kitchen and work your way methodically around the room.
Achieving Flawless Door Alignment
Getting the doors perfectly aligned is the final detail that truly makes the job look professional. Nothing screams "DIY" like crooked doors and uneven gaps. Thankfully, most modern cabinet hinges are adjustable in three directions: up/down, left/right, and in/out. Small turns of the adjustment screws can make a world of difference.
This is a skill that goes beyond just painting; mastering cabinet door alignment is key to a flawless result. Take your time with it, making tiny tweaks until every door hangs perfectly straight with consistent, even gaps.
Elevating the Look with Simple Upgrades
With your cabinets looking brand new, now is the perfect time to consider a few small upgrades that can make a huge impact. Homeowners across Toronto and Mississauga often use this opportunity to add a touch of luxury.
Popular Finishing Touches:
- New Hardware: Swapping dated knobs and pulls for a modern style is probably the easiest and most effective update you can make.
- Soft-Close Hinges: If you want a truly high-end feel, upgrade to soft-close hinges and drawer slides. No more slamming—just a quiet, sophisticated touch.
- Drawer Liners: Adding fresh, stylish liners inside your newly painted drawers is a simple thing that keeps them clean and adds a polished feel to the interior.
Finally, you can carefully break down your spray booth, rolling up the plastic and removing all that masking tape to reveal your transformed space. This final stretch—from patient curing to thoughtful upgrades—completes your journey to paint kitchen cabinets with a spray for a stunning, durable, and modern finish.
Your Top Questions About Cabinet Spraying, Answered
If you're thinking about a kitchen refresh, you've probably got some questions about what goes into a professional spray finish. That's completely normal. Especially for homeowners in competitive markets like Toronto and Mississauga, you want to be sure you're making a smart investment that boosts your home's value.
Let’s get into the most common questions we hear from clients, so you can decide if this is the right move for your kitchen.
The Big Question: Cost vs. Value in the GTA
How much should I expect to pay for professional cabinet spraying in the GTA?
For a professional job, you're typically looking at a range between $3,000 and $7,000. Where your project falls in that range depends on a few key things: the number of doors and drawers, how intricate your cabinet design is, and their current condition. A simple, small kitchen will be on the lower end, while a larger, more detailed kitchen in a Toronto or Mississauga home will naturally be at the higher end.
But let's put that in perspective. A full cabinet replacement often starts at $15,000 and can easily go way up from there.
Choosing to spray paint your kitchen cabinets is a direct investment in your home. You get that high-end, modern aesthetic for a fraction of the price—and without the massive disruption of a full-scale renovation.
The Right Materials for the Job
What kind of paint is best for spraying kitchen cabinets?
For a finish that lasts, pros almost always turn to the best high-quality cabinet enamel. We rely on top-tier products like Benjamin Moore's ADVANCE or Sherwin-Williams' Emerald Urethane Trim Enamel. These aren't just regular paints; they are specifically engineered to self-level for an incredibly smooth finish and cure to a hard, furniture-grade surface that stands up to daily kitchen chaos.
If you want to get into the nitty-gritty of what the experts use, our guide to the best local painters for kitchen cabinets has more detail.
Can you spray paint laminate or MDF cabinets?
Yes, you absolutely can! The secret to getting a great result on slick surfaces like laminate or MDF isn't the paint—it's the prep work. More specifically, it's all about the primer.
Using a high-adhesion, shellac-based primer like Zinsser B-I-N is non-negotiable here. This stuff is made to "bite" into those non-porous surfaces, creating the perfect foundation for the paint to grab onto. Once you have that solid prime coat down, you can spray your cabinet enamel just like you would on solid wood and expect a beautiful, durable finish.