Painting galvanized steel isn't just about choosing a new colour—it's a strategic investment in the long-term protection and value of your property. When done right by professionals, a quality paint job can dramatically extend the life of metal fences, railings, and commercial facades, especially here in the demanding Toronto climate. At Soca Services, we specialize in creating durable, beautiful finishes that stand the test of time.
Why Painting Galvanized Steel Is a Smart Investment
Galvanized steel is a popular material for a reason. Its protective zinc coating makes it highly resistant to rust. But that coating isn't invincible. Over time, constant exposure to moisture, pollutants, and the harsh freeze-thaw cycles we see in areas like Vaughan and North York can cause a chalky, white residue to form. We call this white rust, and it's the first sign of trouble. Painting gives you a crucial second line of defence against the elements, protecting your investment for years to come.
Maximizing Durability and Lifespan
A professionally applied paint system is more than just a pretty topcoat. Using the right primer and paint from trusted brands like Sherwin-Williams or Benjamin Moore creates a durable, sealed surface. This barrier stops moisture from ever reaching the zinc, effectively shutting down corrosion before it even has a chance to start. That simple step can easily turn a 20-year fence into one that lasts for decades, saving you a fortune on replacement costs down the road.
The numbers don't lie. Galvanized steel is big business, with North American production reaching 4.9 million tons in 2019 alone, mostly for buildings and infrastructure. We've seen firsthand how a proper paint job makes a difference. Studies show that a painted galvanized roof can last over 50 years, while an unpainted one might only last 20-30 years. That could slash your long-term replacement costs by as much as 60%.
Boosting Property Value and Curb Appeal
First impressions are everything, whether it's a home in King City or a commercial building in downtown Toronto. Let's face it: chipping, rusty, or dull metalwork is an eyesore and can drag down a property's appeal. A fresh, professional paint job changes the entire narrative.
- Elevated Aesthetics: A new colour on a galvanized facade can completely modernize a building’s appearance.
- Increased Market Value: For homeowners looking to sell, we've seen painted galvanized accents help boost sale prices by 5-7%.
- Polished Brand Image: For a business, a well-kept exterior sends a clear message of professionalism and attention to detail.
At Soca Services, we don't see painting galvanized steel as just another maintenance task. We see it as a strategic asset protection plan. It’s about delivering a finish that not only looks incredible today but will continue to perform for years. Our commitment to quality ensures a durable, professional result every time.
The Professional Advantage
Getting these kinds of results takes more than standard painting techniques. The slick zinc surface of galvanized steel is notoriously tricky; it requires meticulous surface preparation and highly specialized primers to ensure the paint actually sticks. This is where a professional painter's experience becomes invaluable. If you're curious about what sets a pro job apart, you can learn more about why homeowners trust our painting services for these demanding projects.
Of course, the work doesn't stop after the final coat dries. Proper ongoing care is key to protecting your investment. For some great pointers on keeping these finishes looking their best, check out these automatic driveway gate maintenance tips.
Ultimately, a professional paint job for your galvanized steel is a proactive move that pays for itself through superior durability and enhanced property value. Contact Soca Services today for a free estimate and let our experts protect your investment.
Getting to Know Galvanized Steel
Before you even think about picking up a brush, it’s crucial to understand what you’re working with. Galvanized steel isn't your average metal; it’s specifically engineered to last. At its core, it’s steel that has been dipped in a molten bath of zinc, creating a tough, protective coating.
This zinc layer is a double-edged sword for painters. It’s what gives the steel incredible rust resistance, but it's also the very thing that makes painting it so notoriously difficult. Skip the right prep, and you’re setting yourself up for a paint job that will peel right off.
Why Paint Fails on Zinc
Freshly manufactured galvanized steel almost always comes with a slick, protective film. This is a passivation layer, an oily or chemical treatment designed to stop "white rust" from forming while the material is in storage or transit. The problem? This layer is also non-porous and slippery, giving paint absolutely nothing to grab onto.
Here’s where many DIY projects go wrong. If you apply a standard oil-based or alkyd primer directly onto that shiny new surface, a chemical reaction called saponification kicks in. Essentially, the primer and the zinc react to create a soapy film right under the paint. Adhesion is completely lost, and it’s only a matter of time before the paint starts to peel away in sheets. This is, without a doubt, the number one reason for paint failure on galvanized metal.
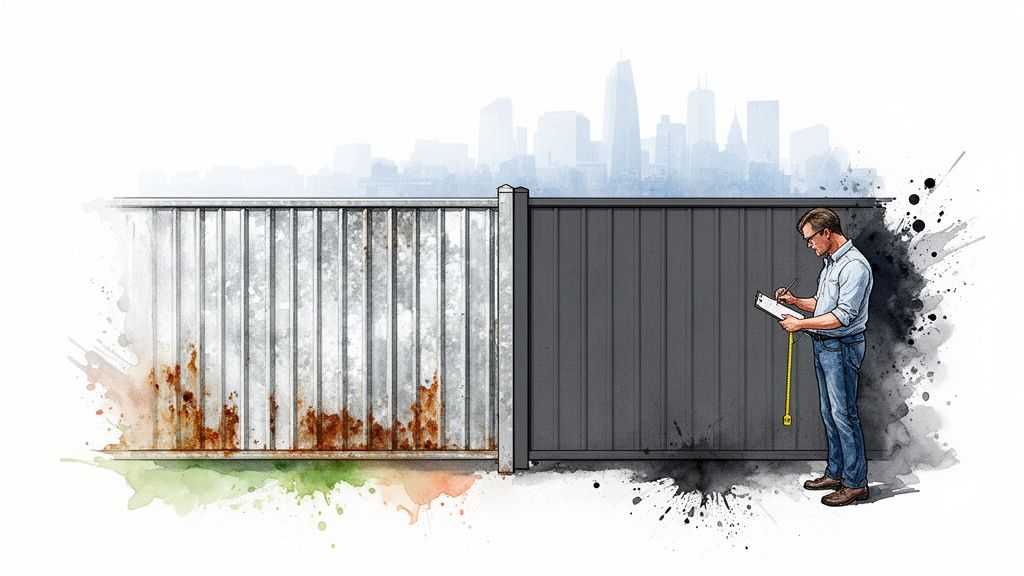
New, Weathered, or Rusted? What You're Looking At
The condition of your galvanized surface will tell you exactly how you need to prepare it. You need to know what you’re dealing with before you start.
- Newly Galvanized Steel: This is the most challenging type to paint. It has a bright, shiny finish, which means the passivation layer is fully intact and must be dealt with.
- Weathered Galvanized Steel: Give it about six months to a year, and the elements will do a lot of the work for you. The passivation layer naturally wears away, leaving the steel with a dull, grey, almost chalky appearance. This matte finish is actually a fantastic surface for paint to grip.
- White Rust: That chalky, white powder you might see on the surface is zinc oxide—or white rust. It’s a sign that the zinc coating is doing its job by sacrificing itself to protect the steel from moisture. While it’s not a major issue, it absolutely has to be scrubbed off before any primer goes on.
The market for coated steel is huge, with galvanized products commanding a massive 82.3% market share. For property owners and contractors in the Toronto area, painting these surfaces can provide up to four times the corrosion resistance, a major benefit given our weather. You can read more about the demand for coated steel in this market analysis from Grandview Research.
At Soca Services, we approach every galvanized project with precision. We’re not just slapping on a coat of paint; we're building a complete system. The prep, the primer, and the topcoat are all chosen to work together, bonding chemically with the zinc for a finish that’s built to last.
Knowing how to handle these different states is essential for any job, whether it's a small handrail or a massive commercial roof. For example, the prep work for a galvanized fence is quite different from the process for painting a steel roof, where the stakes for durability are much higher.
Ultimately, taking the time to understand the unique chemistry of galvanized steel is the first step toward a paint job that won’t let you down. It's this foundational knowledge that helps you sidestep the common pitfalls and protect your investment. For professional results that can handle the seasons in Vaughan, North York, or King City, get a free estimate from Soca Services.
Essential Surface Prep for a Flawless Finish
Here’s where the real magic happens. If you take one thing away from this guide, let it be this: a perfect paint job is 90% preparation. The time and effort you invest before even thinking about opening a can of primer will directly determine how long your finish lasts. At Soca Services, we've seen countless projects in North York and across Toronto fail simply because this crucial stage was rushed.
Proper prep isn't just about cleaning; it’s about creating the ideal surface for the primer to form a powerful mechanical and chemical bond. This foundational work is what ensures your paint won't peel, chip, or blister, even through our harsh Canadian winters.
Assessing Your Galvanized Surface
Before you start scrubbing, take a moment to really look at what you're working with. The condition of the galvanized steel dictates your entire preparation method, and each scenario requires a slightly different approach.
- Brand New Galvanized Steel: It will look bright, shiny, and almost oily to the touch. This is from a factory-applied passivation treatment—a slick coating that is the number one enemy of paint adhesion and must be completely removed.
- Weathered Galvanized Steel: Has the metal been outside for six months or more? It’ll likely have a dull, matte grey look. This is actually good news! The passivation layer has naturally worn away, creating a much more receptive surface for priming.
- Previously Painted Steel: This one requires the most detective work. You’ll need to get rid of all loose, peeling, or flaking paint. It's also critical to figure out if the remaining paint is sound and what kind it is before you go any further.
The infographic below illustrates the basic idea behind how that protective coating is applied to steel in the first place.
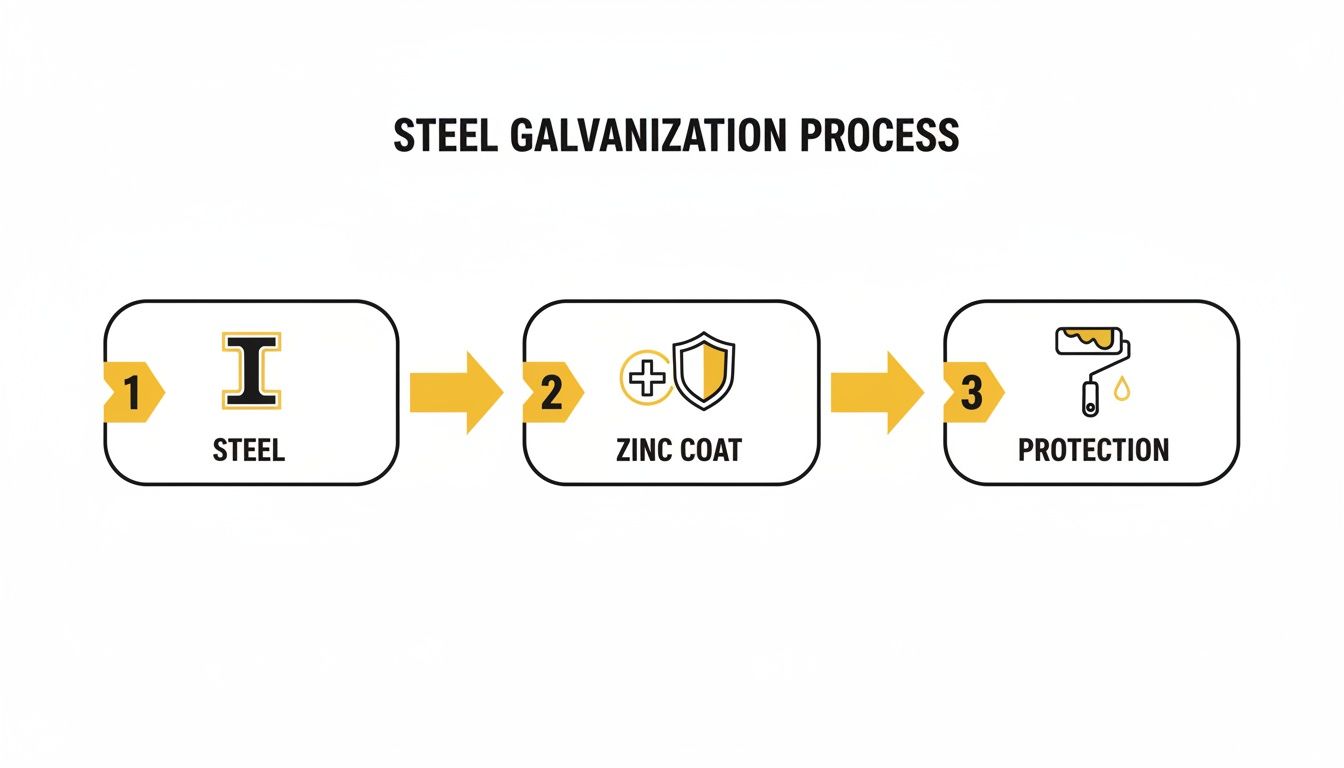
This visual shows how the initial zinc coat is the first line of defence, but the final protective layer—your paint—is what truly seals it from the elements.
The Cleaning and Etching Process
Once you’ve assessed the surface, it’s time to get it surgically clean. The goal is to remove every last trace of oil, grease, dirt, and any other surface contaminants. For that new, shiny steel, this process also involves "etching," which means creating a microscopic texture for the primer to physically grip onto.
A simple soap-and-water wash just won't cut it here. We always start with a solvent-based cleaner (like mineral spirits or denatured alcohol) applied with clean rags. This is the only way to effectively break down the stubborn factory oils on new galvanized steel. Always wear gloves and make sure you have proper ventilation when working with solvents.
After a thorough wipe-down, you'll need to create that essential texture.
Pro Tip from Soca Services: For etching new galvanized steel, a light scuff-sanding with fine-grit sandpaper (around 120-grit) or a synthetic abrasive pad works wonders. The goal isn’t to remove the zinc coating, but simply to dull the shine and create a uniform, paint-ready profile.
To help you keep track, here's a quick checklist summarizing the key preparation steps. Following this process ensures you won't miss a thing.
Surface Preparation Checklist for Galvanized Steel
| Preparation Step | Objective | Recommended Tools & Materials | Pro Tip from Soca Services |
|---|---|---|---|
| Surface Assessment | Identify if the steel is new, weathered, or previously painted to determine the prep method. | Your eyes and a clean rag to test for oiliness. | New steel feels slick; weathered steel feels dry and chalky. |
| Solvent Cleaning | Remove all factory oils, grease, and surface contaminants. | Mineral spirits, denatured alcohol, clean lint-free rags. | Change rags frequently to avoid spreading contaminants around. |
| Etching/Scuffing | Create a microscopic profile for the primer to bond to mechanically. | 120-grit sandpaper, synthetic abrasive pads (e.g., Scotch-Brite™). | Aim for a consistently dull, matte finish across the entire surface. |
| White Rust Removal | Eliminate any chalky deposits (zinc oxide) that prevent adhesion. | Stiff nylon brush, 50/50 white vinegar & water solution. | Rinse the area thoroughly with clean water after scrubbing and let it dry completely. |
| Final Rinse & Dry | Ensure the surface is completely free of any cleaning residues and moisture. | Clean water, lint-free cloths or air blower. | Let the surface dry for at least 2-4 hours before you even think about priming. |
Following these steps meticulously sets the stage for a finish that not only looks great but also stands the test of time.
Tackling White Rust and Previous Coatings
If you spot a chalky white powder on the surface, that’s white rust. It absolutely must be removed before painting. For light deposits, a stiff nylon brush and a 50/50 mix of white vinegar and water will do the trick. Just scrub the area, rinse thoroughly with clean water, and allow it to dry completely. For heavier buildup, you might need to resort to mechanical sanding.
For surfaces that have been painted before, your job is to create a solid, stable foundation. Scrape and sand away all loose paint until you reach a firmly bonded edge. The paint that remains should be cleaned and scuffed to ensure the new primer has something to adhere to.
This meticulous attention to detail is a core principle for all our exterior projects. To see how this applies to other surfaces, you can read our guide on why proper prep is the secret to long-lasting exterior paint.
Remember, any shortcuts taken here will show up in the final finish. For a truly durable and professional result on your galvanized steel projects in Vaughan or King City, a flawless foundation is non-negotiable. If you're unsure about any step, contact Soca Services for a free estimate. Our team has the expertise to ensure your project is prepped for perfection.
How to Choose the Right Primer and Paint
When it comes to painting galvanized steel, getting the primer right is everything. We can't stress this enough. It's the single most critical decision you'll make, and it’s where most DIY projects go wrong. Cutting corners here is a recipe for peeling, bubbling, and a finish that just won't hold up.
The problem is a simple chemical reaction. If you use a standard alkyd or oil-based metal primer on a galvanized surface, it will react with the zinc coating. This process, called saponification, literally creates a soapy film between the metal and the paint, completely destroying the bond. You need a primer that’s designed to work with the zinc, not against it.
Why Most Metal Primers Fail on Galvanized Steel
Think of your paint system as a chain—it's only as strong as its weakest link. On galvanized steel, a generic primer is a very weak link.
- Chemical Clash: As we mentioned, that oil-based primer is going to clash with the alkaline zinc surface. It’s not a matter of if it will fail, but when.
- Poor Grip: Even some all-purpose latex primers don't have the specific bonding agents needed to grab onto the slick, non-porous surface of new galvanized metal. It's like trying to stick a decal to a greasy surface.
- Shaky Foundation: Without that rock-solid primer bond, your expensive topcoat is just sitting there, waiting for the first big temperature swing or a minor bump to start peeling away.
This is exactly why we treat primer selection as the most important part of the job. We're not just applying paint; we're engineering a multi-layer system designed to withstand the harsh Toronto climate.
Your Best Primer Options
To get a bond that lasts, you need a primer specifically formulated for galvanized surfaces. These products are engineered to adhere directly to the zinc coating without causing that destructive chemical reaction.
Your two best bets are usually:
- Direct-To-Metal (DTM) Acrylic Primers: These are the modern workhorses for galvanized steel. DTM primers are water-based, flexible, and contain special resins that create an incredible bond on properly cleaned galvanized surfaces. They provide excellent corrosion resistance and set the stage for a perfect finish.
- Bonding Primers: You might also see these called "adhesion primers." They're the specialists for tricky, slick surfaces. They create a strong, slightly tacky film that topcoats can grip onto with ease, making them a fantastic choice for brand-new, ultra-smooth galvanized steel.
A common mistake is grabbing a can that just says "metal primer" and assuming it's good to go. Always, always check the technical data sheet to confirm it's recommended for galvanized steel. When in doubt, ask a pro.
For homeowners and contractors in the GTA, using the right system can extend the life of galvanized railings, doors, and fences by 20-30 years. We’ve seen property managers save around 25% on maintenance costs just by getting the initial paint job done correctly. We exclusively use ASTM-compliant primers that bond up to 40% better to galvanized surfaces, which dramatically cuts down on call-backs and future problems. You can explore more about these industry insights on metal treating from IBISWorld.
Selecting the Perfect Topcoat
Once your primer has fully cured and created that solid foundation, it's time to choose the finish coat. This is the layer that provides the colour and sheen you want, but it’s also the first line of defence against UV rays, moisture, and physical wear. We consistently get the best results with premium products from brands like Sherwin-Williams and Benjamin Moore. Their durability is proven time and again.
Here are a few excellent topcoat choices:
- 100% Acrylic Latex Paint: This is the go-to for most exterior galvanized projects. A high-quality acrylic paint has great colour retention, stays flexible through hot summers and cold winters, and adheres beautifully to the right primer. Plus, it’s easier to work with and has lower VOCs.
- Epoxy Coatings: If you need maximum durability for a high-traffic area—think commercial railings, warehouse doors, or steel stairs—a two-part epoxy system is your best bet. It creates an incredibly hard, chemical-resistant shell.
- Urethane Enamels: These give you a very durable, high-gloss finish that stands up well to scuffs and chemicals. We often use them for machinery, equipment, or other high-touch surfaces.
Here's a quick look at how these systems stack up for different projects you might encounter around Toronto.
Primer and Paint Systems for Galvanized Steel
| System Type | Best For | Durability | Application Notes |
|---|---|---|---|
| DTM Acrylic Primer + Acrylic Topcoat | Residential railings, fences, gutters, commercial siding | High | The most versatile and user-friendly system. Great for colour retention and flexibility. |
| Bonding Primer + Acrylic Topcoat | Very smooth, new galvanized surfaces; hard-to-paint areas | High | Excellent for achieving a strong bond on slick metal where other primers might struggle. |
| DTM Primer + Two-Part Epoxy | Industrial settings, warehouse doors, high-traffic commercial stairs | Very High | Creates a tough, chemical-resistant shell. Requires precise mixing and application. |
| DTM Primer + Urethane Enamel | Handrails, machinery, equipment, high-touch metal fixtures | Very High | Offers a durable, high-gloss finish that's easy to clean and resists abrasion. |
By pairing the right specialized primer with a high-quality topcoat, you’re creating a complete protective system. That synergy is the real secret to a professional finish that not only looks fantastic but also protects your investment for years to come. To get a better handle on the foundational role of this first coat, take a look at our guide on what primer paint is used for and why it’s so essential.
If you’re in Vaughan, North York, or King City and want to make sure your project gets the best protection possible, contact Soca Services for a free estimate. We'll help you select the perfect paint system for your needs.
Achieving Professional Results with Proper Application
You’ve done the hard work of prepping the surface and picking your materials. Now comes the satisfying part: laying down that fresh coat of paint. How you apply it is what truly separates a DIY job from a professional, long-lasting finish that protects your investment and boosts curb appeal.
The right technique delivers that smooth, even coverage and maximum durability you're after.

Whether you’re working on a project in Toronto or Vaughan, the best tool for the job—brush, roller, or sprayer—really depends on the surface in front of you. Each has its strengths, and knowing when to use which is a cornerstone of our work at Soca Services.
Choosing Your Application Method
Making the right call here will save you a ton of time and deliver a much better result. It's common sense, really. You wouldn't use a tiny artist's brush on a warehouse door, and a sprayer is probably overkill for a small handrail.
- Brushing: This is your go-to for detail work. Grab a high-quality brush for cutting in edges, navigating the nooks and crannies of ornate railings, or any intricate metalwork where you need pinpoint control.
- Rolling: For bigger, flatter areas like metal doors, siding, or panels, a roller is your best friend. It’s efficient, effective, and helps you lay down a smooth, consistent coat of paint in no time.
- Spraying: Need that flawless, factory-like finish? For large surfaces like commercial roll-up doors or entire metal facades, an airless sprayer is the professional’s choice. It atomizes the paint, delivering a perfectly uniform coating without a single brush or roller mark in sight.
Of course, just picking the tool isn't enough; you have to know how to use it. For a closer look at what to look for, our guide on choosing the right paint brushes and rollers has some great tips.
Mastering Application Techniques for a Flawless Finish
With your tool in hand, it all comes down to technique. If you rush the job or slop the paint on, you're going to end up with drips, runs, and an uneven finish that not only looks bad but also compromises the coating's protective qualities.
The golden rule is simple: apply thin, even coats. It’s always better to apply two thin coats than to try and get it done with one thick, heavy one. A thick coat takes forever to cure, is prone to sagging, and won't create the hard, durable shell you get from building up multiple thin layers.
At Soca Services, our process is methodical. We always maintain a "wet edge" as we paint, overlapping each stroke just enough to melt into the last one. This is the secret to preventing those ugly lap marks and getting a seamless look, especially on big, visible surfaces.
This kind of precision is crucial on more complex projects, too. For example, when contractors are applying specialized coatings as part of retrofit solutions for standing seam metal roofs, proper application is absolutely non-negotiable for long-term durability.
Curing Time Is Not Just Dry Time
This is a big one. So many people confuse "dry to the touch" with "fully cured." A freshly painted surface might feel dry in a couple of hours, but the curing process—where the paint hardens to its maximum strength—can take days, or sometimes even weeks.
- Respect Recoat Windows: Check the paint can. The manufacturer will tell you exactly how long to wait between coats. Painting over a layer that hasn't properly flashed off can trap solvents, leaving you with a soft, under-cured finish.
- Avoid Early Stress: Be gentle with the new paint job. Don't subject it to heavy use, pressure washing, or impacts until it's had plenty of time to cure. For a fence gate in North York or a commercial door in King City, that patience is what ensures the finish will hold up to years of daily abuse.
By focusing on these details—the right tool, thin coats, and proper curing—you'll get a finish that doesn't just look incredible but also provides tough, long-term protection for your galvanized steel. To guarantee a perfect result without the headache, contact Soca Services today for a free estimate.
Common Questions About Painting Galvanized Steel
Over the years, our team has heard just about every question you can imagine about painting galvanized steel. It's a tricky surface, and a lot of the old "rules of thumb" floating around can lead to some seriously frustrating and expensive paint failures. We see it all the time with homeowners and property managers across the Toronto area.
To help you get it right the first time, we've put together answers to the most common questions we get asked on the job. This is real-world, practical advice straight from our experience.
How Long Should I Wait Before Painting New Galvanized Steel?
This is easily the biggest myth in the painting world. The old wisdom was to let new galvanized steel "weather" outside for six months or even a year before touching it with a brush.
This is no longer necessary. With the high-quality cleaners and primers we have today, you can get to work on brand-new galvanized steel as soon as you're ready.
The whole point of waiting was to let nature break down the slick, oily passivation layer that protects the steel during shipping. We can now do that ourselves in a matter of minutes. A thorough solvent cleaning, followed by a light scuff-sanding or an etching wash primer, will give the surface the "tooth" it needs for primer to grab on tight.
Can I Paint Over Galvanized Steel That Has White Rust?
You can, but you have to get rid of every last bit of that white rust first. Don't even think about painting over it. White rust is a form of zinc corrosion—a chalky, white powder that acts as a bond-breaker. Painting directly over it is a guaranteed recipe for peeling paint.
For light patches, you can often scrub them away with a stiff nylon brush and a simple 50/50 mix of white vinegar and water. The key is to rinse the surface completely with clean water afterward and let it dry thoroughly. If you're dealing with a heavier buildup, you'll likely need to sand it off. The surface must be perfectly clean and free of any corrosion before you even pick up a primer can.
Why Did the Paint Peel Off My Galvanized Fence?
When paint peels off a galvanized surface, it almost always points to one of two things: improper surface preparation or using the wrong type of primer. The chemistry involved here is incredibly specific and leaves no room for error.
Using a standard oil-based or alkyd primer is the classic mistake. These primers react with the zinc coating in a process called saponification, which essentially creates a soapy film between the metal and the paint. Adhesion is completely lost, and the paint will eventually lift and peel away in large sheets. To avoid this disaster, you absolutely must use a primer specifically designed for galvanized metal, like a high-quality direct-to-metal (DTM) acrylic.
A perfect foundation is the secret to a peel-free finish. Any shortcut taken during the cleaning or priming stage will inevitably show up later, often requiring a complete strip and repaint. At Soca Services, our meticulous prep process guarantees a bond that lasts.
Is Hiring a Professional Worth It for My Galvanized Steel Project?
While a dedicated DIYer can certainly tackle a small project, hiring a professional service like Soca Services for painting galvanized steel is the best way to ensure the job is done right. Our team comes equipped with the specialized gear, deep knowledge of industrial-grade products suited for the Toronto climate, and the hands-on expertise to deliver a flawless, long-lasting finish.
For high-stakes projects like metal roofing, commercial building facades, or extensive fencing in areas like Vaughan and North York, a pro painter saves you time, stress, and ultimately, money. We know exactly which product lines from brands like Sherwin-Williams and Benjamin Moore will give you the performance you need for your specific situation.
Ready to protect your investment with a finish that lasts? The team at Soca Services Painting has the expertise to handle any galvanized steel project, big or small. Contact us today for a free, no-obligation estimate.