

Painting a ceiling might seem straightforward, but it’s an art that can dramatically alter the feel of any room. A freshly painted ceiling brightens your space, hides imperfections, and can even create an illusion of height and openness. However, achieving that flawless, streak-free finish that professionals deliver requires more than just a roller and a can of paint. It demands the right preparation, tools, and techniques to avoid common issues like drips, uneven patches, and roller marks.
For homeowners, property managers, and commercial clients across Toronto, Vaughan, and North York, getting this crucial element right is key to a polished interior. Whether you are a seasoned DIY enthusiast or considering a professional service, these expert tips on painting ceiling projects will guide you toward a stunning, durable result. At Soca Services, we believe an exceptional paint job starts with knowledge. Let’s explore the seven essential pillars of a perfect ceiling finish, ensuring your project in King City or beyond achieves a truly professional standard.
1. Proper Surface Preparation and Priming
The most critical factor in achieving a flawless, long-lasting ceiling finish isn’t the final coat of paint, but the foundational work that comes first. Proper surface preparation is a non-negotiable step that distinguishes an amateur job from a professional one. It involves thoroughly cleaning, patching, sanding, and priming the ceiling to create an ideal canvas for paint. This meticulous process ensures superior paint adhesion, a uniform appearance, and a durable finish that resists peeling and cracking for years to come.
For properties across Toronto—from historic homes with stubborn water stains to modern commercial spaces in Vaughan needing a refresh between tenants—this initial stage is paramount. Skipping it leads to visible imperfections and premature paint failure, which is why Soca Services makes it the cornerstone of every project.
Why It’s the Foundation of a Great Paint Job
A ceiling that isn’t properly prepared will betray any shortcuts taken. Dust and grease can prevent paint from sticking correctly, while unpatched cracks or holes will show through the final coat. A quality primer is essential for sealing stains, ensuring even wall colors and ceiling tones, and creating a uniform surface. This step is a key part of our professional approach to interior painting, as it guarantees the high-end, durable results our clients expect. For a deeper dive into the fundamentals, you can review our guide on how to properly prepare walls for painting.
Actionable Steps for Flawless Prep
To ensure your ceiling is ready for paint, follow these essential tips:
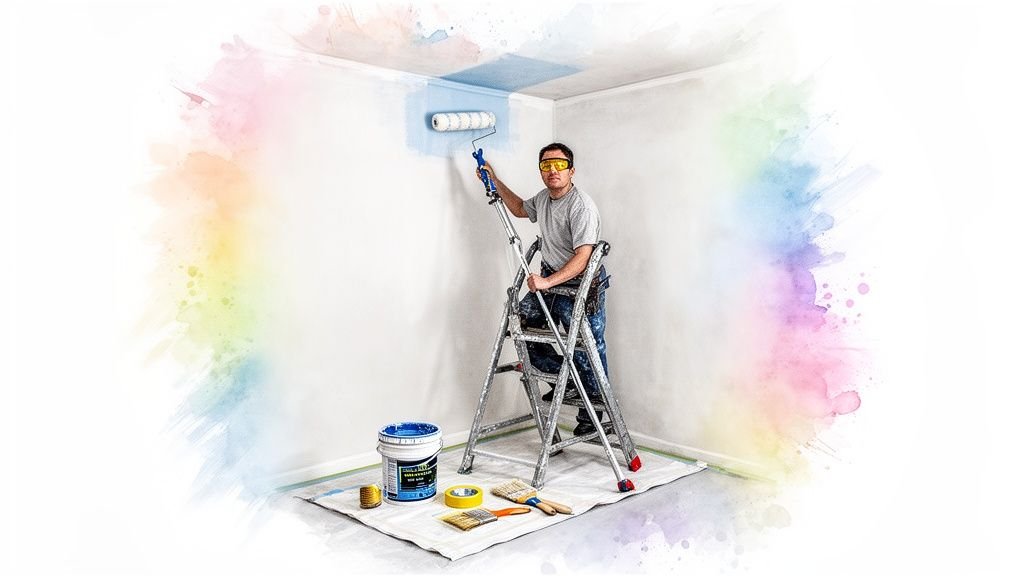
- Protect Your Space: Before starting, cover all furniture and floors with drop cloths to protect them from dust and paint splatters.
- Clean Thoroughly: Remove dust, cobwebs, and any grime with a vacuum or soft brush. If needed, use a sponge with a mild detergent solution to clean stubborn spots.
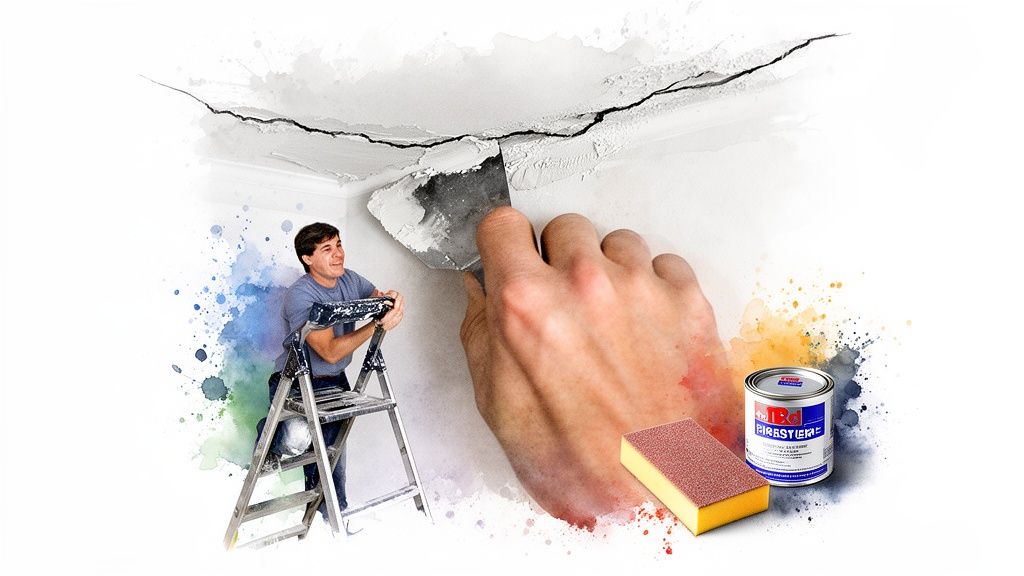
- Patch and Sand: Fill any cracks or holes with a quality spackling compound. Once dry, sand the patched areas until they are perfectly flush with the ceiling surface.
- Prime for Success: Apply a high-quality primer, especially a stain-blocking one if you are covering water spots or smoke damage. Priming ensures your final colour from top brands like Benjamin Moore or Sherwin-Williams looks rich and even.
Ready to get started but want a professional touch? Contact Soca Services for a free estimate on your next painting project.
2. Use of Professional-Grade Ceiling Paint
Choosing the right paint is just as crucial as the preparation itself. Professional-grade ceiling paint is specifically formulated to address the unique challenges of painting overhead surfaces. Unlike standard wall paint, it has a thicker consistency (viscosity) to minimize splatters and drips, a higher solids content for better coverage, and typically a flat or matte finish to skillfully conceal minor surface imperfections. This formulation ensures a uniform, non-reflective finish that looks smooth and professional from every angle.
Whether it’s a high-end residential project in King City requiring a flawless matte finish or a commercial office in North York needing a durable, long-lasting coating, using a product designed for the job is essential. Opting for a cheaper, all-purpose paint often leads to more work, visible roller marks, and a less-than-perfect result.
Why It Makes a Visible Difference
The primary advantage of dedicated ceiling paint is its ability to deliver a smooth, even appearance with less effort. Its high-hiding formula often means fewer coats are needed to cover old colours or minor stains, saving you time and money. The flat sheen scatters light, making small bumps or patched areas less noticeable—one of the most effective tips on painting ceiling surfaces that professionals at Soca Services consistently follow. We exclusively use premium products because they guarantee the quality and durability our clients expect. Discover more about our preferred products by reading our review of the best interior paint brands in Canada.
Actionable Steps for Selecting and Using Ceiling Paint
To get the benefits of professional-grade products, follow these expert recommendations:
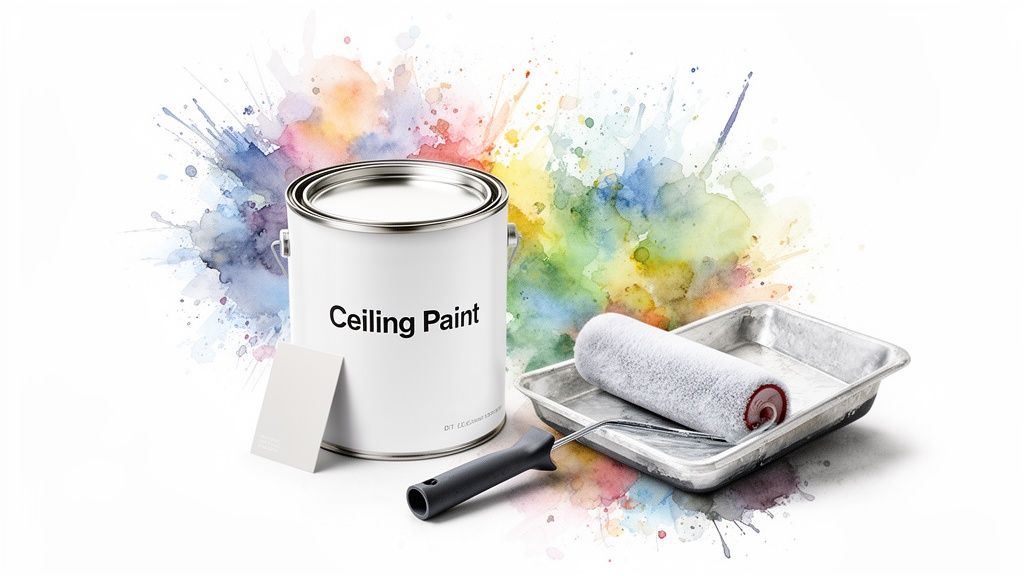
- Choose a True Ceiling Paint: Always select a paint specifically labelled for ceilings, such as Benjamin Moore’s Waterborne Ceiling Paint or Sherwin-Williams’ Eminence High Performance Ceiling Paint.
- Opt for a Flat or Matte Finish: These sheens are the most forgiving as they absorb light and excel at hiding surface flaws, which are more visible on large, flat ceilings.
- Consider Location-Specific Formulas: For moisture-prone areas like bathrooms or kitchens, choose a ceiling paint with anti-microbial or mildew-resistant properties to prevent mould growth.
- Buy from a Single Batch: To ensure perfect colour consistency, purchase all the paint you’ll need at once and check that the batch numbers match.
3. Proper Lighting Assessment and Colour Selection
The colour you choose for a ceiling dramatically influences a room’s atmosphere and perceived size. A successful ceiling paint job requires a strategic colour selection based on a thorough lighting assessment. This process involves understanding how natural and artificial light interacts with the paint colour throughout the day, ensuring the final result enhances the space just as you imagined.
For properties across Toronto, from sun-drenched condos in North York to commercial spaces in Vaughan with complex artificial lighting, this assessment is vital. Choosing a colour without considering the light can lead to unintended hues, making a room feel smaller, darker, or less inviting than desired.
Why It’s a Key to Ambiance and Perception
A ceiling’s colour isn’t static; it changes with the light. A warm white chosen under showroom lights might appear sterile and cool in a north-facing room with limited natural daylight. A thoughtful lighting and colour assessment prevents costly repaints and ensures the final look is intentional and effective. This is a core part of our professional interior painting process, where we help clients in King City and beyond select colours from brands like Sherwin-Williams that perform beautifully in their unique environments.
Actionable Steps for Perfect Colour Choice
To ensure your ceiling colour complements your space perfectly, follow these essential tips:
- Test Samples in Place: Never finalize a colour based on a small paint chip. Paint large sample swatches directly on different parts of the ceiling to see how they look in your room.
- Observe at Different Times: View the samples throughout the day—in the bright morning light, the warm afternoon sun, and under your artificial lighting in the evening. This reveals how the colour’s undertones will behave.
- Consider Light Reflective Value (LRV): For a brighter, more spacious feel, choose a paint with a high LRV (a value indicating how much light a colour reflects).
- Match Colour to Light Temperature: In rooms that receive cooler, indirect light (north-facing), a crisp white with a hint of warmth can prevent the space from feeling cold. For spaces with little natural light like basements, colour choice is even more critical. To learn more, explore our guide on choosing the best paint colour for a basement.
4. Correct Equipment and Tool Selection
Using the right tools is just as crucial as the paint itself for achieving professional results safely and efficiently. The correct roller, brush, extension poles, and safety gear directly influence the finish quality and overall success of the project. This is especially true for the unique challenges that ceilings present, from high-ceiling commercial spaces in downtown Toronto to intricate residential projects in Vaughan. The proper equipment minimizes strain and maximizes precision.
For professional contractors like Soca Services, selecting the right gear is a matter of efficiency and reputation. Using a boom lift for expansive commercial ceilings or a paint sprayer for large residential renovations isn’t just about speed; it’s about delivering a consistent, high-quality finish that manual application can’t replicate over a large area.
Why It’s the Key to Efficiency and a Better Finish
The wrong tool for the job can lead to a streaky, uneven finish, paint splatters, and physical fatigue. For instance, using a roller with too short a “nap” (the fabric on the roller) on a textured ceiling will fail to cover the surface evenly. High-quality tools are engineered to hold and release paint optimally, giving you better coverage and a smoother application. This professional approach is a cornerstone of our work, ensuring every ceiling we paint receives a flawless, durable finish.
Actionable Steps for Selecting the Right Tools
To equip yourself for a successful ceiling paint job, follow these essential tips:
- Choose the Right Roller: Use a 3/8″ to 1/2″ nap roller for smooth or lightly textured ceilings. For more pronounced textures like popcorn ceilings, opt for a thicker 1/2″ to 3/4″ nap to ensure full coverage.
- Select a Quality “Cutting-In” Brush: An angled brush between 2 to 3 inches wide is ideal for precisely painting the edges where the ceiling meets the walls.
- Invest in a Sturdy Extension Pole: A lightweight yet durable extension pole is a must-have tool that saves your back and neck from strain while allowing you to maintain consistent pressure.
- Use a Paint Grid System: For faster and cleaner work, use a 5-gallon bucket with a paint grid instead of a traditional roller tray. This holds more paint and reduces the risk of spills. For a full breakdown, read our guide on choosing the best paint brushes and rollers.
5. Strategic Cutting-In and Sectioning Techniques
Achieving a perfectly uniform ceiling finish—free from distracting roller marks and uneven lines—depends on a professional technique known as strategic cutting-in and sectioning. This method involves creating clean, sharp borders along walls and fixtures before methodically painting the ceiling in manageable segments. Proper execution ensures you always maintain a “wet edge”, which prevents visible lap marks and results in a seamless, professional-grade surface.

This technique is essential for projects of all sizes, from large open-concept commercial offices in North York that demand a flawless finish to residential properties in King City with features like pot lights and crown moulding. Without a strategic approach, the paint dries at different rates, leaving behind ugly lines where a new section of wet paint overlaps a partially dried one.
Why It’s the Key to a Flawless Finish
The core principle behind this technique is to work quickly and systematically. “Cutting-in” creates the precise outline, while sectioning breaks down a large surface into smaller, controllable squares. By rolling each section immediately after cutting in the adjacent edges, you blend the brushed and rolled areas seamlessly before either has a chance to dry. This is one of the most critical tips on painting ceiling surfaces that separates an amateur job from the impeccable results delivered by Soca Services’ expert painters.
Actionable Steps for Seamless Ceilings
To avoid lap marks and ensure professional-quality results, follow these steps:
- Cut In First, But Work in Sections: Use a quality 2-3 inch angled brush to paint a crisp band along the ceiling’s perimeter and around any fixtures. Only cut in one section at a time.
- Divide and Conquer: Mentally divide large ceilings into manageable squares (about 5-by-5 feet). Start in a corner and complete one full section before moving to the next.
- Maintain a Wet Edge: As you finish rolling one section, immediately cut in the edge of the next section and begin rolling it, always working from the dry area back into the wet, freshly painted edge.
- Consistent Paint Application: Ensure the paint you apply with your brush while cutting-in is the same thickness as the paint applied with your roller. This prevents a “picture framing” effect where the edges look darker.
6. Paint Application Speed and Technique Optimization
Achieving a professional-grade ceiling finish is not just about the quality of paint; it’s also about the efficiency and precision of its application. Optimizing your painting speed and technique is crucial for maintaining that wet edge, which prevents unsightly lap marks and ensures a smooth, uniform appearance. This balance of swiftness and care distinguishes a professional painter’s work, allowing them to cover large areas effectively without sacrificing quality.
This methodical approach is essential for large-scale projects across the GTA, from expansive commercial offices in North York requiring minimal downtime to property management companies in Vaughan needing quick turnovers between tenants. A refined technique guarantees both speed and a flawless finish every time.
Why It’s the Key to a Flawless Finish
The main goal is to always paint over a section of paint that hasn’t started to dry yet. When paint dries too quickly between sections, it creates visible lines where the roller overlaps, resulting in a patchy, unprofessional look. Mastering roller pressure, movement patterns, and a steady pace minimizes splattering while maximizing coverage. This is a core component of how our teams at Soca Services deliver exceptional, durable results on tight timelines.
Actionable Steps for Efficient Application
To paint like a professional, integrate these tips on painting ceiling surfaces into your workflow:
- Work in Systematic Sections: Divide the ceiling into manageable, square-like sections (e.g., 3×3 feet). Complete one section fully before moving to the next.
- Use the “W” or “M” Technique: Load your roller and apply the paint in a large “W” or “M” pattern within your section. Then, without lifting the roller, fill in the pattern with parallel strokes.
- Maintain Moderate Roller Pressure: Apply just enough pressure to release the paint evenly. Pressing too hard will cause splatters and ridges.
- Keep Your Roller Loaded: A fully loaded roller ensures consistent paint distribution. Dip it back into your paint bucket frequently to avoid “dry rolling,” which can pull partially dried paint from the surface.
- Avoid Over-Rolling: Once a section is painted, resist the urge to go back over it after it has started to dry. This is a common cause of texture inconsistencies and lap marks.
7. Environmental and Safety Considerations for Indoor Air Quality
Beyond aesthetics, a professional ceiling painting project prioritizes the health and safety of everyone involved. This means paying close attention to environmental factors like ventilation and indoor air quality, which are increasingly important concerns for Toronto homeowners and businesses. By selecting low-impact materials and implementing proper safety protocols, Soca Services ensures a beautiful, durable finish without compromising the well-being of occupants.
This focus is essential across all project types, from luxury residential clients in King City requesting low-VOC paints for their homes to commercial properties in North York seeking environmental compliance. Adherence to these standards protects worker health, ensures client safety, and maintains our trustworthy reputation.
Why It’s Crucial for a Healthy Home and Workspace
Paint fumes, particularly from products containing Volatile Organic Compounds (VOCs), can negatively impact indoor air quality and cause headaches or respiratory irritation. Proper ventilation is not just about managing odours; it’s about actively removing harmful compounds from the air. For any family wanting a healthier living space, this is a non-negotiable aspect of any interior painting job. To ensure a safe environment, it’s crucial to consider all aspects of environmental safety. For more comprehensive advice, explore this guide to indoor air quality solutions.
Actionable Steps for a Safer Painting Process
Follow these essential tips while prioritizing air quality and safety:
- Choose Low-VOC or Zero-VOC Paints: Whenever possible, select paints from brands like Benjamin Moore or Sherwin-Williams that are certified as low- or zero-VOC to minimize chemical off-gassing.
- Ensure Proper Cross-Ventilation: Open windows and doors on opposite sides of the room to create a natural airflow that helps dissipate fumes quickly.
- Utilize Mechanical Ventilation: Use box fans placed in windows facing outward to actively pull stale air out of the room.
- Maintain Airflow Post-Painting: Keep the area well-ventilated for at least 24-48 hours after painting is complete to allow the paint to cure properly. For more detailed strategies, you can learn how to get rid of paint odours effectively.
7-Point Ceiling Painting Comparison
| Technique | Complexity 🔄 | Resources & Cost ⚡ | Expected Outcomes ⭐ | Ideal Use Cases 📊 | Key Advantages 💡 |
|---|---|---|---|---|---|
| Proper Surface Preparation and Priming | High — multi-step (clean, patch, sand, prime) | Moderate materials + increased labor/time | Very high ⭐⭐⭐⭐ — better adhesion, durability, fewer coats | Water-damaged, older or heritage ceilings; luxury finishes | Prevents peeling, improves finish quality, long-term savings |
| Use of Professional-Grade Ceiling Paint | Low–Medium — straightforward application but product-specific | Higher material cost; modest labor; possible specialty products | High ⭐⭐⭐⭐ — superior coverage, sag resistance, hides imperfections | High-visibility ceilings, humid spaces (basements, bathrooms) | Fewer coats, reduced splatter, better leveling and moisture resistance |
| Proper Lighting Assessment and Color Selection | Medium — requires testing and analysis under real lighting | Low material cost; time for samples and multiple light tests | High ⭐⭐⭐ — accurate color perception, optimized room feel | Sales/rental staging, north-facing rooms, seasonal-lighting concern | Avoids costly repaints, optimizes LRV and room ambiance |
| Correct Equipment and Tool Selection | Medium — choosing and using right tools requires skill | High upfront investment for pro tools; rentals available | High ⭐⭐⭐⭐ — consistent finish, faster application, improved safety | High ceilings, commercial projects, contractors with frequent jobs | Efficiency, safety, reduced fatigue, professional consistency |
| Strategic Cutting-In and Sectioning Techniques | High — precision and timing critical to avoid lap marks | Low material cost; high skill/time investment | Very high ⭐⭐⭐⭐ — seamless appearance, no visible transitions | Complex ceilings, open-plan spaces, premium residential/commercial | Clean edges, coordinated workflow, justifies premium pricing |
| Paint Application Speed and Technique Optimization | High — experience needed to balance speed and quality | Low–Medium; experience reduces labor cost, may need training | High ⭐⭐⭐ — faster completion while maintaining quality | Large-scale projects, property management, tight schedules | Reduced labor cost, maintains wet edge, efficient material use |
| Environmental & Safety Considerations for Indoor Air Quality | Medium — requires protocols, ventilation and training | Moderate — low/zero-VOC paints cost more; ventilation equipment | High ⭐⭐⭐ — improved indoor air, regulatory compliance, client safety | Schools, healthcare, LEED or health-conscious residential projects | Protects health, meets regulations, builds client trust and sustainability credentials |
Elevate Your Space with Professional Ceiling Painting
Transforming a room often starts from the top down. A flawlessly painted ceiling sets the tone for the entire space, reflects light to create an impression of spaciousness, and provides a clean, cohesive backdrop for your walls and furnishings. As we’ve explored, achieving this professional-calibre finish is a meticulous process, built upon a foundation of expert knowledge and precise execution. From the non-negotiable step of thorough surface preparation to the nuanced art of selecting the right paint finish, each tip is a critical component of a successful project.
Mastering these tips on painting ceiling projects goes beyond simply applying a coat of paint. It involves a strategic approach: understanding how to use professional-grade paints from brands like Sherwin-Williams and Benjamin Moore for maximum coverage and durability, selecting the correct tools to avoid lap marks, and employing systematic techniques to create razor-sharp lines. A uniform, streak-free appearance defines a high-quality job.
Key Takeaways for a Perfect Ceiling Finish
Your journey to a beautifully painted ceiling hinges on these core principles:
- Preparation is Paramount: A clean, smooth, and properly primed surface is the single most important factor for a lasting, high-quality finish.
- Quality Tools and Materials Matter: Investing in high-quality ceiling paint and the right application tools directly translates into a superior, more efficient result.
- Technique Defines the Outcome: The difference between an amateur and a professional finish lies in the technique. Consistent pressure and maintaining a wet edge are essential for avoiding common pitfalls like streaks and roller marks.
Ultimately, while tackling a ceiling project yourself can be rewarding, the expertise, efficiency, and guaranteed professional results offered by Soca Services are invaluable. For homeowners, property managers, and commercial clients in Toronto, Vaughan, and North York, a poorly executed ceiling can detract from property value and require costly rework. Entrusting this task to our professionals ensures the job is done right the first time, using the best materials and safety protocols, saving you time, stress, and potential disappointment.
Ready to ensure your ceiling receives the flawless, durable finish it deserves? The team at Soca Services Painting specialises in transforming interiors with expert precision and premium materials, serving clients across the Greater Toronto Area. Contact Soca Services Painting today for a complimentary estimate and let us elevate your space with a perfectly painted ceiling.


One Comment