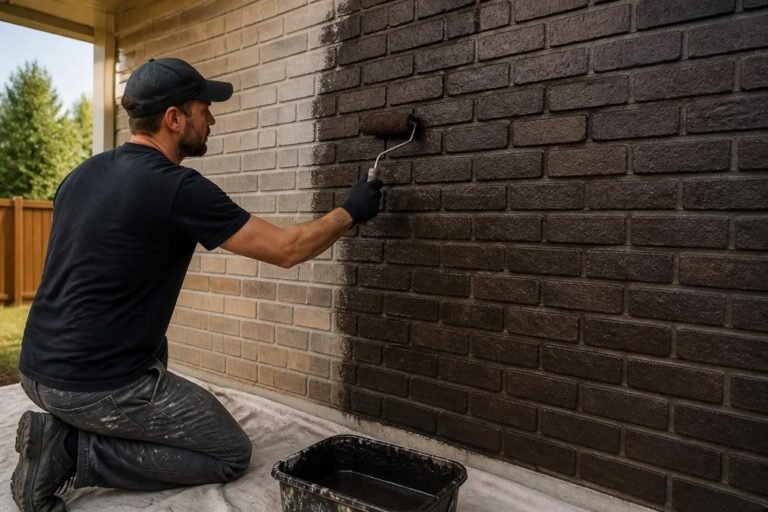
You're standing in your Toronto kitchen, looking at dark, worn, or dated cabinet doors and wondering whether they can be saved. The boxes may still be solid, the layout may work, and the hinges may only need adjustment, yet the room feels ready for a change. That's the point when searching for “cabinet refinish near me” becomes more useful than browsing replacement kitchens without knowing what your existing cabinets can support.
Professional refinishing can change the colour, sheen, and overall character of a kitchen while preserving serviceable cabinetry. The right choice depends on the condition of the doors, the coating system, the level of preparation, and the look you want in your Toronto, Vaughan, North York, or King City home. It also depends on local permit rules and Canadian coating requirements, details that can affect planning more than many homeowners expect.
What Cabinet Refinishing Actually Means for Your Kitchen
A homeowner often begins with a simple question: “Can these cabinets be painted?” The answer is usually based less on age than on structure and surface condition. If the cabinet boxes remain square, the doors operate properly, and the material hasn't suffered serious swelling or delamination, refinishing may offer a practical visual reset without changing the kitchen's footprint.

Refinishing means preparing and coating the existing cabinet doors, drawer fronts, and exposed frames. Depending on the substrate and desired appearance, the finish might be a solid colour in a cabinet enamel, a stained wood treatment, or a clear-coat system that preserves visible grain. The work can also include small repairs, hardware removal, hinge adjustment, and a change of knobs or pulls.
Refacing is different. Refacing generally replaces the visible door and drawer fronts and applies a new material to the cabinet boxes. The internal structure and layout usually remain, but the project introduces new components. Replacement goes further by removing the existing cabinetry and installing new boxes, doors, and related components.
The kitchen situations that suit refinishing
Refinishing works particularly well when the layout already makes sense. If the sink, appliances, storage zones, and work triangle function for your household, changing the finish can address the room's dated appearance without creating the disruption that comes with moving services or rebuilding storage.
Good candidates often include:
- Sound wood cabinetry: Oak, maple, cherry, and other stable wood surfaces can accept a properly specified coating or stain system after thorough preparation.
- Serviceable painted doors: Existing paint can be renewed when it's bonded well and the underlying material hasn't deteriorated.
- Kitchens with cosmetic wear: Faded colour, surface grime, minor scratches, and dated sheen are different problems from warped or water-damaged construction.
- Homes needing a controlled update: A warm neutral, muted green, deep blue, or natural wood treatment can support current design preferences without forcing a full replacement.
A professional result depends on more than applying a new colour. Kitchen surfaces collect grease, cooking vapour, hand oils, and cleaning residue. A refinisher must remove those contaminants, create a suitable bonding surface, choose compatible primer and finish, and control dust while the coating cures.
Practical rule: If the cabinet structure works but the finish doesn't, refinishing deserves serious consideration. If the structure fails, paint can only disguise the problem temporarily.
For a closer look at substrate selection, preparation, and finish choices, the cabinet painting guide for the GTA offers useful context. Homeowners and renovation professionals can also consult Silva Marketing's remodeler playbook for broader kitchen-remodelling considerations, particularly when a cosmetic update forms part of a larger project.
Refinishing Versus Replacing Your Kitchen Cabinets
The most important comparison isn't just refinishing versus replacement. It's appearance and function versus structure and layout. Refinishing changes what you see and touch. Replacement can correct poor storage, damaged boxes, awkward clearances, outdated construction, and a kitchen that no longer suits the household.
| Factor | Refinishing | Full Replacement |
|---|---|---|
| Existing layout | Preserved | Can be redesigned |
| Cabinet boxes | Retained and prepared | Removed and replaced |
| Visible appearance | New colour, stain, or clear finish | New doors, boxes, and finish |
| Demolition | Limited | Required |
| Disposal | Usually limited | More extensive |
| Daily disruption | Lower when carefully staged | Higher during removal and installation |
| Best fit | Sound cabinets with dated finishes | Damaged cabinets or unsuitable layouts |
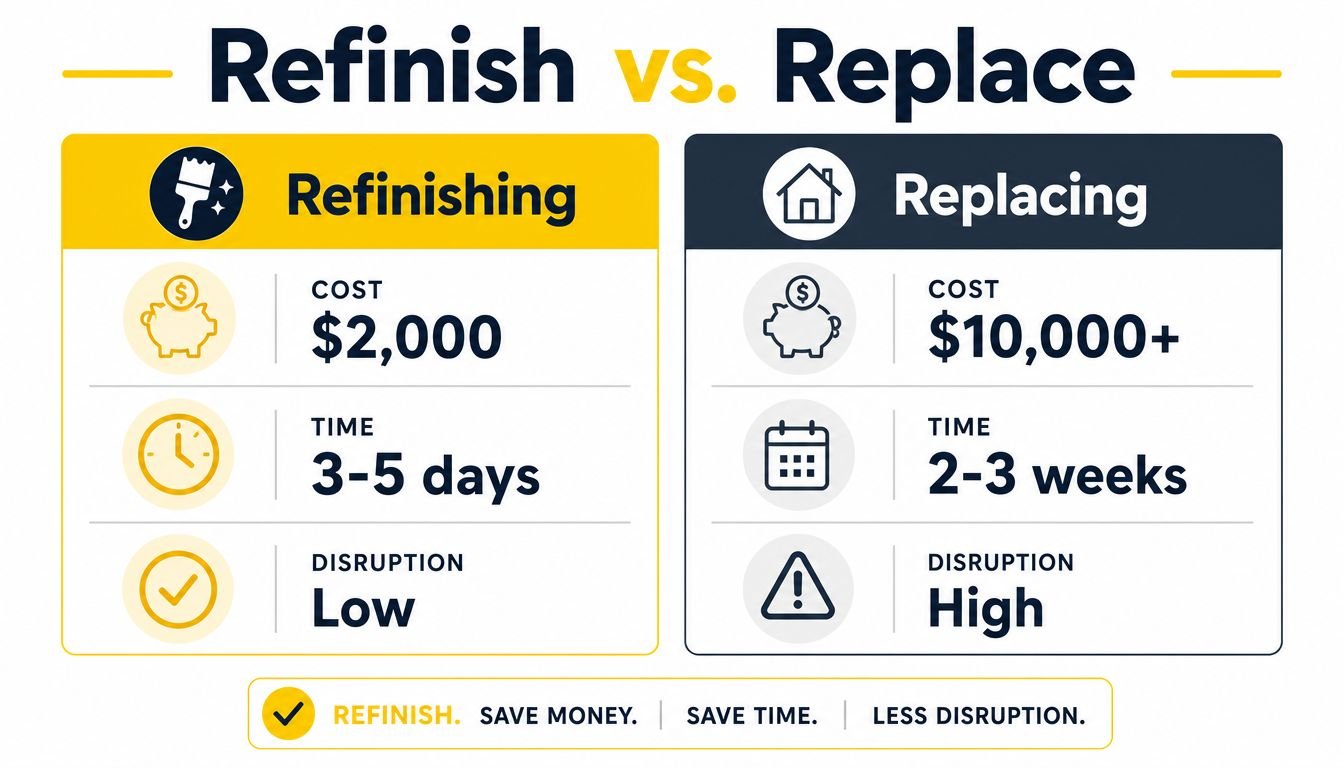
Replacement can look attractive because it promises a completely new kitchen. It also introduces decisions about measurements, door styles, hardware, fillers, countertops, backsplashes, flooring transitions, and disposal. If the project changes walls, plumbing, electrical systems, or the room layout, the planning burden grows further.
When refinishing protects value
Refinishing can preserve value when buyers see a clean, coherent kitchen with reliable storage and a finish that suits the home. A carefully selected colour can modernise traditional Toronto cabinetry, soften a dark room, or complement warmer wood and mixed-material design. Houzz trend coverage cited by Golden Hands Builders reports wood cabinets at 29% and white cabinets at 28% among renovating homeowners, while 27% choose partial cabinet upgrades instead of full replacement. These figures support a broader point, refinishing doesn't have to mean defaulting to stark painted white. Golden Hands Builders' 2026 Southern California cabinet trend coverage discusses the movement toward warmer and more varied kitchen finishes.
A light, uniform coating may work in one home, while a clear or toned finish that preserves grain may suit another. The right decision considers architecture, natural light, flooring, counters, and resale expectations rather than copying a popular colour.
When replacement makes more sense
Replacement becomes more logical when cabinet boxes are swollen around sinks, shelves sag, doors are badly twisted, or thermofoil has separated extensively. It's also the stronger option when you need deeper drawers, taller uppers, improved accessibility, a new island, or a different appliance arrangement. Painting damaged material won't correct poor joinery or create storage that isn't there.
For a more detailed financial and practical comparison, review this cabinet painting versus replacement cost guide. A cosmetic update can also support a broader renovation strategy. Pasadena Remodeler's discussion of Southern California projects notes that minor renovations can recoup over 100% of cost in some Southern California contexts, but Toronto homeowners should treat that as a market-specific reference, not a guarantee of resale performance in the GTA. The Pasadena Remodeler trend and return discussion is useful for understanding why project fit matters.
The Professional Cabinet Refinishing Process Explained
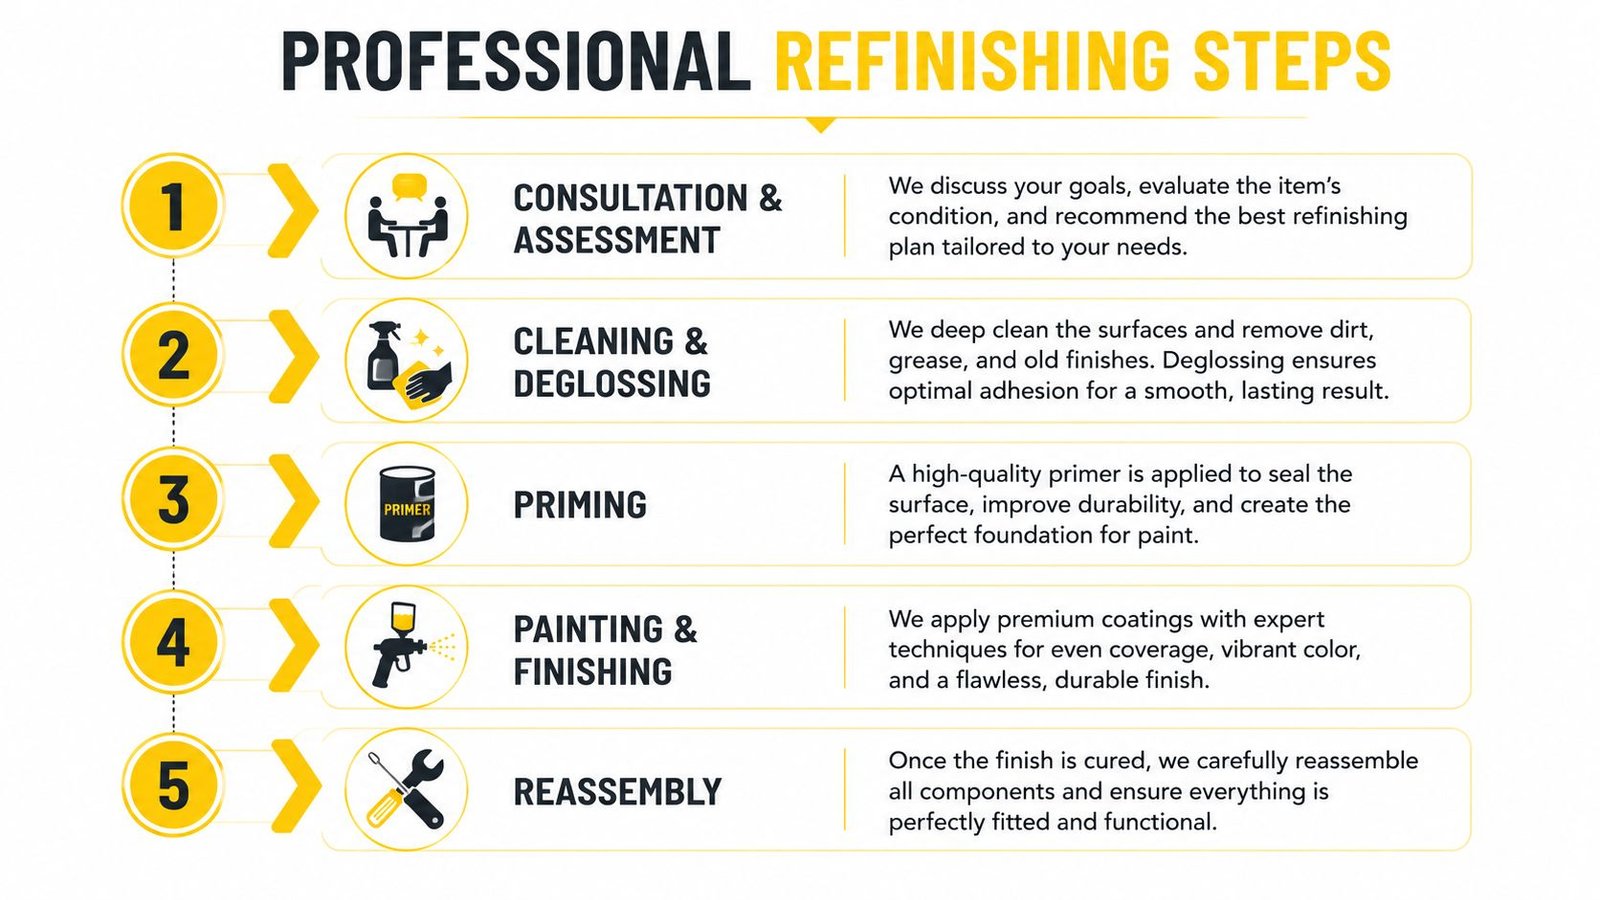
A durable cabinet finish starts long before the spray gun or brush appears. The contractor should first inspect the doors, drawer fronts, frames, hinges, previous coatings, and areas exposed to water or heat. That assessment determines whether refinishing is appropriate and whether repairs or a different coating system are necessary.
Consultation and organised removal
Before removing anything, label every door and drawer clearly. A professional team should track hinges and hardware, protect floors and counters, isolate the work area, and establish where doors will be prepared and coated. This sounds routine, but poor labelling can create alignment problems during reassembly, especially in older kitchens with individually adjusted doors.
The crew should also identify the surfaces that won't be painted, including appliance panels, stone counters, backsplashes, and adjacent walls. Good containment keeps overspray and sanding residue away from the rest of the home.
Cleaning and surface preparation
Kitchen grease is one of the main reasons coatings fail. Degreasing removes cooking residue that can prevent primer from bonding. After cleaning, the existing surface may need deglossing or sanding to reduce sheen and provide a consistent profile.
Preparation commonly includes:
- Degreasing: Remove oils, waxes, silicone residue, and embedded grime.
- Repairs: Fill dents, tighten loose joints, and address damaged edges.
- Sanding or deglossing: Create an even surface without unnecessarily removing sound material.
- Dust removal: Vacuum and wipe surfaces so particles don't become trapped in the finish.
- Masking: Protect the kitchen and establish a clean application zone.
Skipping preparation can produce a finish that looks acceptable at first and then chips around handles, peels near sink areas, or separates at edges.
Primer and coating selection
Primer isn't a universal product. The substrate, existing coating, wood tannins, and desired colour all matter. A bonding primer may be required for slick surfaces, while a stain-blocking primer can help prevent bleed-through from knots or existing discolouration.
Canadian coating compliance also matters. Federal guidance lists category benchmarks including 480 g/L for fillers, 670 g/L for clear sealers, 600 g/L for pigmented coatings, 670 g/L for clear topcoats, and 780 g/L for lacquer topcoats in wood furniture and kitchen-cabinet-related applications. These values come from the Government of Canada's VOC reduction guideline for wood furniture and kitchen cabinets. The figures don't mean every project uses the maximum permitted content. They show why the contractor should identify the coating category and verify the product before application.
Ontario contractors should also check current requirements for materials sourced from outside Canada. The supplied federal guidance notes that regulations for many product categories apply to manufacturers and importers, with concentration limits effective January 1, 2024. Product documentation is more reliable than a colour name or a claim that a coating is “professional grade.”
Application, curing, and reassembly
Spray application can create a smoother factory-style appearance on doors and drawer fronts, while careful brush and roller work may suit frames, edges, or smaller components. The best method depends on the coating, workspace, door profile, and the contractor's ability to control runs, dry spray, dust, and overspray.
The final stages include inspection under suitable lighting, controlled curing, hardware installation, hinge adjustment, and a walkthrough. For practical scheduling guidance, see how long professional cabinet refinishing takes.
A short process demonstration can help homeowners understand why each stage matters:
Toronto Cabinet Refinishing Costs and Project Timelines
A reliable refinishing quote must identify what is being coated, how it will be prepared, which products will be used, and how the work will be staged. A low figure without those details is difficult to compare. Two kitchens with similar door counts may require very different labour if one has grease buildup, ornate profiles, dark stain, damaged edges, or limited workspace.
The main cost factors include:
- Door and drawer quantity: Each removable component requires labelling, preparation, coating, handling, and reinstallation.
- Cabinet condition: Repairs, heavy contamination, peeling finishes, and water damage increase preparation time.
- Colour change: Changing dark wood to a pale colour usually requires careful priming and controlled coverage.
- Door profile: Raised panels, grooves, routed details, and narrow edges take longer to prepare and coat evenly.
- Finish type: Solid colour, stain, clear coat, high-sheen, and specialty finishes have different application demands.
- Site conditions: Ventilation, pets, children, occupied rooms, and limited staging space affect production planning.
Why quotes vary across the GTA
A North York kitchen may involve different parking and access restrictions than a detached home in King City. A Toronto condo can require building bookings, elevator coordination, and protection of shared areas. Vaughan homes may instead involve basement staging, open-concept layouts, or larger custom kitchens.
Ask contractors to separate preparation, materials, spraying or hand application, hardware handling, reassembly, and optional repairs. This shows whether the quote covers the complete system or only the visible painting stage. The Toronto kitchen cabinet painting service page can help frame the scope before requesting estimates.
Building a realistic schedule
Refinishing usually takes less time than replacement because the cabinet boxes and layout remain in place. The schedule still depends on the coating system, number of coats, drying conditions, door complexity, repairs, and whether doors are sprayed off-site or in a controlled area at the property.
Solvent content affects odour persistence and re-entry planning. Canadian guidance notes that higher-solvent systems can form films differently from lower-solvent alternatives. Waterborne coatings may require different spray technique, curing time, or additional coats for a comparable result. Confirm the coating system before the start date, rather than changing products during the job.
Toronto's seasonal conditions also affect production. Cold temperatures, high indoor humidity, and limited ventilation can slow drying and make odour control harder. The contractor should state where doors will be coated, how the kitchen will be protected, when components can be handled, and when normal use can resume. In the GTA, those details help distinguish a workable schedule from an optimistic estimate.
Questions to Ask Before Hiring a Cabinet Refinishing Contractor
Cabinet refinishing is a specialised form of painting. A contractor may be excellent at walls and ceilings yet lack the preparation discipline, spray control, or coating knowledge required for kitchen cabinetry. The consultation should reveal how the company thinks, not just what colour it can apply.

Ask for a cabinet-specific portfolio
Look for doors, drawer fronts, profiles, frames, and close-up edges rather than only wide kitchen photographs. Ask whether the portfolio shows sprayed finishes, darker-to-lighter colour changes, stained wood, laminate, or thermofoil work similar to your project.
A contractor should explain which examples are comparable. A smooth slab door and a heavily routed oak door don't present the same preparation or application challenges.
Get the coating system in writing
Ask for the manufacturer, product line, coating category, sheen, primer, and intended application method. Sherwin-Williams and Benjamin Moore offer products across different uses, but a brand name alone doesn't identify the complete system. The specification should clarify whether the contractor plans to spray, roll, brush, or combine methods.
You should also ask how the selected products address Canadian VOC requirements. The Canadian federal coating guidance provides category-based benchmarks, including 600 g/L for pigmented coatings and 670 g/L for clear sealers and clear topcoats. Those figures are useful reference points when reviewing a written product schedule.
Find out how the work will be protected
Ask where doors will be prepared, how the crew will contain dust and overspray, and what happens to hardware. Confirm who labels and stores components, how counters and floors are covered, and how the contractor handles daily access to the kitchen.
Review the contract, warranty, and exclusions
The written agreement should identify the surfaces included, repairs excluded, colour and sheen, number of finish stages where applicable, payment terms, access requirements, and the process for addressing defects. Be cautious when a quote avoids preparation details, refuses to identify products, or promises an unusually fast result without discussing curing.
A contractor should also provide evidence of appropriate insurance and references relevant to cabinet work. For more selection criteria, use this guide to choosing a cabinet painter.
Soca Services Painting is one local option homeowners can evaluate for cabinet refinishing and related home painting services. Compare its written scope with other qualified contractors, then choose the proposal that gives you the clearest understanding of preparation, products, protection, and completion.
Caring for Your Refinished Cabinets to Maximize Durability
A professional coating still needs sensible care. The first days after completion matter because a finish can feel dry before it reaches its working hardness. Follow the contractor's instructions about handling, cleaning, and loading shelves, especially if the selected system has a longer cure period.
Use a soft microfibre cloth and a mild, non-abrasive cleaner for routine cleaning. Spray the cleaner onto the cloth rather than flooding door seams, exposed edges, or the area around the sink. Wipe spills promptly, then dry the surface so moisture doesn't sit against joints or end grain.
Keep grease and water under control
Range areas, handles, and the cabinet beneath the sink usually receive the most abuse. Clean these locations more often with gentle products instead of waiting for residue to harden. Avoid scouring pads, powdered cleaners, solvent experiments, and aggressive melamine sponges, which can dull or remove the finish.
Maintenance priority: Water damage around a sink deserves attention before cosmetic wear elsewhere. A small leak can affect the substrate beneath the coating, and paint can't stabilise swollen material.
Use working exhaust ventilation while cooking, repair plumbing leaks quickly, and don't leave wet cloths resting on cabinet doors. Hardware also needs care. Tighten loose pulls before they enlarge mounting holes, and lift rather than drag objects across shelves and finished surfaces.
Address small damage early
A chip should be cleaned, allowed to dry, and assessed before applying touch-up material. Don't fill a damaged edge with a random household paint and expect an invisible repair. The colour, sheen, and film build may differ, making the patch more noticeable than the original mark.
Ask your contractor to leave a labelled touch-up container or record the exact product and colour formula. Store it safely and use a small artist's brush for minor repairs. Larger chips, peeling, swelling, or repeated failure around one area indicate a substrate or moisture problem that needs professional assessment.
Toronto homes experience changing indoor conditions through heating and humid summers. Stable ventilation and reasonable humidity control help reduce stress on wood components, but they won't compensate for leaks, poor substrate preparation, or an incompatible coating system. If a door begins sticking, identify whether the issue is hinge alignment, swelling, or coating build before forcing it closed.
Common Questions About Cabinet Refinishing in Toronto
Do I need a building permit for cabinet refinishing in Toronto?
Routine cosmetic refinishing is generally treated differently from a major renovation. Toronto guidance distinguishes construction, demolition, additions, and major interior alterations from cosmetic work, while permit requirements can apply when structural, plumbing, electrical, or layout changes are involved. Confirm the scope with the City of Toronto or your building department if the project includes more than coating existing cabinetry.
For comparison, Toronto-area guidance states that paint, wallpaper, trim replacement, flooring replacement without subfloor changes, and cabinet replacement in the same location are typically exempt, while structural, plumbing, and electrical work requires permits. Toronto renovation permit guidance provides a useful planning reference. Another Toronto permit overview notes that cosmetic work can be submitted through the city's permit system by email when an application is needed.
In California, local treatment can also classify cabinet refacing as cosmetic when walls, plumbing, electrical systems, and room layout remain unchanged. The City of Salinas explicitly states that a permit isn't required for kitchen refacing of existing cabinets, and Contra Costa County gives similar guidance for upper cabinets and cabinet refacing. Those examples don't govern Toronto, but they illustrate why homeowners should ask the local authority about the exact scope rather than assume every cabinet project follows the same rule. The City of Salinas kitchen remodel guide contains those California examples.
Can I stay in the home during refinishing?
Often, yes, but the answer depends on the application method, ventilation, odour, coating chemistry, household members, and the location of the work area. Solvent-heavy products may require stricter separation and longer re-entry planning than lower-VOC waterborne systems. Your contractor should provide clear instructions before work begins.
Does refinishing work on laminate or thermofoil?
It can work on some laminate surfaces when the material is sound and the contractor uses a compatible bonding system. Peeling thermofoil, swollen particleboard, loose edges, and heat-damaged areas may require replacement of the affected component instead. Ask for a substrate-specific inspection rather than accepting a general promise.
How should I choose a colour?
Start with the permanent elements that will remain, such as counters, flooring, backsplash, appliances, and trim. Benjamin Moore and Sherwin-Williams colour collections can help narrow options, but always review samples in your actual kitchen under daylight and evening lighting. Warm wood, soft neutrals, and mixed-material palettes can create a more current result than choosing a colour solely because it's popular online.
What should happen at the final walkthrough?
The contractor should inspect door faces, edges, drawer fronts, frames, hinge alignment, hardware, and visible transitions with you. Make sure the kitchen is clean, doors open without rubbing, drawers close properly, and you understand curing and cleaning instructions. Record any agreed touch-ups in writing before the project is closed.
How do I prepare before the crew arrives?
Clear countertop items, remove fragile objects, identify anything that must remain accessible, and discuss pets, children, parking, elevator access, and building rules. Don't remove doors yourself unless the contractor asks you to. Professional labelling and hardware control reduce the risk of reassembly problems.
For a Toronto, Vaughan, North York, or King City kitchen that needs a durable cosmetic update, request a written assessment before deciding between refinishing, refacing, and replacement. Contact Soca Services, get a free estimate, and visit Soca Services Painting to discuss cabinet refinishing, interior painting, wall colours, and a practical plan for your home.