

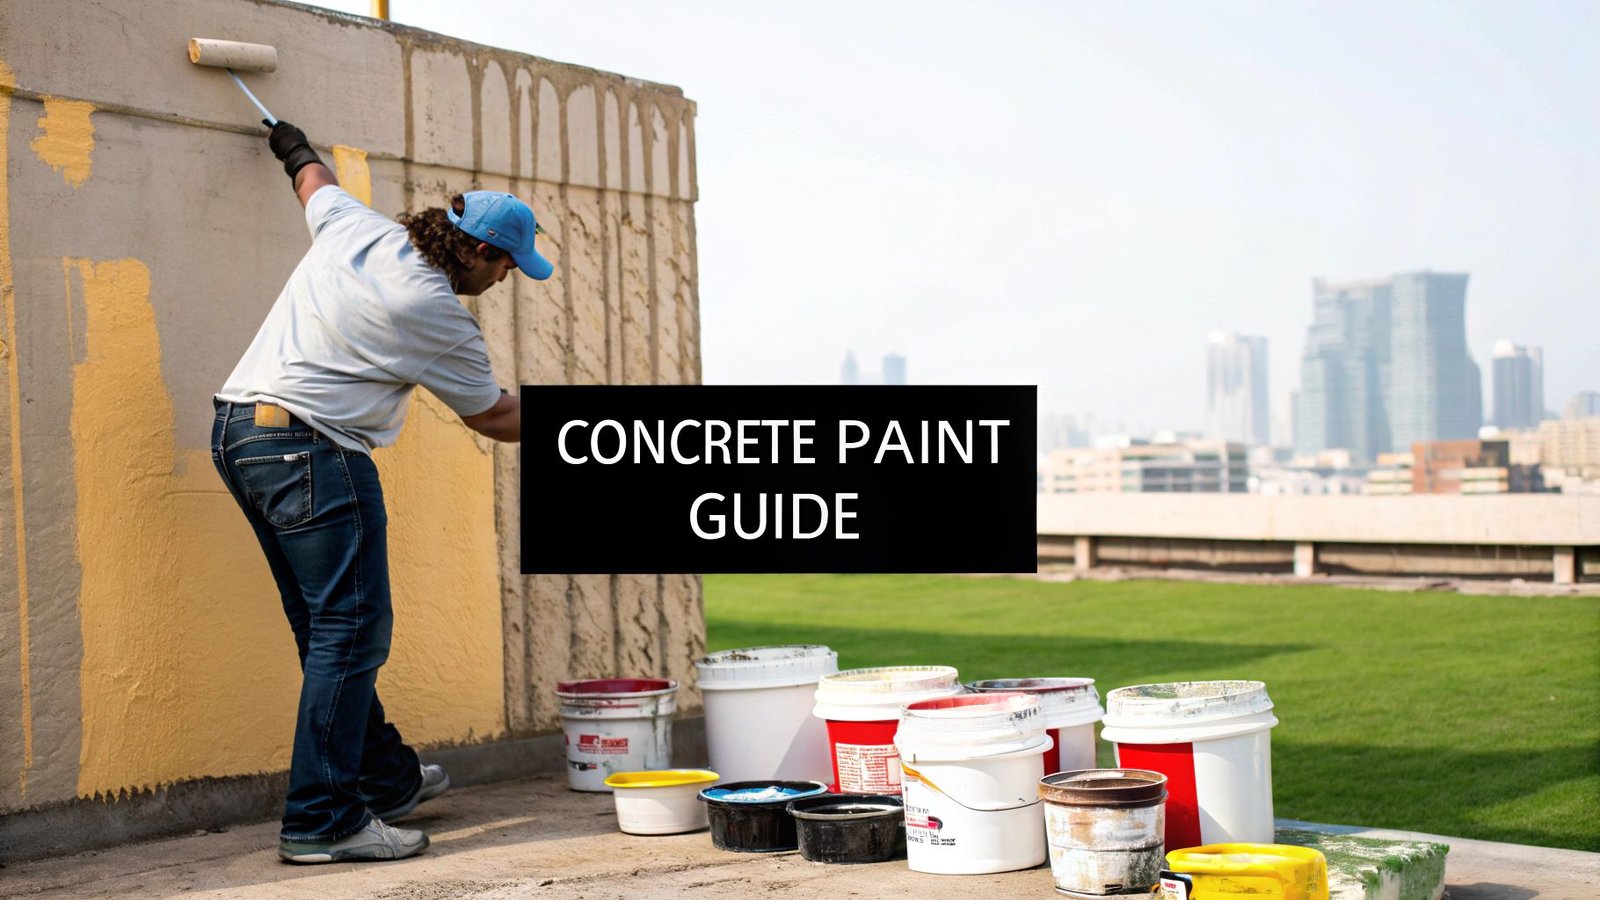
The best paint for concrete walls depends entirely on the wall's location and its environment. For projects across Toronto, Mississauga, and the wider GTA, your choice will typically be between three key products: epoxy paint for high-traffic, damp, or demanding areas; acrylic latex paint for standard interior walls; and specialized masonry paint for all exterior surfaces. An exposed exterior wall in downtown Toronto requires a different approach than a damp basement in Mississauga, making the right selection critical for a lasting finish.
Choosing the Right Paint for Your Concrete Walls
Picking the best paint for a concrete wall in the GTA is like choosing the right jacket for our unpredictable four-season weather. A product that works perfectly for a dry, protected interior wall will fail against a damp spring or a harsh winter freeze-thaw cycle. This decision is about more than just colour; it's about providing your concrete with a durable shield to protect your property.
Think of it this way: you wouldn't wear sandals in a snowstorm. Similarly, applying standard interior paint to a concrete basement wall is a recipe for peeling, bubbling, and frustration. Concrete is unique—it's porous, it breathes, and it holds moisture. That means it needs a paint specifically formulated to bond securely and not let go. Getting the "best" paint means matching the product to the wall's specific needs.
Your Top Options for Concrete Surfaces
To make the right choice, you need to understand the main contenders. Each paint type offers a unique set of benefits, making it suitable for different applications, from a busy commercial garage near me to a quiet residential basement. The goal is to create an objective structure for your decision-making process.
Here are the primary options you’ll come across:
- Epoxy Paint: This is a two-part system that cures into an incredibly hard, durable, and chemical-resistant shell. It's the champion for high-traffic garage floors, demanding commercial spaces, or basement walls in areas like Mississauga that are prone to moisture.
- Acrylic Latex Paint: A solid all-rounder, acrylic latex is user-friendly and great for finished interior concrete walls that stay dry and don't get a lot of abuse. It holds its colour well and cleans up easily with just soap and water.
- Masonry Paint: This paint is purpose-built for exterior concrete and brick. Its key feature is being "breathable," which allows any moisture trapped inside the concrete to escape without blistering the paint. This makes it the perfect choice for exterior walls that have to face Toronto's distinct seasons head-on.
This quick visual breaks down how they compare in terms of coverage, durability, and cost.
As you can see, epoxy is the most durable of the bunch, but it also comes with a higher price tag. That makes it a strategic investment for the most demanding jobs.
A Quick Guide to Concrete Wall Paints for GTA Conditions
With our local Toronto climate in mind, here’s a simple table to help you match the right paint to your project. This objective structure helps you quickly narrow down your options based on what our weather can throw at it.
| Paint Type | Best For | Durability Level | Moisture Resistance |
|---|---|---|---|
| Epoxy Paint | Basements, garages, high-traffic commercial floors. | High | Excellent |
| Acrylic Latex | Finished, dry interior walls like rec rooms or painted accents. | Medium | Low |
| Masonry Paint | Exterior walls, foundations, retaining walls. | High | Very Good |
Ultimately, this table reinforces that the best choice is always the one that directly addresses the environment your wall lives in.
Making the Right Choice for Your Project
The market for these high-performance coatings is growing, which is good news for consumers. The industrial coatings sector, which includes these specialized concrete paints, was valued at USD 15.3 billion back in 2022 and continues to expand. This growth is fuelled by construction and renovation right here in hubs like the GTA, ensuring that top brands are easy to find. For a deeper dive, you can review market trends for industrial coatings on grandviewresearch.com.
When you're standing in the paint aisle, your goal is to perfectly match the product's strengths to your wall's specific needs. A moisture-resistant epoxy is your best line of defence for a basement, while a flexible masonry paint will protect an outdoor wall from cracking under the summer sun and freezing in the winter.
At the end of the day, the "best" paint is simply the one that gives you the right mix of protection, appearance, and longevity for your specific project. For homeowners all over the GTA, understanding these key differences is the first step toward a paint job that looks great and lasts for years. If you're curious about how the professionals get it done, you can see how our team approaches these projects.
Why Concrete Needs a Specialized Paint
Let's get one thing straight: you can't just grab a can of leftover interior paint and slap it on a concrete wall. That’s a recipe for disaster. Trying to use regular paint on concrete is a bit like writing on wet paper—it’s just not going to stick, and you’ll be left with a peeling, bubbled mess in no time. Concrete has a unique personality, and it demands a paint that understands it.
Many people think of concrete as a solid, impenetrable surface, but that's only half the story. On a microscopic level, it’s more like a tough sponge, full of tiny pores that constantly absorb and release moisture. This is a huge factor, especially for basement walls in places like Mississauga or anywhere near the Toronto waterfront where high humidity and groundwater are a constant battle.
Because of this porosity, the surface is almost never completely dry. When you apply a standard acrylic or oil-based paint, you're creating a film that can't breathe. As moisture naturally pushes out from within the concrete, it gets trapped. That pressure has to go somewhere, and it ends up pushing the paint right off the wall, creating those ugly bubbles and blisters that are the classic signs of a failed paint job.
The Alkaline Problem in Concrete
Beyond its sponge-like nature, concrete has another trait that's actively hostile to most paints: it's highly alkaline. Freshly poured concrete can have a pH as high as 13. To put that into perspective, that’s on par with household bleach. It’s incredibly caustic.
This high alkalinity is a paint-killer. It triggers a chemical reaction called saponification, where the lime in the concrete literally breaks down the binders in regular paint, turning them into a soapy mush. The paint loses its grip entirely and basically washes away from the inside out.
A specialized paint for concrete walls isn't just a good idea; it's a must-have for any kind of durability. These coatings are specifically engineered with alkali-resistant binders that can stand up to the high pH, ensuring the paint forms a lasting bond instead of getting eaten away by the very surface it's meant to protect.
Engineered Solutions for a Tough Surface
This is where paints designed specifically for concrete—like masonry paint, epoxy coatings, and elastomeric paints—enter the picture. They are formulated to handle everything concrete can throw at them. Each type offers a specific set of features designed to work with the concrete, not against it.
- Breathability for Moisture Management: The best paint for a concrete wall, particularly in a basement, has to be "breathable." Masonry paints are designed to be vapour-permeable, which means they let moisture vapour escape through the paint film without lifting it off the wall. This is key to preventing blistering and peeling.
- Superior Adhesion and Durability: Epoxy paints are a two-part system that doesn’t just sit on the surface; it creates a powerful chemical bond with the concrete itself. The result is an incredibly hard, durable finish that resists abrasion, chemicals, and moisture. There’s a reason it’s the top choice for garage floors and high-traffic commercial walls across the GTA.
- Flexibility for Crack Prevention: Exterior concrete walls in Toronto have to endure wild temperature swings, from scorching summers to freezing winters. This causes the concrete to expand and contract, leading to hairline cracks. Elastomeric coatings are amazingly flexible—they can stretch and bridge these small cracks, creating a waterproof barrier that moves with the wall and keeps it looking flawless.
Choosing the right paint isn't just about colour. It's about selecting a product engineered for a very specific, demanding environment. Standard house paint is simply out of its league when faced with concrete's combination of moisture, high alkalinity, and rough texture. Making the right choice from the start will save you the immense headache and expense of having to redo the entire job in a year or two. This is why getting the best professional advice, whether you're in Toronto, Mississauga, or looking for painters near me in the GTA, is so crucial for a finish that lasts.
The Critical Steps for Prepping Concrete Walls
I’ve seen it a hundred times: a beautiful paint job on a concrete wall starts to peel and bubble within a year. Why? Because the most important part of the project was rushed. The secret to a finish that lasts isn’t in the final coat of paint; it’s in the prep work. In fact, a stunning paint job on concrete is really 80% preparation and only 20% application.
Skipping the prep is like building a house on a shaky foundation—it’s just destined to fail. Think of your bare concrete wall as a dirty, cracked canvas. No matter how premium the paint is, it simply won't stick properly if the surface underneath is dusty, greasy, or damp. All that grime creates a barrier that stops the paint from getting a solid grip.
This meticulous prep is what separates a professional, long-lasting finish from a DIY job that looks tired and flaky after one winter. For anyone in the GTA tackling a project, from a Mississauga basement to a Toronto storefront, getting these steps right is non-negotiable. This objective structure provides a clear path to success.
Your Essential Preparation Checklist
Getting a concrete surface ready involves much more than a quick wipe-down. It's a methodical process of cleaning, repairing, and making sure the wall is in prime condition to accept paint.
Here’s a simple but effective checklist to follow:
- A Deep Clean is a Must: Start by getting rid of all the obvious dust and dirt with a stiff brush and a shop vac. But don't stop there. Grease, oil, and grime are paint's worst enemies. You'll need a heavy-duty concrete degreaser to properly lift those invisible contaminants that cause paint to fail.
- Tackle Any Moisture Issues: Concrete has to be bone-dry before you even think about painting. Check for dark patches or a damp feeling. A big red flag is efflorescence—that chalky, white powder that forms when moisture evaporates from the concrete. You have to scrub it off with a wire brush and, more importantly, figure out where the moisture is coming from and fix that first.
- Repair Cracks and Holes: Use a quality concrete patching compound or an epoxy filler to fill every crack, hole, and imperfection. The goal is a smooth, uniform surface for a flawless finish. Always let the patches cure completely, following the manufacturer’s directions to the letter.
- Sand It Smooth: Once your patches are fully cured, sand them down so they’re perfectly flush with the wall. For a really rough or uneven surface, you might even need to use a concrete grinder to get the smooth, paintable texture you’re looking for.
The whole point of prep is to create a surface that is clean, dry, solid, and just slightly porous. This combination gives the primer and paint the perfect foundation to grab onto, creating a powerful bond that can stand up to time and weather.
When to Call in a Professional
While many of these prep tasks are perfectly fine for a dedicated DIYer, some problems are clear signs that you need to bring in a local pro. These issues often require specialized tools and the kind of know-how that only comes with experience. If you are searching for the "best painters near me" in Toronto or Mississauga, these are the signs to look for.
Keep an eye out for these warning signs:
- Large, Structural Cracks: Hairline cracks are one thing, but if you see wide, deep, or growing cracks, that could signal a serious foundation issue that paint will only cover up, not fix.
- Persistent Moisture or Leaks: Is the wall constantly damp or actively weeping water? You’ve got a major waterproofing problem on your hands. A professional painting contractor or a waterproofing specialist needs to find and solve the root cause.
- Widespread Efflorescence: A little bit of that white, chalky powder can be managed. But if it’s covering a huge area and comes back right after you clean it, that’s a clear sign of a significant, ongoing moisture issue behind the wall.
Trying to paint over these problems is a waste of time and money, and it can dangerously hide serious structural issues. Hiring a professional from the get-go ensures the job is done right, protecting your investment. To see how a professional team approaches these challenges, you can explore our approach to painting projects.
Don’t underestimate the scale of this work. To give you some perspective on the industry, a comparable market in California is home to over 8,400 concrete contractor businesses and nearly 34,000 painting businesses. That sheer volume of work highlights just how vital proper preparation is for guaranteeing a project’s longevity. You can find additional details on construction industry trends on ibisworld.com. Getting the prep right isn't just a best practice—it’s the absolute foundation of a successful project.
How to Apply Paint for a Flawless Finish
You’ve done the hard yards—the cleaning, patching, and priming are all behind you. Now comes the satisfying part where all that prep work really pays off. Proper application is what separates a decent paint job from a truly professional one, giving you that smooth, durable finish that’s built to last. This isn’t about just slapping some paint on the wall; it’s a craft that requires the right tools and techniques.
The method you choose will make a huge difference to the final look and how long the job takes. Whether you're a DIYer tackling a basement in Mississauga or a property manager in downtown Toronto, picking the right tool is essential. Your main choices come down to the classic paint roller or the more modern paint sprayer, and each has its pros and cons.
Roller vs. Sprayer: Which Is Best for Concrete?
Deciding between a roller and a sprayer really comes down to a trade-off between speed, control, and the texture of your wall. A rough, exterior concrete block wall has completely different needs than a smooth interior basement wall, for instance.
-
Paint Roller: This is the go-to for most DIY projects. A roller is affordable, easy to handle, and gives you great control, especially indoors. For concrete, you’ll want a roller with a thick nap—think at least a 1/2 inch—to really push the paint into all the tiny pores and crevices of the surface.
-
Paint Sprayer: When you're dealing with big projects, especially outdoors, a sprayer is the undisputed champion of speed. It lays down a perfectly even, consistent coat and can cover huge areas in no time. The catch? It requires a lot more prep work to mask off surrounding areas and protect them from overspray.
To help you choose the right tool for your project, here’s a quick comparison.
Painting Tools Comparison: Roller vs. Sprayer
This table breaks down the key differences to help you decide which tool is the best fit for your concrete wall project, based on factors like size, speed, and finish.
| Feature | Paint Roller | Paint Sprayer |
|---|---|---|
| Project Size | Best for small to medium-sized interior projects. | Ideal for large exterior walls or entire rooms. |
| Speed | Slower and more methodical application process. | Significantly faster, covering large areas quickly. |
| Control | Offers excellent control, minimizing mess and overspray. | Requires careful masking to control overspray. |
| Finish | Can leave a slight texture (stipple). | Delivers a very smooth, factory-like finish. |
For most homeowners in the GTA, a high-quality roller is the most practical choice for a basement or garage wall. On the other hand, professional contractors almost always lean towards sprayers for bigger commercial or residential jobs.
Pro Techniques for a Perfect Finish
Once you've got your tool, your technique is what makes all the difference. Just rolling paint up and down is a rookie mistake that leads to visible lap marks and an uneven sheen once it dries.
A time-tested method to avoid this is the "W" pattern. Start by rolling a large "W" onto a section of the wall, about three to four feet wide. Then, without lifting the roller, fill in the "W" with smooth, parallel strokes. This technique is fantastic for distributing the paint evenly and blending each section seamlessly into the next, giving you a beautiful, uniform finish without those ugly lines.
When painting concrete, always remember: thin, even coats are the goal. Two thin coats will always stick better and give you a more durable, longer-lasting finish than one single thick layer, which is just asking for drips and peeling down the line.
Working with the GTA Climate
Living in the Greater Toronto Area, we have to think about our local climate. The humid summers and cool, damp spring and fall seasons can really affect how your paint cures. For the best results, you absolutely have to paint within a specific temperature and humidity range.
Most concrete paints need an ambient temperature between 10°C and 30°C to cure properly. If you paint in direct, scorching sunlight or when it’s too cold, the paint can dry too fast or too slow, leading to a weak bond. High humidity is another enemy—it can trap moisture under the paint film, causing bubbles and blisters later on.
Always check the weather forecast and read the paint can for the manufacturer’s specific recommendations. Following these guidelines ensures you get the best possible bond and a finish that truly lasts. For a look at how the pros handle large-scale projects and challenging conditions, you can see the tools and expertise our teams use across the region.
Creative Finishes Beyond a Solid Colour
A solid coat of paint certainly gets the job done for protecting a concrete wall, but why stop there? Think of your concrete surfaces as a blank canvas. This is a chance to use paint as a design tool, not just a protective layer. Moving beyond a simple, flat colour can completely transform a space, turning a drab basement into an industrial-chic den or giving an exterior wall some serious curb appeal.
This is all about turning a purely functional surface into a real feature. Homeowners I talk to across Toronto and Mississauga are always looking for new ways to inject personality into their homes, and concrete walls are a prime opportunity. With the right approach, you can create some truly sophisticated, high-end looks that make a real statement.
Exploring Popular Decorative Finishes
Instead of just rolling on a single colour, let's look at finishes that create depth, texture, and visual interest. These techniques don't just cover up the concrete; they work with its natural character to enhance it. You might be surprised to find that many of these are quite DIY-friendly, though a pro can really nail the execution.
Here are a few popular options I often recommend:
- Concrete Stains: Unlike paint, which sits on top of the surface, stains are translucent and soak right in. This creates a rich, mottled look full of varied tones, much like natural stone. Stains are perfect if you're going for an earthy, organic vibe in a basement rec room or on a patio wall.
- Textured Finishes: You can actually buy paint with things like sand already mixed in, or use special rollers and trowels to create a textured effect. This adds a physical, tactile quality to the wall—a great trick for hiding minor surface flaws and getting a rustic or even a Mediterranean feel.
- Faux Finishes: This is where you can get really creative and make concrete look like something else entirely. Simple techniques like sponging, rag-rolling, or colour washing can create the illusion of aged plaster, suede, or even marble. It’s a fantastic way to add a touch of luxury without the price tag of the real materials.
The Growing Trend of Decorative Concrete
The move toward these unique finishes isn't just a local trend; it reflects a huge shift in design thinking. The global market for decorative concrete, which includes these kinds of paints and coatings, was valued at a massive USD 18.3 billion in 2023. It’s projected to climb to USD 24.3 billion by 2028. You can see this happening right here in the GTA, where homeowners and businesses are demanding style and durability for their concrete walls. For more on this, check out this deep dive into the decorative concrete market on marketsandmarkets.com.
Think of a decorative finish as the difference between a plain t-shirt and a tailored jacket. Both cover you up, but one adds style, intention, and personality that completely elevates the entire outfit.
By exploring these creative options, your painted concrete wall becomes more than just protected—it becomes a beautiful, intentional part of your home’s design. From subtle stains that whisper to bold textures that shout, the possibilities are endless. To see how these specialized looks come to life with professional precision, you can get a feel for the types of projects our expert teams handle across the region.
Maintaining Your Painted Concrete for Long-Term Durability
You've put in the time, effort, and money to get your concrete walls looking just right. Now, let’s make sure that beautiful finish sticks around. A great paint job deserves a smart maintenance plan, which is much easier than the initial project itself. Think of it as protecting your investment and keeping those walls looking pristine for years.
The foundation of proper maintenance is gentle cleaning. The best approach is to use a soft-bristle brush or cloth with a simple, mild solution of soap and water. Steer clear of harsh chemicals and aggressive pressure washing—they can easily strip the paint or wear down the protective layer, undoing all your hard work.
Proactive Care and Quick Fixes
Getting ahead of problems is the secret to a long-lasting finish. Make a habit of inspecting your walls, especially after the major weather swings we get here in Southern Ontario. Catching issues early is always better than dealing with a big fix later on.
Keep an eye out for these early warning signs:
- Chalking: A fine, powdery residue on the surface. This is the first hint that the paint binder is starting to break down.
- Bubbling or Peeling: This is a major red flag. It means moisture is trapped behind the paint film and pushing it away from the wall.
- Fading Colour: UV exposure is usually the culprit here, especially on exterior walls. It's a sign the paint's protective qualities are weakening.
- Hairline Cracks: Even tiny cracks can be trouble, allowing moisture to seep in and ruin the paint’s bond with the concrete.
For small scuffs or chips, a quick touch-up is your best friend. I always recommend keeping a small, well-sealed container of leftover paint and a little brush on hand for this very reason. Nipping these imperfections in the bud stops them from getting worse and keeps moisture out.
Understanding Paint Lifespan in the GTA
How long your paint job lasts really comes down to the type of paint you used and where the wall is located. In a four-season climate like ours, a high-quality masonry paint on an exterior wall should look good for 5 to 10 years. An interior basement wall coated with a tough epoxy paint can last even longer.
Of course, touch-ups can only do so much. You'll know it's time for a full repaint when you see widespread peeling, major fading, or cracking all over the surface. These are clear signs that the paint film has failed and is no longer protecting the concrete underneath.
If you need professional advice on maintaining or completely repainting your surfaces, you can see some examples of our high-quality painting services and how we approach jobs to ensure lasting results.
Common Questions About Painting Concrete Walls
Even with a solid game plan, a few nagging questions can pop up when you're about to paint concrete. I hear the same ones all the time from homeowners across the GTA, whether they're in Toronto or out in Mississauga. Nailing down the answers to these common sticking points is the best way to sidestep simple errors that could derail your whole project.
Think of this as your final check-in before you crack open that first can of paint. Getting these details straight is what ensures a finish that not only looks great but will actually last.
Do I Always Need a Primer on Concrete Walls?
Yes, absolutely. Priming is a non-negotiable step for concrete. The material is naturally porous and has a high pH (alkaline), which creates a double whammy for paint. It can soak up the topcoat unevenly and its chemical makeup can literally break down the paint, causing it to fail prematurely. A good quality masonry primer is designed to solve both problems.
It essentially neutralizes the surface and seals it up, giving your paint a stable, uniform foundation to grip. For basements near the lake or in humid areas, using a dedicated waterproofing primer isn't just a good idea—it's your most important defence against moisture damage and peeling down the road.
Skipping the primer is like building a house without a foundation. It doesn't matter how expensive the paint is; the job is set up to fail from the get-go because the topcoat has nothing to properly bond with.
What Is the Best Paint for a Damp Basement Wall?
For a damp basement wall, you can't just grab a standard can of paint. You need a system built specifically to handle moisture. Your first coat should always be a dedicated waterproofing paint, often labelled as a "masonry waterproofer." This stuff is formulated to sink into the concrete's pores and create a barrier that physically blocks water from passing through.
After the waterproofing layer has fully cured, you can then top it with a premium, mildew-resistant acrylic latex paint. This type of paint is "breathable," which is a key feature. It allows tiny amounts of water vapour to escape without blistering or peeling the paint off the wall. Regular interior paint simply can't handle these conditions and will fail in no time.
How Long Should I Wait to Paint New Concrete?
Patience is crucial here. You have to wait for any new concrete to cure completely before a single drop of paint touches it. The absolute minimum wait time is 28 to 30 days. During this curing period, the concrete is still hardening and, more importantly, pushing out a ton of excess moisture.
If you paint too soon, you're just trapping that moisture. It will push its way out, forcing the paint right off the wall and guaranteeing a failed job. Keep in mind that in the cooler, damper weather we often get during a Toronto spring or fall, you might even need to wait a bit longer. An easy trick is to tape a small plastic square to the wall for 24 hours. If you pull it off and see condensation, it's still too wet to paint.
When you want a flawless, long-lasting finish on your concrete walls without the stress and guesswork, it's best to call in the experts. Soca Services offers professional painting across the GTA, making sure every project is handled correctly from prep to the final coat. Visit us at https://www.socaservicespainting.com to get a quote today.








Your article helped me a lot, is there any more related content? Thanks!