You're standing in a Toronto kitchen with dated oak cabinets, worn handles, and a layout that still works perfectly. The cabinet boxes are solid, the doors close properly, and the drawers haven't given you trouble. What you don't want is to spend $50,000 on a full renovation to stop looking at a finish that belongs to another decade.
That's where kitchen cabinet refinishing earns serious consideration. It can change the colour and surface of your kitchen while preserving the parts that already function. It can also become a false economy when doors are warped, boxes are damaged, or your real goal is a new layout. This guide gives you the straight answer on refinishing, refacing, replacement, professional process, project downtime, aftercare, and the Toronto-area money question.
Your Kitchen Deserves Better Than Dated Cabinets
A North York homeowner can have solid oak boxes, reliable hinges, and enough storage, yet still dislike the kitchen's dark, worn appearance. A Vaughan family may face the same problem: the room handles daily use, but the finish makes it feel older than it is. Replacing every cabinet would solve the visual complaint while discarding parts that still work.
That is why kitchen cabinet refinishing deserves a serious look before a larger renovation. Ontario kitchen renovations can reach $45,000–$65,000, while refacing averages about $8,227 locally. Refinishing usually costs less than refacing because the existing doors and cabinet surfaces remain in service. The savings only make sense when those components have enough useful life left to justify the preparation and finishing work.
A full renovation earns its price when the kitchen needs new plumbing, electrical work, a different layout, or more storage. A surface renewal fits a different problem. If the cabinet boxes are sound and the layout works, changing the finish can refresh the room without removing the countertops or turning the home into a long construction project.
The kitchen also carries significant visual weight. Family members, visitors, and prospective buyers notice the cabinet doors quickly, especially in a room used every day. A professional finish can make the space look cleaner and more current while preserving its existing footprint.
Start with the cabinet structure
Identify the problem before choosing the service:
- The appearance: The colour feels dated, the finish has gone dull, or everyday wear shows on the doors.
- The function: Doors no longer close, drawers bind, shelves sag, or the storage arrangement falls short.
- The layout: Appliances, plumbing, work zones, or cabinet locations need to move.
- The condition: Water damage, swelling, delamination, or broken frames threatens the cabinet's remaining life.
Refinishing directly addresses appearance. It can improve minor cosmetic wear, but it cannot restore a failing cabinet box or create storage. Warped doors, swollen panels, and damaged frames point toward refacing or replacement instead.
The same decision applies to a kitchen upgrade for Phoenix homeowners. Preserve a functional foundation when the structure and layout meet your needs. Replace it when deeper problems make a new surface an expensive short-term fix. Toronto homes add practical concerns such as older cabinetry, occupied rooms, and local product requirements, so the material and preparation plan matter.
The pages ahead examine the three renovation paths, professional workflow, project downtime, DIY risks, finish care, and where Soca Services Painting fits for homeowners and property professionals across Toronto, Vaughan, North York, and King City.
What Kitchen Cabinet Refinishing Actually Means
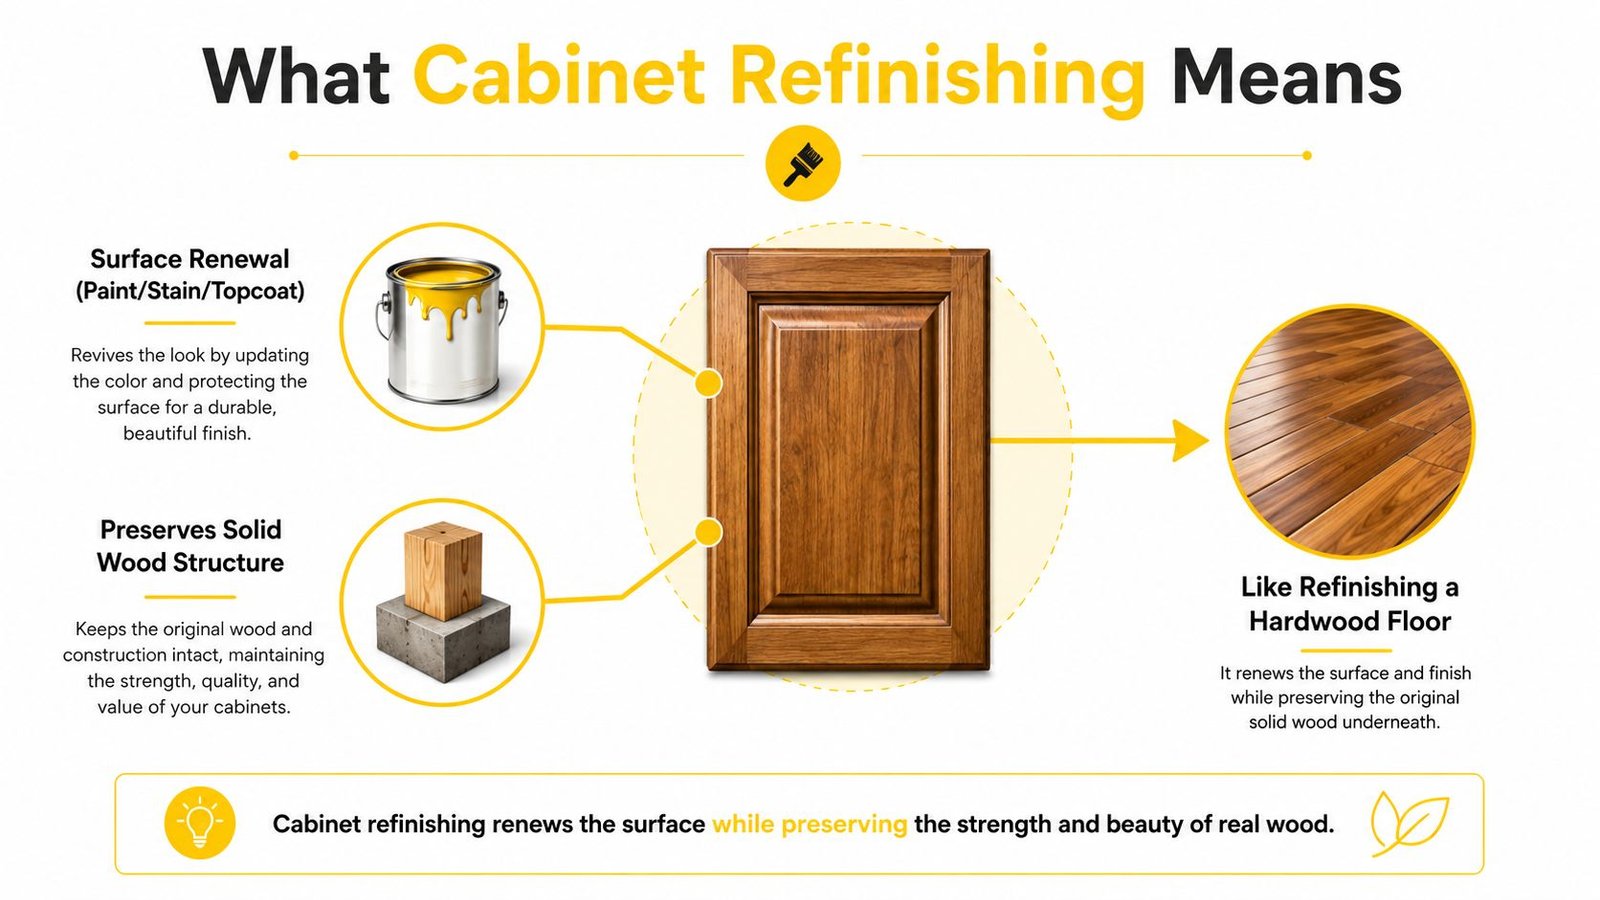
Refinishing cabinets is like refinishing a hardwood floor. You don't remove a solid subfloor and rebuild the room because the surface looks tired. You clean, prepare, renew, and protect the existing foundation.
With cabinet refinishing, the cabinet boxes, doors, drawer fronts, and usually the existing hardware remain in place or return to their original positions. The change happens on the visible surface. Depending on the material and desired result, that can mean a new painted finish, a renewed stain, or a protective clear coat.
Three renovation paths that sound similar
Homeowners often use refinishing, refacing, and replacement interchangeably. They're different services with different outcomes.
| Option | What changes | What remains |
|---|---|---|
| Refinishing | The existing surface receives a new finish | Cabinet boxes, doors, drawer fronts, and layout |
| Refacing | New doors and drawer fronts are installed, with veneer or another covering applied to the boxes | Cabinet boxes and usually the layout |
| Replacement | New cabinets are designed and installed | Usually only the room itself and selected fixtures |
Refinishing makes the most sense when the existing doors have a shape you like and their structure remains reliable. A painted finish can cover dated oak, provided the surface receives the right preparation and the grain is handled according to the desired appearance.
Refacing creates a larger visual change because it replaces the most prominent pieces, while preserving the boxes. It can be useful when doors are worn or their style no longer suits the room, but the boxes remain dependable.
Replacement is the correct answer when you need a different layout, more storage, larger cabinets, improved accessibility, or repairs that go beyond a coating system.
Why preparation controls the result
Cabinet refinishing is not like painting a wall. Kitchen surfaces collect cooking oils, hand residue, silicone contamination, and cleaning-product residue. Paint applied over that film can lose adhesion even if it initially looks smooth.
A professional workflow uses:
- Degreasing, to remove oil, silicone, and household residue.
- Abrasion, usually controlled sanding or scuffing, to create mechanical tooth.
- Priming, to improve adhesion and control stains or tannin bleed.
- Finish application, using a coating suited to cabinet use.
- Protection, through a compatible topcoat when the system requires it.
Soca Services Painting's explanation of painting over stained wood is useful for homeowners whose cabinets have a dark stain or a glossy factory finish. The key question isn't whether paint can cover the colour. It's whether the complete coating system can bond to the prepared surface and remain stable under repeated cleaning and handling.
Material choice also affects the wider kitchen design. If you're changing cabinet colour alongside a countertop, a resource on why choose quartz slabs can help you think through how a durable surface and renewed cabinet finish should work together visually.
Refinishing, Refacing, or Replacing in the GTA
If you like your kitchen's layout and the cabinet boxes remain solid, refinishing deserves the first quote. It changes the finish without paying to rebuild components that still work. The decision hinges on structural condition and function, not cosmetic appeal alone.
A mid-range Ontario kitchen renovation runs about $45,000–$65,000, and cabinet work can account for roughly 25–35% of the total budget. That makes the cabinets a major financial decision. Keeping the existing layout, plumbing, countertops, and boxes can prevent unnecessary renovation costs.
Toronto refacing guidance averages about $8,227, with projects ranging from $1,500 to $25,000. Soca Services' cabinet painting versus replacing cost comparison provides a broader look at how these options differ.
Refinishing is usually the lowest-cost choice when doors and boxes are healthy. The quote still depends on door count, material, existing finish, repairs, colour change, access, and the coating system selected. Have a contractor inspect those variables before relying on a price based only on photographs.
GTA decision table
| Option | Typical Cost vs Replacement | Disruption Level | Best For |
|---|---|---|---|
| Refinishing | Usually the lowest-cost path when existing components are sound | Lower disruption than removing and rebuilding the kitchen | Homeowners who like the layout and need a new colour or renewed finish |
| Refacing | Often costs more than refinishing, with Toronto guidance averaging about $8,227 and ranging from $1,500 to $25,000 | Moderate, because doors and drawer fronts change while boxes remain | Kitchens with reliable boxes but doors that need a style or material change |
| Replacement | Highest investment, as the full cabinet system changes | Highest disruption and coordination demand | Layout changes, serious damage, storage problems, or a complete redesign |
When refinishing becomes the wrong saving
Skip refinishing for doors that are warped, water-swollen, structurally loose, or losing their surface. A new coating cannot correct poor alignment, strengthen a failing joint, or repair damage beneath the finish. In those cases, replacement or targeted component work protects the budget better.
Replacement also makes sense when the layout creates daily frustration. Moving the sink, adding storage, changing appliance locations, or improving accessibility requires more than a new cabinet finish.
For landlords and property managers, turnaround time can change the calculation. A rental with sound cabinets may suit refinishing, while damaged doors can make a cheaper surface project expensive after another intervention. Commercial clients should price access, ventilation, tenant coordination, and the cost of keeping a kitchen or service area unavailable.
Choose refinishing when it preserves enough cabinet life to justify the spend. Low price alone does not make a project economical.
The Professional Cabinet Refinishing Process Explained
A durable result comes from a controlled sequence, not a single impressive spray coat. Soca Services approaches cabinet work as a finish system, with preparation, coating selection, application, curing, and reassembly treated as connected stages across Toronto, Vaughan, North York, and King City.

Preparation protects the room and the finish
The crew starts by identifying every door and drawer front before removal. Labels prevent a frustrating reassembly problem, particularly in kitchens where several doors appear identical but hinge alignment differs.
Hardware comes off, and countertops, floors, appliances, walls, and nearby surfaces receive protection. Removing the doors allows the finish to reach edges more evenly and lets the pieces be handled in a controlled area rather than painted in awkward positions.
The existing finish then receives a condition check. Peeling or failing coatings need attention before new material goes on top. A glossy or contaminated surface may require stronger cleaning and more abrasion than a clean, open-grained wood surface.
Cleaning and abrasion create the foundation
Degreasing removes the residue that prevents coatings from bonding. Kitchen cabinets near the range, dishwasher, sink, and waste bins often need especially careful cleaning because grease, moisture, and cleaning products collect in those zones.
Sanding or scuffing creates mechanical tooth, a microscopic texture that gives primer something to grip. The goal isn't to remove every trace of the old finish automatically. The goal is to create a stable, clean surface without damaging profiles, edges, or veneer.
Poor preparation usually reveals itself later as:
- Adhesion loss, where the new coating lifts or chips.
- Tannin bleed-through, especially over certain woods and stains.
- Premature edge wear, where frequently handled corners fail first.
- Visible contamination, including fisheyes or uneven texture.
Priming and coating require compatibility
A high-build bonding primer can improve adhesion and help block tannin bleed. The selected primer must be compatible with the finish coat, and the application must respect the product's flash and recoat requirements.
Professional application may use spray equipment for a smoother, more uniform appearance, with careful control of atomization and overspray. Brushing still has a place in detailed areas and on certain site conditions, but uncontrolled brush marks and heavy edges can undermine an otherwise sound project.
In California, VOC compliance is a central technical consideration. The California Air Resources Board district coatings guidance explains that local air districts regulate VOC content for architectural and wood coatings. For contractors working under those rules, primers, sealers, solvents, and topcoats must be selected as a compliant system.
South Coast AQMD's wood-coatings framework identifies category-based VOC limits and notes that equivalent control can involve abatement equipment rated at least 90% efficient for certain operations, as described in the South Coast AQMD wood-coatings rule. Toronto projects follow Canadian requirements rather than California district rules, but the broader lesson is useful: product selection and ventilation are technical decisions, not afterthoughts.
Curing and reassembly determine downtime
The team applies the chosen paint or stain, allows the required drying and curing time, then seals the finish where the system calls for a durable topcoat. Doors shouldn't be stacked, handled, or reinstalled before the coating has developed enough strength.
A kitchen cabinet project may take several working days, depending on the number of doors, preparation, repairs, colour change, access, and drying conditions. The kitchen may remain partly usable during some work, but homeowners should expect limited access while doors are removed, boxes are masked, and coatings cure.
For a more detailed planning reference, Soca Services outlines how long professional cabinet refinishing takes.
This short video provides another visual look at cabinet preparation and application. It appears later in the process discussion so the written sequence remains clear.
DIY Cabinet Painting Versus Hiring a Professional
DIY cabinet painting can work for a patient homeowner with time, suitable ventilation, a clean work area, and realistic expectations. It offers a lower direct spend and the satisfaction of completing the transformation yourself. It also gives you flexibility to work in small stages, although that flexibility can extend the period when the kitchen feels unsettled.
The visible result often separates amateur work from professional refinishing. Cabinet doors have profiles, corners, edges, hinge areas, and high-touch zones. Inadequate degreasing, skipped abrasion, contamination, or the wrong roller can leave brush marks, uneven sheen, poor adhesion, or early wear.
The DIY route suits a narrow set of conditions
DIY is more reasonable when:
- The existing coating is stable: It isn't peeling, bubbling, or failing underneath.
- The material is predictable: Solid wood and suitable MDF are easier to assess than questionable laminate or thermofoil.
- You have a controlled workspace: Doors need a clean, protected area where dust and debris won't settle into wet coating.
- You can wait: Curing matters more than finishing the last coat quickly.
- You accept maintenance: Small touch-ups may be part of ownership, particularly on doors around the sink and waste area.
A brush-and-roller finish can look acceptable from a distance, but it may not match the smooth, even appearance many homeowners expect from a factory-style cabinet finish. Professional spray equipment can improve uniformity, but equipment alone doesn't solve contamination or poor surface preparation.
VOC rules affect product decisions
Canada's federal architectural-coatings framework sets mandatory VOC concentration limits for 53 categories of architectural coatings, and those limits apply at the time of application after thinning, according to the federal VOC concentration-limit regulations. That means DIYers need to read product requirements carefully rather than assume any coating is suitable.
The issue is both legal and practical. Low-VOC materials can behave differently in open time, atomization, drying, and recoat windows. Ventilation, temperature, humidity, overspray control, and safe handling all affect the final result.
Ask the value question first: Are the cabinets sound enough that a renewed finish will preserve useful life, or are you covering damage that needs replacement?
Questions to ask a contractor
Before signing, ask for clear answers about:
- Materials: What primer, cabinet coating, and topcoat will be used?
- Preparation: How will the crew handle grease, silicone, old varnish, and failing paint?
- Application: Will doors and drawer fronts be removed, labelled, and finished separately?
- Protection: How will countertops, floors, appliances, and ventilation openings be protected?
- Curing: When can doors be reinstalled, handled, cleaned, and used normally?
- Scope: Does the estimate include repairs, hardware removal, masking, reassembly, and touch-ups?
- Proof: Can you see completed cabinet projects with a similar material and finish?
Soca Services' guide to why hire professional painters for cabinets can help you build a contractor-vetting checklist. A trustworthy quote explains the work rather than hiding behind a single attractive total.
Finishing Options, Colours, and Caring for Your New Cabinets
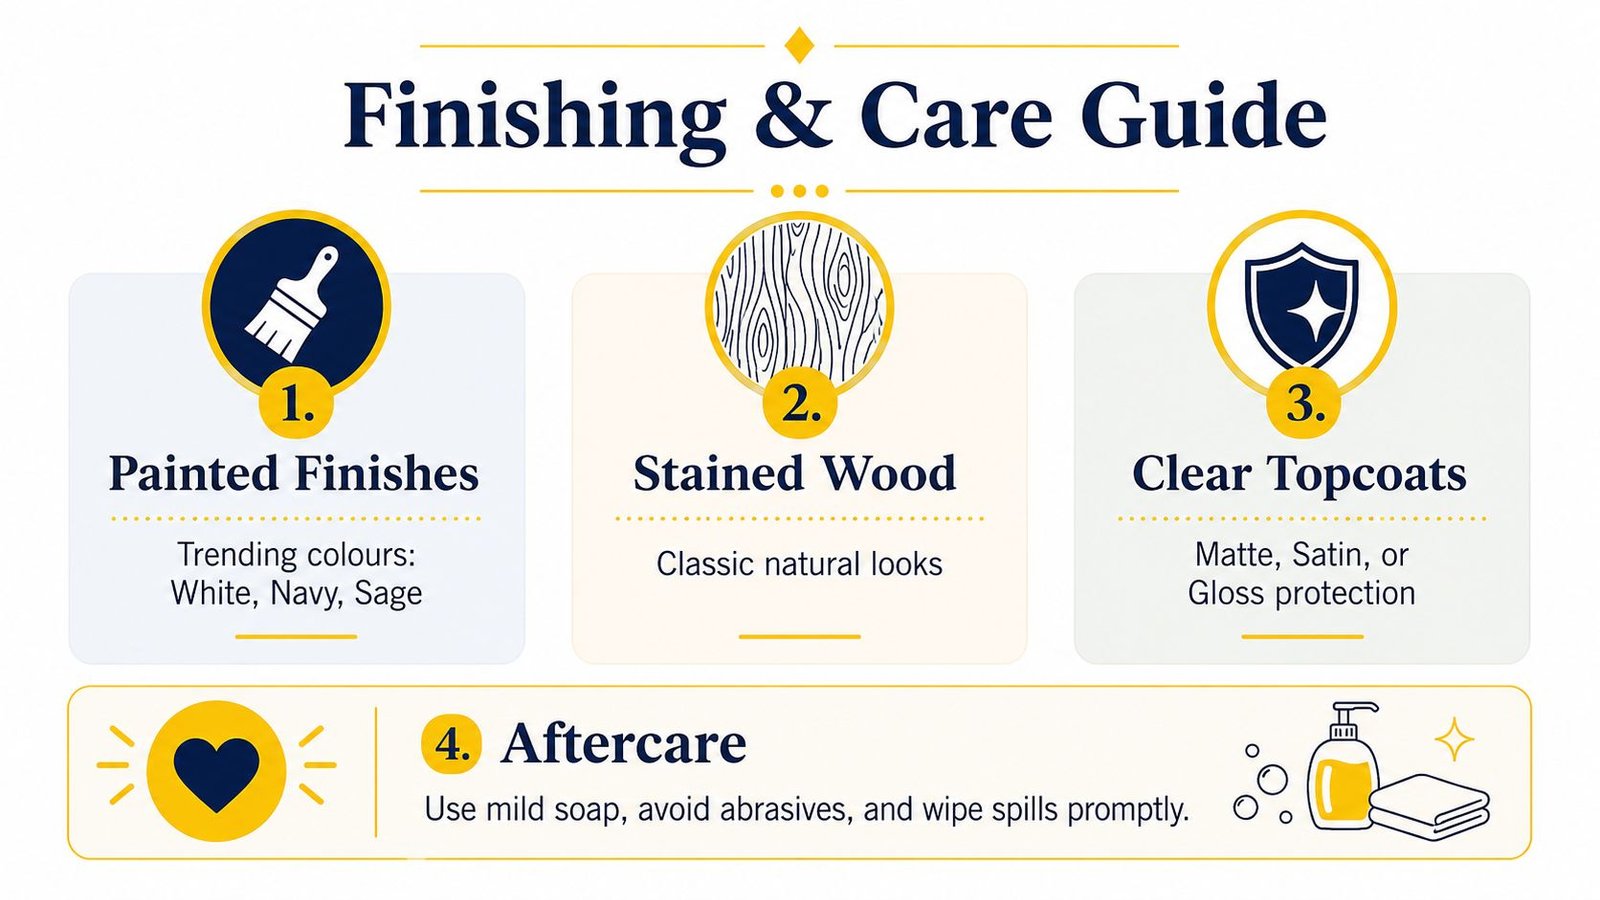
A refinished kitchen doesn't have to mean plain white cabinets. Painted finishes can move from soft neutrals to navy or sage, while stained wood preserves a more traditional character. The right choice depends on the cabinet material, the room's natural light, the countertop, flooring, hardware, and how much visual change you want.
Professional painters commonly work with established product families from Sherwin-Williams and Benjamin Moore, selecting a cabinet-suitable coating rather than treating ordinary wall paint as a universal solution. Cabinet surfaces need to tolerate hand contact, repeated cleaning, cooking residue, and everyday impacts.
Match the finish to the look
Painted finishes offer the broadest colour change. White can brighten a darker kitchen, navy can add contrast to pale counters, and sage can soften a contemporary space. A sprayed finish usually gives flat panels and profiles a more consistent appearance than an ordinary wall-paint application.
Stained wood finishes make sense when you like the existing grain and want to refresh the tone rather than hide it. They require careful evaluation because the final appearance depends on the wood, previous stain, sanding pattern, and absorption.
Clear topcoats add a protective layer in systems designed to use one. Sheen can range from matte to satin or gloss, but the choice should support cleaning and reflect the existing style. High sheen can highlight surface imperfections, while a softer sheen often suits older profiles.
For product-selection questions, Soca Services' guide to the best paint for kitchen cabinets is a practical starting point.
Dry isn't the same as cured
Freshly painted cabinets can feel dry within hours, but that doesn't mean they're ready for normal kitchen abuse. Benjamin Moore guidance cited by Toronto cabinet-painting information says cabinets should not be used for at least 2 to 3 days after painting, and full cure takes approximately 30 days (cabinet paint drying and curing guidance).
During the early curing period, avoid slamming doors, dragging objects across shelves, applying tape, or using strong cleaners. The coating needs time to develop its full hardness and resistance.
A simple care routine
- Use mild soap: Clean with a soft cloth and gentle cleaner suited to painted surfaces.
- Avoid abrasives: Scouring pads and abrasive powders can dull or scratch the finish.
- Wipe spills promptly: Moisture and food residue should not sit on edges or joints.
- Control humidity: Older Toronto homes can experience changing indoor moisture, so use ventilation during cooking and address persistent dampness.
- Handle nicks early: Clean the area, let it dry, and use a properly matched touch-up product sparingly.
- Protect high-wear areas: Take extra care around sink bases, waste bins, pulls, and frequently opened doors.
Good aftercare doesn't eliminate normal wear, but it keeps small problems from becoming a reason to refinish the entire kitchen again.
Why Toronto Homeowners Choose Soca Services
A dedicated cabinet-painting contractor should contribute more than a colour recommendation. The value sits in the preparation, spray control, product compatibility, protection, reassembly, and accountability for the finished surface.
For homeowners in Toronto and North York, that can mean coordinating work around family routines and limited kitchen access. In Vaughan, a busy household may prioritise a clear schedule and careful protection of adjoining rooms. A luxury property in King City may demand exceptionally clean lines, consistent sheen, and a finish that suits custom millwork.
Property managers face a different pressure. Rental turnovers need organised removal, labelling, coating, curing, and reinstallation so a cosmetic update doesn't create avoidable delays. Commercial owners and renovation contractors need clear scopes, site protection, and minimal downtime around other trades.
What to expect from a local painting specialist
Look for a contractor who can explain:
- Surface preparation: How grease, silicone, old varnish, and damaged coating will be handled.
- Professional application: Whether spray equipment is appropriate for the doors, boxes, site, and ventilation.
- Premium coatings: Which Sherwin-Williams, Benjamin Moore, or comparable cabinet-grade products suit the job.
- Schedule control: When doors come off, when the kitchen is restricted, and when reassembly occurs.
- Final accountability: How the crew checks edges, profiles, colour consistency, hardware, and touch-ups.
Soca Services Painting offers cabinet refinishing alongside broader home painting services, including interior painting and related work for residential and commercial properties. The company's approach is relevant when the kitchen needs a controlled coating project rather than a full demolition.

If your cabinet boxes are solid, the layout serves you well, and the dated finish is the main problem, refinishing deserves a professional assessment. If the doors or boxes are failing, ask for an honest comparison with refacing or replacement instead of forcing paint onto an unsuitable foundation.
Soca Services Painting provides professional kitchen cabinet refinishing, careful surface preparation, premium coatings, and organised reassembly for homes and businesses across Toronto, Vaughan, North York, and King City. Visit Soca Services Painting to request a free estimate and learn more about giving your kitchen a durable, low-disruption update.