Choosing the right paint for cement walls isn’t as simple as grabbing any can of interior paint off the shelf. That's a common mistake that leads to bubbling, peeling, and a finish that fails in no time. Cement is a porous, alkaline surface that demands a specialized product—like a high-quality acrylic latex or an elastomeric coating. These paints are specifically formulated to bond with cement and manage moisture, giving you a durable, beautiful finish that protects your walls for years to come.
At Soca Services, our team has seen it all. We understand that a professional paint job is the key to lasting results, and we're here to share our expertise.
Understanding the Unique Demands of Cement Walls
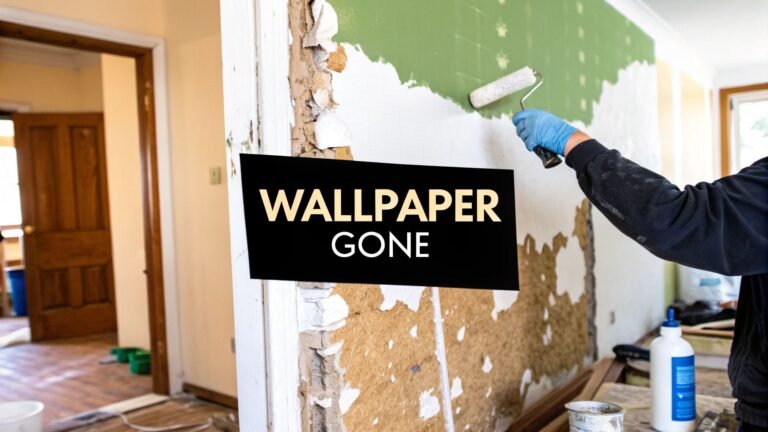
Painting a cement wall is a completely different challenge than painting drywall. Cement has unique properties, and if you don't respect them, your hard work will be for nothing. This is the single biggest reason DIY paint jobs on cement go south within a few months, leaving homeowners frustrated and back at square one. Here at Soca Services, we’ve seen the aftermath all over the GTA, from peeling basement walls in North York to cracked exterior surfaces in King City.
Unlike drywall, cement is incredibly porous. Think of it like a hard sponge; it soaks up and releases moisture from the ground and air. If you apply a standard interior paint, you’re trapping that moisture behind the paint film. Soon, you’ll see bubbles, blisters, and eventually, the paint will peel off in sheets. On top of that, new concrete is highly alkaline (it has a high pH). This can chemically attack the binders in regular paint, preventing it from curing properly.
Key Differences to Consider
To get that professional, long-lasting finish, you need to understand what makes cement so different.
- Porosity and Moisture: Cement is always interacting with its environment. This is a huge factor for basement walls in Toronto, which constantly battle dampness. The right paint system lets the wall breathe by allowing water vapour to escape while blocking liquid water from getting in.
- Alkalinity: The high-pH chemical environment of new cement needs to be addressed before applying a topcoat. A specialized primer neutralizes the surface, creating a stable foundation for your paint to achieve a solid, lasting bond.
- Surface Texture: Cement walls are rarely perfectly smooth and often have a rough, uneven texture. Your paint and application method need to account for this to get even coverage and fill imperfections without looking splotchy.
The secret to a flawless finish on cement isn't just the paint—it's the entire system. Using a compatible primer and topcoat designed to work together is key. Brands like Sherwin-Williams and Benjamin Moore offer systems specifically made to combat moisture and alkalinity, delivering results that last.
Choosing the right products from the start is non-negotiable. While most people know the big names in wall colors for home painting, masonry coatings are more specialized. It's worth looking into the best interior paint brands in Canada to understand quality, but for cement, always check the label for "masonry" or "concrete." This ensures you're getting a formula engineered for these tough surfaces.
Understanding the Unique Challenges of Cement Surfaces
Cement walls have their own personality. They breathe, hold moisture, and have a naturally high pH that can be hostile to the wrong kind of paint. Getting to know these characteristics is the first step toward achieving a finish that looks great and lasts. If you skip this part, you're guaranteeing a future of peeling, bubbling, and wasted effort.
The biggest culprit, by far, is moisture. Cement is porous by nature, acting like a dense sponge. It can easily pull dampness from the ground or humid air—a familiar story for anyone with a basement in the Toronto area. When that trapped moisture tries to escape through a layer of paint that can't breathe, it simply pushes the paint right off the wall, causing blistering and peeling.
The Problem with Alkalinity and Efflorescence
Freshly poured concrete is highly alkaline. Its pH level is so high that it can chemically attack the binders in a standard paint formula. This reaction, called saponification, literally turns the paint into a soapy, mushy mess that will never properly harden or stick. That’s why new cement walls need to cure for at least 28 days—this allows the pH to neutralize and excess moisture to evaporate.
Have you ever seen a chalky, white powder on a cement wall? That’s efflorescence, and it's a major red flag.
- What it is: Efflorescence is mineral salts left behind as water evaporates out of the cement.
- What it means: It’s a clear sign that you have an active moisture issue that needs to be solved.
- What to do: Painting over it is a waste of time and money. The moisture will keep pushing new salts to the surface, causing your new paint job to fail.
At Soca Services, we don't just clean off efflorescence; we see it as a diagnostic tool. Our experts remove it completely and then work to find the source of the moisture. Solving the problem at its root is the only way to ensure the paint we apply is the last you'll need for a long time.
Dealing with Older and Previously Painted Walls
Older homes, especially in areas like Vaughan and North York, come with their own history. A cement wall that's been painted before might be hiding cracks or other damage. Often, the old paint is already failing, creating an unstable foundation for a new coat. This is where meticulous prep work—scraping, sanding, and filling every crack—becomes essential. This detailed preparation is what separates a professional, long-lasting job from a quick, temporary fix.
For a broader perspective on working with these materials, understanding the pros and cons of concrete residential flooring offers great context. When you're ready for specific solutions, our guide on basement paint options dives into the products we trust.
Ultimately, understanding these challenges highlights how critical professional preparation is. Contact Soca Services for a free estimate, and let our experts handle your cement walls the right way from the start.
Mastering Preparation for Flawless Results
Ask any seasoned painter, and they’ll tell you the secret to a stunning paint job: it’s 80% preparation and only 20% application. This is especially true when dealing with the unique challenges of cement. If you skip the prep work, you're building on a shaky foundation, and the results are doomed to fail. At Soca Services, our meticulous preparation process is what guarantees a durable, flawless finish that lasts.
This is about more than just a quick wipe-down. It’s a systematic approach to creating a perfectly clean, stable, and dry surface—the kind that allows new paint to bond perfectly.
Deep Cleaning and Surface Inspection
First, the wall needs a thorough cleaning. Over the years, cement walls, especially in basements or commercial spaces, collect dust, grime, and oily residues that will ruin paint adhesion. We start by scrubbing the entire surface with a strong masonry cleaner to cut through these contaminants.
If we spot that chalky white powder known as efflorescence, we get to work with wire brushes. It's critical to remove every trace of these mineral salts because they're a clear sign that moisture is pushing through the cement. Painting over it is a surefire way to watch your new paint bubble and peel.
This flowchart shows how interconnected these common cement issues are.
As you can see, underlying moisture is almost always the root cause of both high alkalinity and visible efflorescence. That makes getting moisture under control the single most important part of the job.
To make this crucial stage easier to manage, here's a quick checklist of what we do to get a cement wall ready for its new look.
Your Essential Cement Wall Prep Checklist
| Preparation Step | Why It's Critical | Soca Services Pro Tip |
|---|---|---|
| Thorough Cleaning | Removes dirt, grime, and oils that block paint adhesion, ensuring a strong bond. | Use a dedicated masonry cleaner, not just soap and water. For tough efflorescence, a wire brush is your best friend. |
| Surface Repair | Fills cracks and holes to create a smooth, uniform surface for a professional look. | For larger gaps or crumbling areas, use hydraulic cement. It expands as it cures for an incredibly strong patch. |
| Moisture Testing | Confirms the wall is completely dry, preventing blistering, peeling, and paint failure. | In damp basements, run a dehumidifier for a few days before you even think about painting. It makes a world of difference. |
Following these steps methodically ensures that the wall isn't just clean—it's truly ready for primer and paint.
Repairing and Smoothing the Surface
Once the wall is spotless, we shift our focus to repairs. Cement is tough, but it's not indestructible. We meticulously inspect for any cracks, chips, or holes and fill these imperfections with a high-quality, flexible masonry filler. For larger gaps, we often use hydraulic cement.
Our goal is to create a surface that is not only structurally sound but also completely smooth. This attention to detail ensures that the final coat of paint looks uniform and professional, without any distracting flaws showing through.
For more general advice on getting surfaces ready for a new coat of paint, our comprehensive guide on how to prep walls for painting has plenty of other valuable tips.
The Critical Moisture Test
Before a single drop of primer touches the wall, we must be 100% certain it’s completely dry. A simple but effective way to check this is with the plastic sheet test.
- Step 1: Securely tape a one-foot-square piece of plastic sheeting to the cement wall.
- Step 2: Use painter's tape to seal all four edges, creating an airtight patch.
- Step 3: Wait 24 to 48 hours.
- Step 4: Carefully peel back the plastic and check for condensation on the side that was facing the wall.
If you see moisture, the wall is still too damp to paint. In the often-humid basements around Toronto and Vaughan, we frequently recommend running a dehumidifier for several days to pull out stubborn residual moisture. This step is a non-negotiable part of a Soca Services project; it guarantees your new paint for cement walls has the perfectly dry surface it needs to bond for good.
Picking the Right Primers and Paints for the Job
Now that you’ve done the hard prep work, it’s time to choose the products that will bring your vision to life. This isn't just about picking a colour. Selecting a high-performance primer and the right topcoat is what makes the difference between a paint job that lasts for years and one that starts failing after the first season.
At Soca Services, we’ve seen how skipping the right products can undo careful preparation, leading to peeling, blistering, and frustration. The secret to a lasting finish on cement always starts with the primer—it’s the one step you can't skip.
The Critical Role of a Good Masonry Primer
Think of a masonry primer as the essential bridge between a tricky cement surface and your final paint colour. It’s not just an extra coat; it does several heavy-lifting jobs that a standard wall primer isn’t built for.
A quality masonry primer, like those from Sherwin-Williams or Benjamin Moore, soaks into the porous cement to create a solid, uniform foundation. This accomplishes three crucial things:
- It seals the surface: This prevents the topcoat from being absorbed unevenly, giving you a consistent sheen and true colour without needing extra coats.
- It blocks moisture: A good sealer creates a barrier against dampness trying to push through the concrete—a leading cause of bubbling and paint failure.
- It neutralizes alkalinity: The primer creates a chemically stable base, preventing the cement's high pH from attacking and breaking down your beautiful topcoat over time.
For a closer look at different primer types, check out our guide on the best paint primer for walls.
Choosing the Best Paint for Your Cement Walls
With the surface properly primed, you can now choose your topcoat. The best paint for the job depends on where the wall is and what it needs to endure.
- Acrylic Latex Paint: This is our go-to for most interior and exterior cement walls. Modern formulas are breathable enough to let moisture vapour escape while offering fantastic durability and colour retention. It’s the perfect choice for anything from basement walls in North York to a stylish painted concrete feature wall.
- Elastomeric Coatings: For an exterior wall with hairline cracks, elastomeric paint is a game-changer. This thick, flexible coating bridges small cracks to create a waterproof shield that expands and contracts with Canadian temperature swings. It’s an ideal solution for the climate in King City.
- Epoxy Coatings: For high-traffic areas like garage floors or commercial spaces in Vaughan, nothing beats the ruggedness of a two-part epoxy. It cures into an incredibly hard, chemical-resistant shell that can handle vehicles, foot traffic, and spills.
Matching the right product to the environment is how we guarantee the finish doesn’t just look great when we leave—it protects your property for years. Ready to find the perfect coating for your project? Contact Soca Services for a free estimate and expert advice.
Achieving a Lasting, Professional Finish
This is where all the hard work pays off. The science, preparation, and product knowledge come together to create a flawless final look. This is what truly separates a weekend DIY project from a guaranteed professional interior painting job.
A perfect finish has less to do with the final brushstroke and more to do with everything that happened before it. An experienced painter from Soca Services might spot a faint trace of hidden moisture that a DIYer could overlook. Fixing that tiny issue before applying paint can prevent a massive failure down the road, saving you time and money.
The Soca Services Advantage
When you hire a professional service like Soca Services, you're not just paying for a paint job; you're investing in peace of mind and a superior result. We bring more than just brushes and paint to your home in Toronto or Vaughan—we bring a proven system built on years of hands-on experience.
Here’s what sets a professional job apart:
- Efficiency and Speed: Our crews use professional-grade tools, like paint sprayers, to apply perfectly even coats far faster than a roller, minimizing disruption to your home.
- Guaranteed Durability: We stand by our work because we use the right system for cement—from cleaner to primer to topcoat. It’s a finish built to last.
- Safety First: We handle all the logistics, including proper ventilation and safe material handling, so you don't have to worry.
- A Flawless Look: Our obsessive attention to detail during prep guarantees your final wall colors are smooth, rich, and free of imperfections.
A professional paint job is an investment in your property's value and longevity. It protects the underlying cement from moisture and damage while dramatically improving its appearance.
By choosing Soca Services, you’re not just getting a coat of paint. You’re getting a protective, beautiful finish that defends your investment for years to come. Learn more on our website about our commitment to quality.
Your Top Questions About Painting Cement Walls, Answered
Over the years, our team has painted countless cement walls across the Toronto area, and certain questions always come up. Getting straight answers from a pro is the best way to ensure your project starts on the right foot. Let's tackle a few of the most common ones we hear.
Can I Just Use Regular Interior Paint on My Basement Walls?
While it’s tempting to use what you already have, it's a recipe for disaster. Regular interior paint isn't built to handle what concrete throws at it.
Cement is naturally porous and has a high alkaline level, which will attack a standard paint film from behind, causing peeling, bubbling, and flaking. You need to use a dedicated masonry paint—like an acrylic latex or a robust elastomeric coating. These are engineered to bond properly and "breathe" with the concrete, giving you a finish that actually lasts.
How Long Do I Really Need to Wait Before Painting New Concrete?
Patience is key here. New concrete needs a minimum of 28 days to cure before you even think about picking up a paintbrush. This time is crucial for moisture inside the slab to escape and for the surface pH to decrease to a manageable level.
If you paint too early, you trap that moisture inside, which is the single biggest reason paint fails on new concrete. At Soca Services, we always perform moisture and pH tests to be certain the wall is ready for paint.
What’s This White, Powdery Stuff on My Wall?
That chalky residue is called efflorescence. It’s mineral salts left behind as water travels through the cement and evaporates. You absolutely cannot just paint over it.
Think of efflorescence as a symptom of an active moisture issue. Our first step is to scrub it off completely. Then, the real work begins: finding where that moisture is coming from and stopping it at the source. Otherwise, it will just push through your beautiful new paint job. A perfectly prepared surface is the first step in understanding how long paint should last and getting the most out of your investment.
Ready to transform your cement walls with a finish that's built to last? Soca Services Painting has the expertise to handle any project in Toronto, Vaughan, North York, and King City.