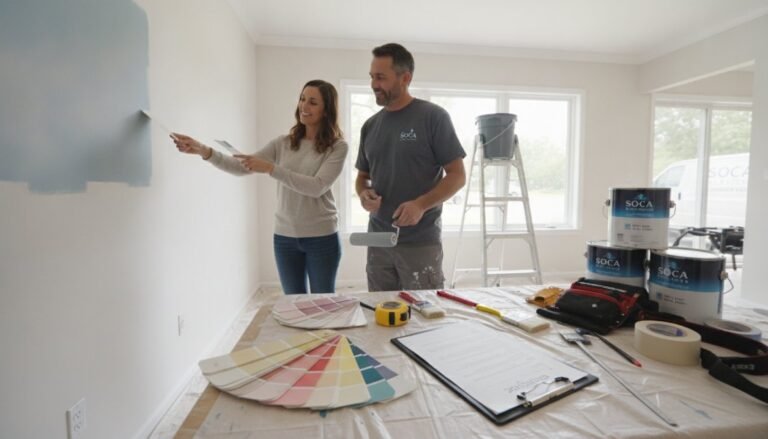
You're halfway through repainting a North York living room. The furniture is pushed into the centre, the baseboards are dusty, and a strip of old beige paint still shows beside the window trim. You can grab a roller and keep going, or stop and ask whether the walls need more than a fresh colour.
That decision matters. Interior painting North York projects vary sharply between a condo near Finch, a postwar bungalow in Bathurst Manor, and an older Willowdale home with multiple layers of failing paint. The right result depends on preparation, product selection, ventilation, access, and a clear scope, not just the colour on the can.
This guide gives homeowners, property managers, renovation contractors, and commercial clients a practical way to plan the work, compare quotes, handle North York-specific rules, and protect the finished surface.
What Interior Painting in North York Really Involves
A repaint can be cosmetic, corrective, or both
A homeowner often starts with a simple goal, such as changing a hallway from dark grey to a warmer neutral. Then the walkthrough reveals nail pops, hairline cracks, glossy patches, stained drywall, loose caulking, and trim that has been touched up with several different whites. That's no longer a quick colour change. It's a surface-restoration job with a decorative finish.
Professional interior painting can include walls, ceilings, doors, baseboards, window frames, closets, millwork, stair components, and accent features. The scope needs to identify each one. Painting walls while leaving yellowed doors and marked baseboards untouched may make the room look unfinished, even if the wall colour is excellent.
North York's housing mix makes this assessment especially important. The City of Toronto's North York Census Profile based on Statistics Canada Census data identifies a mature local housing base with detached homes, semi-detached homes, row houses, and apartments. The profile also reports a 2016 North York population of 644,685, which reflects the scale and variety of the local residential and commercial repaint market.
The property type changes the preparation
A postwar bungalow in Bathurst Manor may have broad plaster or drywall surfaces, lower ceilings, older trim, and years of patching. A condo tower near Finch can have tighter access, elevator booking requirements, building protection rules, and furniture that can't simply be moved into a garage. A century home in Willowdale may need careful treatment around uneven plaster, historic trim, old caulk, and previous coatings.
The basic questions are practical:
- How many rooms are included? A bedroom repaint is a different job from a whole-home package.
- What is the ceiling height? High walls require additional equipment, setup, and controlled cutting.
- What condition is the existing paint in? Sound paint may need cleaning and light sanding. Peeling or chalking paint needs more involved preparation.
- Will furniture stay? Occupied homes require careful moving, covering, and daily cleanup.
- Are trim and doors included? These surfaces need different products and application techniques.
Contractor's rule: If the quote only says “paint interior,” the scope isn't specific enough. You need to know which surfaces get prepared, primed, painted, and inspected.
Soca Services Painting fits naturally into this decision because its listed services include interior painting in North York, serving the kind of residential and commercial properties where scope and finish standards differ. The useful comparison isn't just DIY versus contractor. It's a quick cosmetic repaint versus a properly managed restoration and repaint.
The Step-by-Step Painting Process From Estimate to Final Walkthrough
A professional job should feel organised before the first roller touches the wall. Each stage protects something different, from scope accuracy to the final finish.

The first five steps establish control
Initial inquiry. You describe the rooms, surfaces, access conditions, occupancy, and desired timing. Photos can help, but they don't replace an on-site review.
On-site walkthrough. The contractor checks wall condition, ceiling height, trim, furniture, lighting, access, and possible repairs. This protects the scope from surprises.
Written estimate. The estimate should list rooms, surfaces, preparation, products, coats, exclusions, repairs, and payment terms. It protects the budget because both sides can see what the price covers. For a Toronto project, you can also review the painting estimate service from Soca Services.
Colour and product selection. Test wall colours under the room's actual daylight and artificial lighting. A Benjamin Moore neutral and a Sherwin-Williams neutral may look very different beside flooring, cabinetry, and existing trim.
Scheduling. Confirm start dates, access, furniture arrangements, drying conditions, and any condo or commercial-site restrictions.
Preparation protects the finish
Prep day usually involves moving or protecting furniture, removing hardware and switch plates, washing surfaces, patching nail holes and cracks, sanding glossy areas, priming stains and bare drywall, and taping edges. The contractor should feather repairs so patched areas don't show as raised rectangles after painting.
The primer decision depends on the surface. Bare drywall, water stains, glossy coatings, major colour changes, and uncertain adhesion may require specific primers. A clean, sound, previously painted wall may need only preparation and finish coats. Skipping primer where it's needed can cause flashing, bleed-through, poor adhesion, and uneven sheen.
Paint day comes after the surface is ready. The crew cuts edges, rolls consistent sections, keeps a wet edge, and respects the product's recoat window. Rushing a second coat over paint that hasn't set properly can create lap marks and inconsistent coverage.
A typical North York project may take one to three days for a condo repaint or four to seven days for a full detached home, depending on scope and condition. Late material delivery is the biggest schedule risk, particularly when a selected colour, primer, or specialty finish isn't available. Experienced contractors confirm products early and keep approved alternatives ready.
The last steps catch small problems
A punch list records missed spots, edge corrections, drips, hardware reinstalls, and agreed repairs. The final walkthrough protects warranty discussions because you can review the completed scope together, in good light, before signing off.
Typical Costs and the Price Drivers That Move Your Quote
Interior painting quotes should make the work understandable, not leave you guessing whether you're paying for paint, preparation, access, or vague extras. The planning range commonly used for North York interiors is about $2 to $6 per square foot of wall area, while whole-home projects can fall between $3,500 and $12,000 or more, depending on size and condition. Those figures are market guidance, not a promise for a particular property, so the written scope still matters.
Toronto renovation conditions are active but price-sensitive. BILD GTA says about 4 in 10 Canadian households invest in renovations each year, at an average cost of $14,000, placing repainting inside a recurring home-improvement cycle rather than a one-time purchase. Ontario also recorded the largest increase in the Residential Renovation Price Index in the second quarter of 2024, with the provincial composite index up 91.8%, driven by price pressure in Toronto, as reported by Statistics Canada's renovation price data. The same source material reports that Toronto had a 0.3% quarterly increase in renovation costs in 2025, and an earlier 2025 release reported a 0.5% decline in the first quarter. The takeaway is simple: demand is durable, but quotes need close scrutiny.
What moves the number
Labour hours usually form the largest portion of a professional quote. A crew spends time protecting floors, moving furniture, repairing surfaces, preparing edges, rolling, cleaning, and returning hardware.
Surface area matters more than the number of rooms alone. Open-concept rooms, tall walls, large stairwells, and extensive ceilings can carry more labour than several small bedrooms.
Preparation intensity separates a straightforward repaint from a restoration job. Textured ceilings, failing paint, water marks, nicotine staining, bare drywall, and repeated patching can require scraping, sanding, sealing, and additional priming.
Colour and coats affect coverage. A dark-to-light transition may need more finish coats than a similar-colour repaint. Accent walls and feature ceilings also add setup, cutting, and product coordination.
Trim and doors require careful brushing and often a dedicated enamel. More doors, closets, window frames, and baseboards mean more detail work.
Access difficulty increases time in condos, stairwells, occupied commercial spaces, and homes where furniture can't be removed easily.
| Cost Driver | Typical Impact | Example Range |
|---|---|---|
| Labour and setup | Increases with protection, moving, cutting, rolling, and cleanup | Lower for an empty, accessible room, higher for an occupied home |
| Wall and ceiling area | More surface means more material and application time | A single room versus a complete home |
| Preparation | Repairs, sanding, scraping, and priming can substantially expand the scope | Light patching versus failing or stained surfaces |
| Number of coats | Dark-to-light changes and uneven existing paint may need additional coverage | One planned finish coat versus a multi-coat colour change |
| Trim and doors | Detail surfaces take slower brush and enamel work | Walls only versus walls plus extensive millwork |
| Height and access | Ladders, platforms, stairwells, and condo logistics add setup | Standard room versus high or difficult-to-reach areas |
For a useful sanity check, measure approximate wall area, count doors and windows, and estimate trim linear footage. Ask whether the quote includes ceilings, closets, repairs, primer, furniture handling, and cleanup. Compare product names and sheen, not just “premium paint.”
You can also review this detailed guide to interior painting costs in Toronto by room. Negotiate colour changes, scheduling flexibility, and optional rooms if you want to control the total. Don't negotiate away necessary preparation, safe lead-paint practices, proper protection, or the specified number of coats. Those are not savings. They're future touch-ups.
Choosing the Right Paint, Sheen, and Finish for Each Room
Paint selection should follow room use, not brand loyalty. Benjamin Moore and Sherwin-Williams both offer products across several performance levels, but the right choice depends on washing, moisture, touch frequency, lighting, and the condition of the substrate.
Compare the categories on a real quote
Builder-grade flat latex can suit low-traffic ceilings or a quick refresh on sound, undemanding walls. It usually isn't my first choice for hallways, family rooms, or homes where children and pets create regular marks.
Standard eggshell or satin is a sensible wall finish for many living rooms, bedrooms, hallways, and family spaces. It balances a softer appearance with practical cleanability. Satin reflects more light than eggshell, so it will show more surface irregularity.
Premium 100% acrylic generally makes sense where coverage, adhesion, washability, and touch-up performance matter. It costs more at the can, but a high-quality coating can be the better value when the room receives heavy use or the surface needs a consistent finish.
Low-VOC and zero-VOC products address indoor-air priorities, but check the complete system, including primer and tinting. Health Canada recommends choosing low-emission products when possible and increasing ventilation while using paints, varnishes, glues, or adhesives, as explained in its guidance on reducing indoor VOC exposure.
Specialty kitchen, bathroom, and trim products should be chosen for moisture, scrubbing, adhesion, and repeated contact. Trim and doors deserve a dedicated enamel rather than the same wall coating used across the room.
Match sheen to the job
| Room | Recommended Sheen | Paint Category | Primer Needed |
|---|---|---|---|
| Living room | Matte or eggshell | Standard or premium acrylic wall paint | Only when surface condition requires it |
| Bedroom | Matte or eggshell | Low-emission standard or premium wall paint | On repairs, stains, bare areas, or adhesion concerns |
| Hallway | Eggshell or satin | Washable premium acrylic | Often useful over repairs or mixed existing finishes |
| Kitchen | Satin or semi-gloss | Durable acrylic formulated for high-use areas | Recommended over stains, bare drywall, or difficult coatings |
| Bathroom | Satin or semi-gloss | Moisture-tolerant interior coating | Required where the substrate is bare, stained, or questionable |
| Trim and doors | Satin or semi-gloss enamel | Dedicated trim-and-door enamel | Bonding primer on glossy or poorly adhering surfaces |
Canadian VOC regulations set practical limits for architectural coatings. Federal VOC requirements cap flat architectural coatings at 100 g/L, non-flat coatings at 150 g/L, and high-gloss coatings at 250 g/L, with compliance applying after thinning. The regulations cover 53 architectural-coating categories, so the contractor should verify the product data sheet instead of treating “low-VOC” as a marketing label.
My recommendation: Use the lowest-emission product that still meets the room's durability needs, then confirm the primer and finish coats work as one system.
For living rooms specifically, compare lighting, furnishings, and undertones before committing. This guide to the best interior paint finish for living rooms is useful, but a sample on your own wall remains more reliable than a screen.
How to Choose the Right Painting Contractor in North York
Don't choose a contractor because one quote is the lowest. Choose the company that makes the scope, preparation, crew, products, protection, and follow-up easy to verify.
Check the company before comparing prices
Ask for current WSIB clearance, liability insurance, and relevant trade or manufacturer qualifications where applicable. Confirm who will be on-site each day. A company owner who estimates the work but sends an unknown crew should explain the supervision process.
You should also ask:
- Who does the preparation? Prep quality depends on the person doing it, not only on the company name.
- How are repairs priced? Find out whether patching, sanding, caulking, stain blocking, and drywall repair are included.
- What isn't included? Clarify ceilings, closets, doors, furniture moving, hardware removal, and disposal.
- How are changes handled? A written change order should identify the new work and price before it begins.
- What warranty is provided? Get the coverage and exclusions in writing, including what happens if an adhesion or finish problem appears.
A useful quote identifies the surfaces by room, preparation steps, product by manufacturer and line, sheen, coat count, protection, cleanup, and drywall repair limits. “Two coats throughout” isn't enough if the document doesn't explain whether that means two finish coats after primer or two total applications including primer.
You can use this contractor-selection guide from Soca Services as a checklist, then apply it to every company you interview.
Red flags deserve a hard stop
Door-to-door solicitation, a large upfront deposit, pressure to decide immediately, vague pricing, and refusal to provide a written warranty all deserve caution. So does a quote that doesn't mention surface preparation. A contractor who says “we'll see what it needs when we get there” may be leaving the largest part of the scope undefined.
A low bid often reflects missing work, not efficient work.
Before signing, check recent local references, confirm a physical business address, review current North York or Toronto projects, and ask whether the crew has worked in condos, older houses, commercial spaces, or occupied homes similar to yours. The right experience depends on the property. A contractor who paints vacant new construction may not be the right fit for a furnished heritage interior or a condo with strict board controls.
For property managers and renovation companies, add documentation and coordination to the vetting process. Confirm access procedures, daily cleanup, tenant communication, elevator protection, and how the painter will coordinate with flooring, millwork, electrical, or drywall trades. A professional result depends on those handoffs as much as the final roller marks.
North York-Specific Rules, Air Quality, and Older-Home Considerations
North York projects often combine three issues that homeowners treat separately: building rules, indoor air quality, and older coatings. They need to be planned together because each one can affect access, product choice, preparation, and occupancy.
A condo repaint may involve building administration
Cosmetic painting itself is generally different from an alteration that changes partitions or other regulated interior work. Toronto's permit guidance makes the distinction important. Toronto renovation permit guidance for interior alterations describes a category involving partitions and finishings, while cosmetic painting is commonly treated as exempt. The practical question is whether painting is part of a larger renovation package.
If you're removing walls, changing partitions, altering finishes as part of broader construction, or combining painting with basement or condo renovation work, ask Toronto Building or the property's management team whether permit review applies. Don't assume the answer from the paint portion alone.
Condo boards may also require advance notification, approved working hours, elevator booking, corridor protection, and proof of insurance. Some buildings may specify acceptable low-emission or certified products. Get those rules in writing before the estimate so the contractor can price protection, access time, and scheduling properly.
Air quality affects product choice and re-entry
Health Canada describes VOCs as a large group of chemicals present in indoor and outdoor air. Its guidance recommends reducing exposure at the source and increasing ventilation when using renovation products. Health Canada also states that VOC levels in Canadian homes don't usually pose a significant health risk for most VOCs, while still recommending ventilation during painting and related work, as outlined in its VOC information sheet.
Low-VOC and zero-VOC aren't interchangeable labels for an entire painting system. The primer, tint, caulk, filler, and finish all matter. In higher-performance projects, Canadian guidance recommends that at least 90% of painted interior surface area in some projects use certified low-VOC or no-VOC products, as described in the Canadian home indoor-air-quality checklist.
NRC chamber testing uses 23 C, 50% relative humidity, and one air change per hour as standard conditions for building-material testing, according to its building-material chamber-testing publication. A colder, wetter, poorly ventilated North York room can dry and cure differently. Winter work needs a specific ventilation and re-occupancy plan, especially for families with young children, older adults, asthma concerns, or anyone remaining in the home. For broader household context, Precision Air's indoor air quality advice can help homeowners think through ventilation and occupant comfort during renovation.
Older coatings require respect
Older North York, Toronto, Vaughan, and King City homes may contain pre-existing coatings that need safer preparation. Canadian lead-paint guidance used in Ontario treats paint containing 0.5% lead or more as lead-based paint, as explained in this Ontario lead-paint reference. Don't dry-sand suspect coatings casually.
Discuss testing, wet-scrape methods, HEPA-controlled sanding, containment, dust cleanup, and whether occupants should leave during disturbance work. Lead-related preparation can change the labour, protection, disposal, and schedule requirements, so it belongs in the estimate rather than appearing as an unpleasant surprise after work begins. Homeowners dealing with older architectural details can also consult this guide to painting heritage homes in Ontario.
Prep, Cure Time, and Aftercare That Protect the Finish
The final stretch of an interior painting North York project decides whether the finish still looks sharp later or starts showing marks almost immediately. Preparation, curing, and aftercare aren't administrative details. They determine adhesion, sheen consistency, cleanability, and how well repairs disappear.
Inspect preparation before colour covers it
Before painting, the contractor should wash dirty surfaces, sand glossy areas, feather repairs, apply smooth caulk lines, remove dust, and prime patches where needed. Look closely at corners, window returns, baseboards, door edges, and repaired drywall. If the substrate is rough, the finish coat won't hide every defect.
At the final walkthrough, inspect walls in normal room lighting and from several angles. Check cut lines, ceiling edges, trim transitions, doors, closets, hardware, floors, and any agreed drywall repairs. Mark genuine misses clearly, then allow the painter to correct them before furniture returns.
Dry, recoat, and cure mean different things
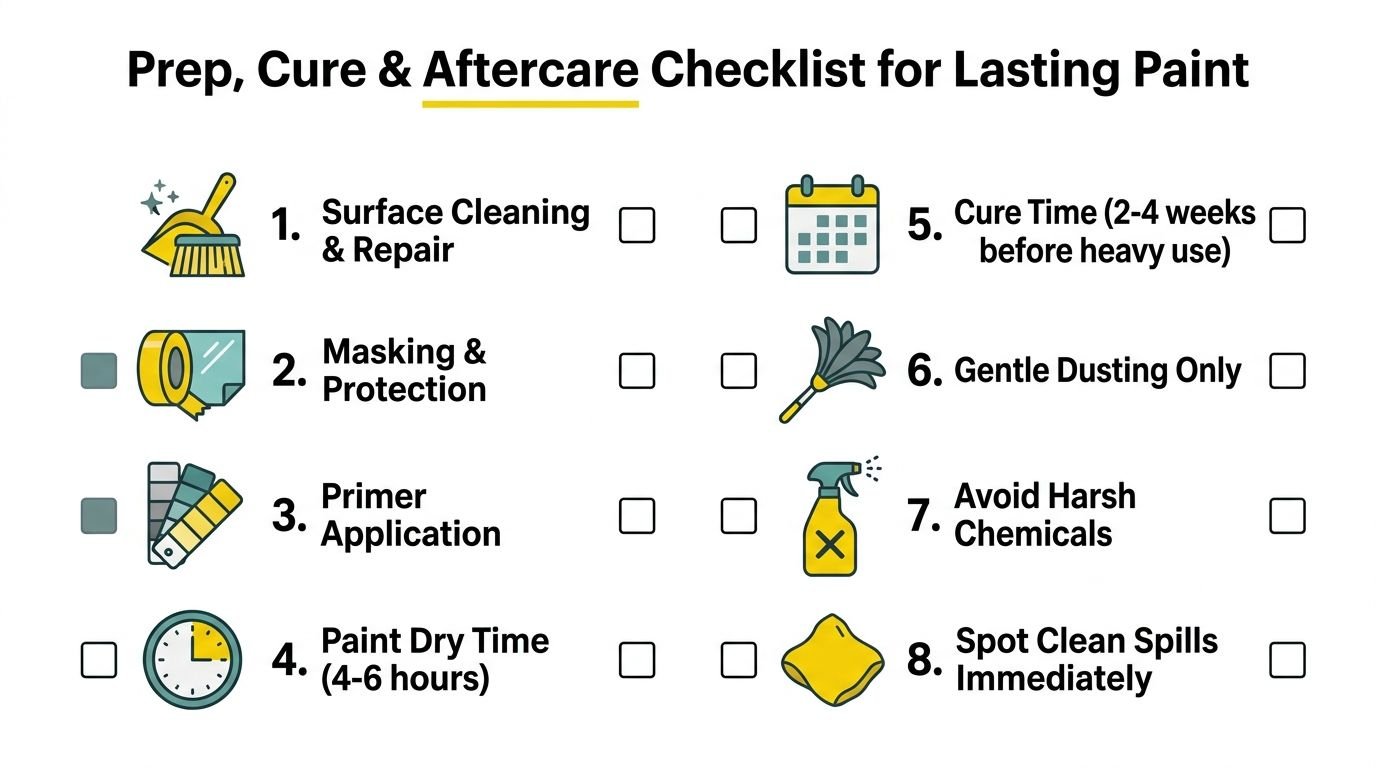
Paint that feels dry to the touch isn't necessarily ready for another coat, and a newly recoated surface isn't fully cured. The product data sheet controls the actual recoat and use windows. Benjamin Moore and Sherwin-Williams product information distinguishes short recoat periods from a full cure that can take two to four weeks, particularly before heavy washing or demanding use.
Keep airflow moving without creating a dusty environment. NRC's standardized benchmark of 23 C, 50% relative humidity, and one air change per hour helps explain why a cold, damp, sealed room may need more patience than the label's ideal conditions. Forced-air heating can also affect how quickly a surface skins over, so the crew should follow the product instructions rather than rely on touch alone.
Bedrooms can often be re-entered overnight when ventilation is adequate and the product instructions permit it. Kitchens and bathrooms need more caution because steam, cleaning, and frequent contact can damage a finish that hasn't cured. Follow the coating manufacturer's instructions and keep ventilation running as practical.
Four habits prevent avoidable damage
- Wait before washing. Give painted walls time to cure before wet cleaning or heavy use.
- Use microfiber. A soft microfiber cloth is safer than abrasive pads or aggressive “magic erasers,” which can burnish or remove sheen.
- Let the painter pull the tape. Tape should come off at the right stage so edges stay clean without lifting fresh paint.
- Record the product details. Keep leftover labels, colour names, sheen, and batch information in case a future touch-up or warranty discussion requires an exact match.
Ontario homeowners can also dispose of leftover residential paint responsibly. Ontario paint recycling guidance says leftover paint can be dropped off for free at more than 400 recycling locations across Ontario, provided it remains in its original, tightly sealed container with labels attached.
For careful prep, product selection, clean application, and practical aftercare guidance, visit Soca Services Painting and request a free estimate for your North York interior. Share your room list, property type, access conditions, and any older or damaged surfaces so the team can recommend a durable painting plan that fits the home.