Table of Contents
- How to Remove Popcorn Ceilings Safely: Key Preparation Steps
- Essential Popcorn Ceiling Removal Tools and Materials
- Wet Scraping Popcorn Ceiling: The Safest Removal Method
- How to Cover Popcorn Ceilings: Finishing and Repair Solutions
Last Updated: June 21, 2026
Popcorn ceilings were popular in Ontario homes built between the 1950s and 1980s, but they’re now among the most requested removal projects for Toronto homeowners. Safe removal is critical, especially in older homes where asbestos-containing materials were common. This guide covers asbestos testing, scraping, repair, and finishing to ensure lasting results.
The key mistake most guides make: they skip the asbestos question. Homes built before 1980 in Toronto, Vaughan, North York, and King City frequently used popcorn texture products containing asbestos fibres. Disturbing these fibres without proper containment and PPE creates a serious health hazard.
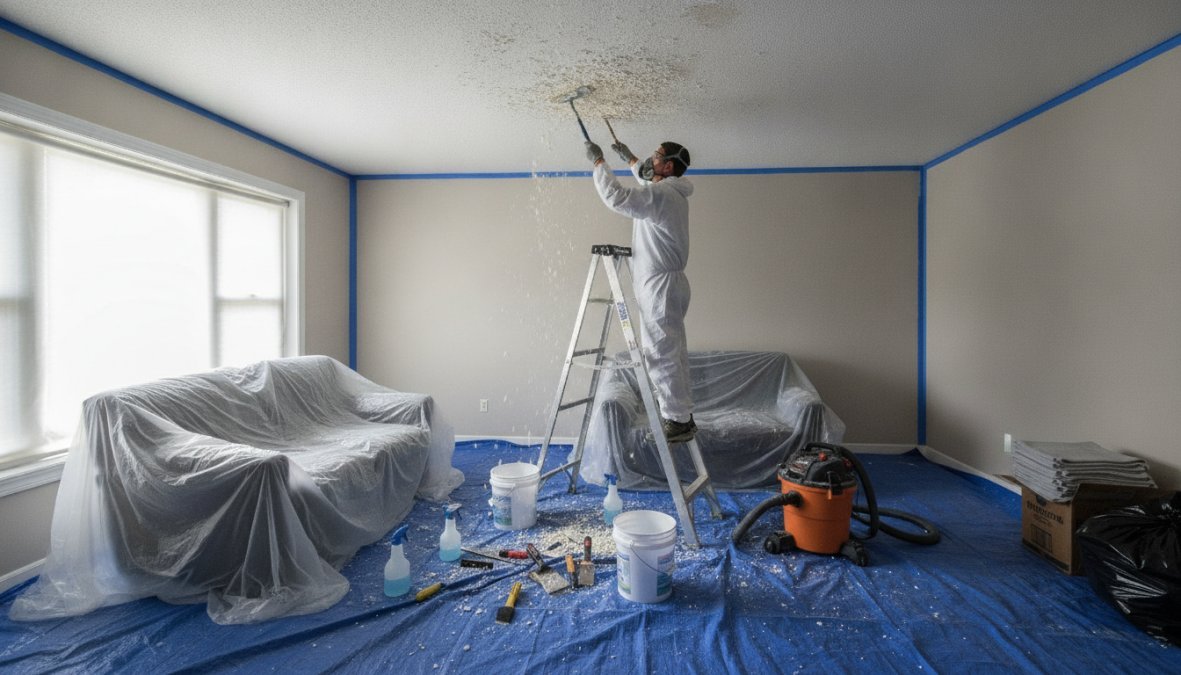
How to Remove Popcorn Ceilings Safely: Key Preparation Steps
Safe removal starts before touching the surface. The critical first step is determining whether your acoustic ceiling contains asbestos.
Test before you touch anything. Homes constructed before 1980 are at highest risk. According to Health Canada’s guidance on asbestos in the home, asbestos fibres were widely used in ceiling texture products until the late 1970s. Collect a small sample using a damp cloth and sealed bag, then send it to a certified laboratory. Do not dry-scrape or sand before you have results.
If asbestos is present, stop. Professional abatement is the only safe option. DIY removal violates Ontario environmental regulations and exposes your family to hazardous materials.
If the test is clear or your home was built after 1980, proceed with this checklist:
- Turn off electricity to the room at the breaker panel and cover all light fixtures and ceiling fans
- Remove all furniture or cover it completely with heavy plastic sheeting
- Lay drop cloths across the entire floor, overlapping edges by at least 30 cm
- Tape plastic sheeting over doorways to contain dust and debris
- Check for lead paint using a lead test kit before sanding
- Put on your respirator (N95 minimum, P100 preferred), safety goggles, and work gloves
Never skip the asbestos test on a pre-1980 home. Dry-scraping an asbestos-containing acoustic ceiling releases microscopic fibres that remain airborne for hours. Ontario regulations require professional abatement for confirmed asbestos-containing materials.
Essential Popcorn Ceiling Removal Tools and Materials
The right tools make the difference between a clean ceiling and damaged drywall. Gather everything before starting.
| Tool / Material | Purpose | Notes |
|---|---|---|
| Garden sprayer | Misting the ceiling surface | Pump-style with adjustable nozzle |
| Putty knife (6-inch) | Detail scraping around edges | Flexible blade preferred |
| Floor scraper (10-12 inch) | Main scraping surface | Long handle reduces neck strain |
| Respirator (P100) | Airborne particle protection | Mandatory for all ceiling work |
| Safety goggles | Eye protection from falling debris | Sealed, not open-vent style |
| Drop cloths | Floor and furniture protection | Plastic sheeting, minimum 4 mil |
| HEPA vacuum | Post-scrape cleanup | Standard vacuums spread fine dust |
| Joint compound | Drywall repair and skim coat | Pre-mixed for easier application |
| Drywall primer | Surface sealing before paint | Required after any skim coat work |
| Stilts or ladder | Reaching the ceiling safely | Stilts improve speed on large areas |
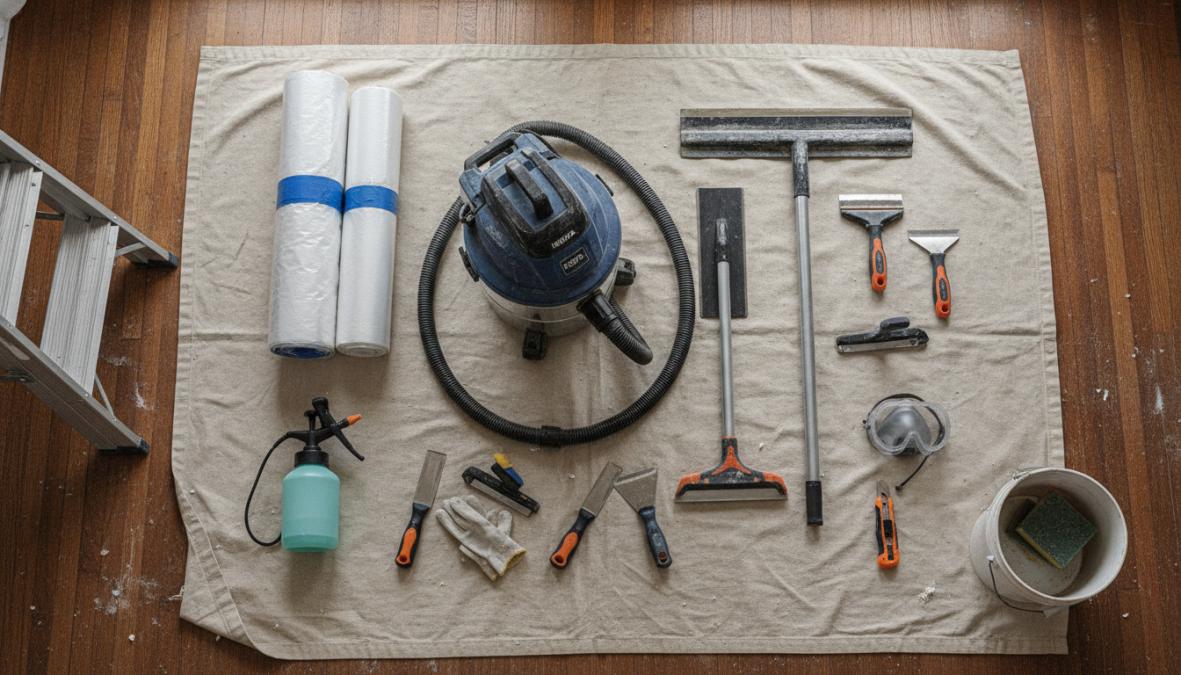
Never use a standard household vacuum after scraping, fine dust passes through standard filters and recirculates. A HEPA vacuum captures particles down to 0.3 microns. Rent a pump-action garden sprayer rather than using a spray bottle; a 2-litre pump sprayer covers a full room in minutes with consistent, even misting.
Wet Scraping Popcorn Ceiling: The Safest Removal Method
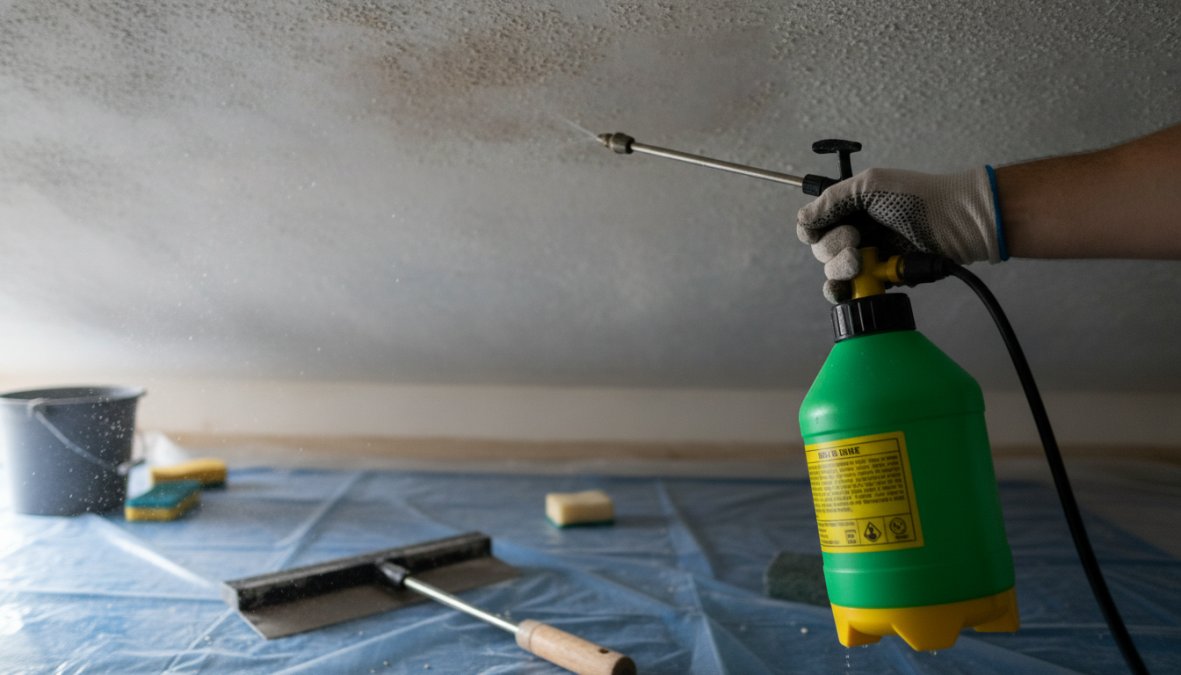
Wet scraping is the safest and most effective method. Misting the texture with water softens the binder, allowing the scraper to glide cleanly rather than tear. Work in 1-metre by 1-metre sections to avoid over-saturating the drywall paper.
Step-by-step wet scraping process:
- Section the ceiling into 1-metre by 1-metre working areas using painter’s tape
- Mist the first section until damp but not dripping (about 30 seconds)
- Wait 2-3 minutes for water to penetrate and soften the binder
- Test a small corner with the putty knife; if texture resists, mist again and wait another minute
- Scrape at a shallow angle (15-20 degrees) using steady forward pressure
- Work in overlapping passes to avoid missed strips
- Switch to the putty knife for edges, corners, and areas around light fixtures
- Move to the next section only after the current one is fully scraped
The water-to-wait ratio is critical. Too little water and the texture tears instead of releasing cleanly. Too much water soaks through the drywall paper, requiring a full skim coat to repair. Dry scraping is faster but generates significant airborne dust and increases inhalation risk.
Wet scraping requires patience. The two-to-three minute wait after misting is not optional. Rushing causes drywall damage that adds hours of repair work before priming and painting.
How to Cover Popcorn Ceilings: Finishing and Repair Solutions
Scraping is only half the job. Post-removal surface preparation determines whether the final paint finish looks professional. Most scraped ceilings need drywall repair before painting, as the scraper inevitably catches the paper face.
Post-removal drywall repair process:
- Sand the entire ceiling lightly with 120-grit sandpaper to knock down raised paper fibres
- Apply a thin skim coat of joint compound over torn or damaged areas using a wide drywall knife
- Feather edges so there’s no visible seam
- Allow joint compound to dry completely (typically 24 hours)
- Sand smooth with 150-grit sandpaper, then wipe with a damp cloth
- Apply drywall primer before finish paint, sealing the joint compound and preventing uneven absorption
Skipping the primer is the most common finishing mistake. Unprimed joint compound absorbs paint differently than surrounding drywall, creating dull spots visible under any light.
Alternative solutions if you’d rather not scrape:
- Skim coat over the texture: Apply two thin layers of joint compound over existing popcorn, creating a smooth surface without removal.
- Install new drywall panels: Attach 6mm drywall directly over the existing ceiling, completely covering the texture.
Once repairs are complete and primer has dried, apply two coats of quality interior ceiling paint with a roller. A flat or matte finish is standard for ceilings because it minimizes light reflection and hides minor imperfections.
For Toronto homeowners who’d rather skip the complexity, professional ceiling removal and repainting is available. Get a free estimate from Soca Services Painting or use the [popcorn ceiling removal calculator(/popcorn-celing-removal-calculator/) | socaservices.ca] for an instant estimate based on your room size and ceiling condition.
Popcorn ceiling removal success depends on preparation far more than scraping itself. Asbestos testing, proper containment, wet scraping technique, and thorough drywall repair are not optional steps. Soca Services Painting has handled ceiling removal and interior painting projects across Toronto, Vaughan, North York, and King City for over a decade. Get Your Free Estimate Today and see what a professionally finished ceiling looks like in your home.
Frequently Asked Questions
How do I know if my popcorn ceiling has asbestos?
Popcorn ceilings installed before the 1980s are more likely to contain asbestos. The only reliable way to know is asbestos popcorn ceiling testing, have a certified professional collect a sample and test it in a lab. Never attempt to remove suspected asbestos yourself. If testing confirms asbestos, hire a licensed abatement contractor. Soca Services can connect you with certified testing professionals in Toronto and surrounding areas.
Is it safe to remove popcorn ceilings myself?
How to remove popcorn ceilings safely depends on whether asbestos is present. If testing shows no asbestos, DIY removal using wet scraping is possible with proper PPE (respirator, safety goggles, drop cloth). However, the process is physically demanding and messy. Many homeowners in Toronto prefer hiring professionals like Soca Services to ensure complete removal, proper cleanup, and a flawless finished ceiling. Get a free estimate to compare DIY costs with professional service.
What is the easiest way to remove popcorn ceilings?
Wet scraping is the easiest and safest method for asbestos-free ceilings. Use a garden sprayer to mist the texture with water, wait 15-20 minutes for moisture absorption, then scrape with a putty knife or floor scraper. Wet scraping reduces dust and makes the texture easier to remove than dry scraping. For large areas or asbestos-containing ceilings, professional removal ensures faster, safer results with proper containment and disposal.
Do I need to wear a respirator when removing popcorn ceilings?
Yes, always wear a HEPA-rated respirator during popcorn ceiling removal, even if asbestos testing is negative. The texture releases fine dust particles that can irritate lungs and airways. Pair your respirator with safety goggles, a drop cloth, and containment measures. A properly fitted N95 or P100 respirator protects against dust inhalation. If asbestos is present, licensed professionals use full containment systems and specialized respiratory protection.
This article was written using GrandRanker