Painting with limewash is more than just a technique; it’s a method for achieving a unique, soft matte finish unattainable with conventional paint. It's an incredibly durable and eco-friendly choice, perfect for adding depth and character to a space. Its breathable quality makes it a fantastic fit for the varied climate experienced across Southern Ontario. This classic technique is making a well-deserved modern comeback.
Why Toronto Homes Are Embracing Limewash Paint
From historic brick homes in Cabbagetown to sleek, modern condos in Mississauga, property owners across the Greater Toronto Area are discovering the appeal of limewash. This isn’t a fleeting design trend. It’s a return to a finish that is not only beautiful but also sustainable and remarkably durable—a perfect match for the region’s diverse architecture.
The magic of limewash lies in how it interacts with the wall. Unlike modern latex or acrylic paints that form a film on the surface, limewash penetrates porous materials. Made from slaked lime, water, and natural pigments, it creates a chemical bond with substrates like plaster, brick, and stone. The result is a finish that becomes part of the wall, so it won’t peel or chip over time.
A Finish Suited For the GTA Climate
For anyone living in the Toronto area, one of the biggest advantages of limewash is its exceptional breathability. Southern Ontario’s climate swings from humid summers to frigid winters, a cycle that can trap moisture inside walls and lead to long-term issues.
Because limewash allows water vapour to pass through, it prevents moisture buildup. Its naturally high pH also makes it a powerful deterrent against mould and mildew. This makes it an outstanding choice for both preserving heritage properties and ensuring healthy indoor air quality in new builds.
Beyond its practical benefits, the aesthetic is where it truly shines:
- Unique Aesthetic: It delivers a soft, chalky matte finish with subtle variations in tone that create a sense of movement and depth.
- Eco-Friendly Composition: Made from natural materials, it’s non-toxic and contains no volatile organic compounds (VOCs).
- Incredible Durability: When applied correctly, it cures back into limestone, creating an incredibly tough surface that only looks better with age.
A Smart Investment for Your Property
The value of using limewash goes beyond its aesthetic appeal. For instance, recent data from California's renovation market revealed that homes with limewashed exteriors saw their value increase by an average of 7.8%. This boost was even more significant in historic neighbourhoods, showing that buyers associate this finish with premium quality and lasting durability. You can explore more about these market trends and the growing demand for authentic limewash finishes.
Choosing to paint with limewash is about more than selecting a colour; it’s about embracing a finish that brings texture, character, and a timeless elegance to a space. It connects modern living with a centuries-old tradition of craftsmanship.
Whether you're looking to carefully restore a century home or add character to a new build, the unique properties of limewash make it one of the smartest choices for discerning property owners in the GTA.
Your Essential Toolkit for a Flawless Finish
Achieving the signature, cloud-like texture with limewash depends heavily on preparation. Skipping prep work is the quickest way to turn a project into a frustrating and costly do-over.
The right equipment is non-negotiable. While a standard roller can be used for primer, applying the limewash itself requires a specific tool to achieve its unique, soft mottling.
- 4-inch Block Brush: This is the primary tool. The wide shape and natural bristles are perfect for holding the thin limewash mixture and applying it in the broad, sweeping strokes that create depth and movement.
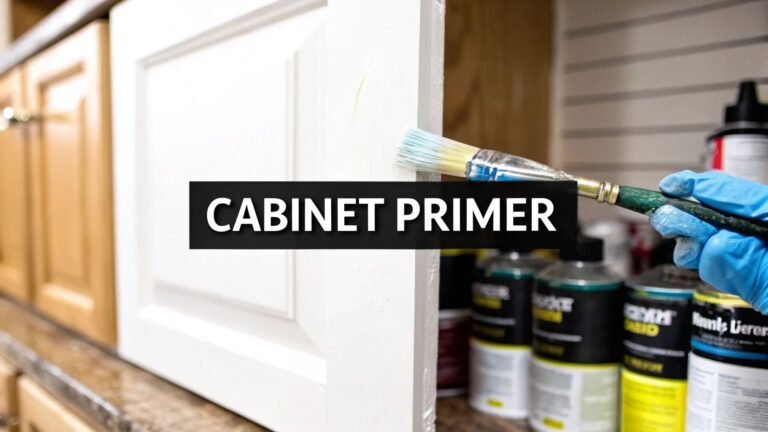
- Mineral-Based Primer: For most walls in Toronto and Mississauga homes, especially painted drywall, a specialized mineral primer is essential. It creates a "breathable" surface that the limewash can chemically bond with.
- Mixing Buckets and a Whisk: At least one clean bucket for mixing and a drill whisk are needed to get a perfectly smooth, lump-free consistency. Stirring by hand is insufficient.
- Standard Prep Tools: Painter’s tape, good-quality drop cloths, and standard cleaning supplies are essential for protecting the space and starting with a clean surface.
If you want a deeper dive into different brushes for your project, our guide on choosing the right paint brushes and rollers has some great insights.
Preparing Your Walls for Limewash
Proper prep is the secret to a finish that is both beautiful and long-lasting. Limewash isn't just a coating; it cures into the surface, so it requires a clean, sound, and properly primed wall to work correctly.
First, inspect the walls. Any nail pops, cracks, or holes need to be filled and sanded smooth. After repairs, a thorough cleaning with a mild soap and water solution is necessary to remove dust, grease, or grime. Allow the surface to dry completely to ensure proper primer adhesion.
Priming is the most critical part of the process, especially for drywall or previously painted surfaces. A standard acrylic primer seals the wall, creating a plastic-like film that limewash can't penetrate. A mineral primer, on the other hand, is designed to create the perfect "tooth" for the limewash to grab onto, allowing it to cure properly instead of just sitting on top.
This checklist helps ensure the right steps are taken for different surfaces commonly found in homes across the GTA.
Limewash Surface Preparation Checklist
This table is a handy reference to make sure you're taking the right steps for your specific wall type.
| Surface Type | Cleaning Method | Required Primer | Key Consideration |
|---|---|---|---|
| Previously Painted Drywall | Mild soap and water, rinse well | Yes, Mineral Primer | This is the most common scenario. The mineral primer is absolutely essential. |
| New, Unpainted Drywall | Wipe down with a damp cloth | Yes, Mineral Primer | Apply after the initial drywall primer/sealer has fully cured. |
| Bare Plaster | Brush off any loose dust | No | Ideal surface. Naturally porous and ready for limewash after cleaning. |
| Unpainted Brick/Masonry | Stiff brush to remove dust/efflorescence | No | Another perfect substrate. Ensure it's completely dry before you begin. |
Bare plaster or unpainted brick are fantastic because they are naturally porous. However, for the vast majority of interior projects in Mississauga or Toronto, a dedicated mineral primer is the key to an authentic, flawless limewash finish. It’s a small investment that protects the work and guarantees a stunning result.
Mastering the Art of Limewash Application
With walls prepped and tools ready, it's time to apply the limewash. This is where a flat wall transforms into a surface with depth, movement, and that signature cloud-like texture. The key is not perfection, but technique.
Getting the Mix and Technique Just Right
First, the consistency of the limewash must be correct. Most products arrive as a thick paste that requires thinning with water. The target consistency is like full cream milk or heavy cream—thin enough for wall absorption but not so thin that it runs excessively. Adhere to the manufacturer's ratios, but small adjustments may be needed.
A critical pro tip: keep stirring the mix every 10-15 minutes with a drill whisk. The lime and pigments are heavy and naturally settle; without constant mixing, the colour will be patchy. This simple step is vital for a uniform finish.
This visual breaks down the essential workflow for a successful project.

As you can see, a clean, properly prepared surface is the bedrock of a professional-looking finish.
The Signature Brushstroke Technique
Limewash application requires a different approach than standard painting. The goal is a soft, multi-directional brushstroke, often called a "cross-hatch" or "cloud" pattern.
Using the block brush, create overlapping "X" shapes and feather the edges. It is best to work in small, manageable sections (about a square metre at a time) to build up subtle variations. Avoid the temptation to overwork an area. The final appearance emerges as the limewash dries and cures, revealing its tonal shifts.
A critical rule is maintaining a 'wet edge.' This means always painting back into the damp edge of the previously finished section. If an edge dries completely, it will create a hard line that is nearly impossible to blend out later.
This technique is also excellent for exterior surfaces. If you're tackling an outdoor project, our guide on painting outdoor brick has some great advice.
Applying Your Coats
The first coat will likely look streaky, uneven, and much darker than expected. This is completely normal. Limewash lightens dramatically as it cures. This first layer acts as a foundation, and its imperfections contribute to the depth of the final finish.
Allow the first coat to dry to the touch—usually a few hours is sufficient—before starting the second. Apply the second coat with the same random, cross-hatching technique. It will go on more smoothly, and this is when the finish truly comes together, enhancing the soft, mottled look that makes limewash so special.
This finish is also practical. The high pH of lime acts as a natural deterrent to mould and mildew. It’s a breathable finish that lets moisture escape. Studies have shown that limewashed surfaces can see 30-40% less surface mould compared to synthetic paints. You can find more details on its regional benefits and eco-friendly properties in this report on limewashing tips.
Curing and Sealing: The Final Touches for a Lasting Finish
After the final brushstroke, the post-application phase begins. This is where the freshly painted surface transforms into the signature, stone-like finish that will last for years.
Unlike modern paints that simply dry, limewash undergoes a chemical change called carbonation. It absorbs carbon dioxide from the air to slowly crystallize and revert to its original form—limestone. This unique process creates an incredibly durable finish that becomes one with the wall.
The process is working when the colour lightens dramatically. A surface that appears dark and patchy when wet will slowly transform over days or weeks into a soft, chalky finish with beautiful, subtle variations in tone.
How the Toronto Climate Affects Curing Time
The duration of the curing process can vary. Here in the Greater Toronto Area, local humidity is a significant factor. A humid summer day in Mississauga, for example, can slow carbonation due to excess moisture in the air. Conversely, the dry, heated air of a downtown Toronto condo in winter might accelerate it. Patience is key; rushing the process can weaken the final finish.
This ancient technique is incredibly durable. The original California Missions—many built almost 250 years ago—still have their protective limewash coatings. Studies on these historic buildings show that the original limewash has a 75% longer lifespan than modern paints used in restorations. You can read more about the incredible durability and modern revival of limewash paint in heritage conservation.
The Big Question: Should You Seal Your Limewash?
After the limewash has fully cured, a decision must be made: to seal or not to seal. The right answer depends on the room's function.
For most spaces like bedrooms, living rooms, or other low-traffic areas, leaving it unsealed is ideal. This preserves one of limewash's best qualities: its breathability. An unsealed wall allows moisture vapour to pass through, helping to regulate indoor humidity and create a healthier home.
However, a sealer is practical in certain situations. It should be considered for walls in:
- High-Traffic Zones: Hallways, mudrooms, and entryways where scuffs and fingerprints are likely.
- Kitchens: A sealer is a must-have for a backsplash or any wall near the stove to guard against grease and food splashes.
- Bathrooms: While limewash is naturally mould-resistant, a sealer in a high-moisture room prevents stains and makes cleaning easier.
If sealing is necessary, it is crucial to select the right product. Use a high-quality, water-based matte or "invisible" sealer designed for mineral-based paints. The goal is to add protection without creating a shine, preserving the beautiful, chalky look.
Finding the Best Limewash Painters in the GTA

While a DIY limewash project can be rewarding, professional application ensures a flawless finish. For larger jobs or to guarantee the best result, hiring an expert is the recommended path.
Finding the right painter in a large area like the GTA requires locating a specialist who understands limewash. This is not standard latex paint; it is a specialized finish that demands a craftsperson with specific experience. A general painter may be a master with a roller, but limewash has its own set of rules regarding application and curing.
Vetting Your Local Limewash Pro
When searching for painters in Toronto or Mississauga "near me," the main goal is to find someone with proven, hands-on experience with this exact finish. The best limewash specialists will be proud of their work and willing to discuss their process.
It is important to ask specific questions to separate true professionals from those with limited experience.
- Portfolio is everything. Ask to see examples of their limewash projects. High-resolution photos are useful, but seeing the work in person is ideal. Look for the signature soft, mottled texture.
- What’s their product of choice? An experienced painter will have preferred brands for limewash and mineral primer and should be able to explain why they favour them.
- How do they prep a painted wall? The answer must include using a specialized mineral primer. Failure to mention this is a major red flag, as limewash will not adhere properly without it.
- Talk technique. Ask them to describe their application method. They should mention using a proper limewash or block brush and applying the paint in organic, cross-hatch strokes. If they suggest using a roller for the limewash itself, they lack the necessary expertise.
A true professional will welcome these questions. Your attention to detail shows you respect the craft and are serious about a quality result. Their confidence in answering is often the best sign you’ve found the right expert.
Understanding Quotes and Contracts
After narrowing down your list, it's time to review quotes. A proper estimate for a limewash job will be more detailed than a standard painting quote. It should break down the specific products being used—from the primer to the final limewash coats—and clarify the number of coats planned.
Ensure any service agreement clearly outlines:
- The full scope of work, including all surface preparation.
- The brand and type of limewash, primer, and any sealers.
- A realistic project timeline from start to finish.
- Clear payment terms, along with proof of liability insurance and WSIB coverage.
Reviewing these details protects your investment and ensures clear expectations. For a reliable starting point, a curated directory of vetted local painters in the GTA can connect you with specialists who have the right expertise. Ultimately, hiring the best limewash expert guarantees that beautiful, authentic finish that only improves with age.
Your Top Limewash Questions Answered
As limewash gains popularity from Mississauga to downtown Toronto, it's natural to have questions. Understanding its unique qualities is the first step to a beautiful result. Here are the most common questions from homeowners in the GTA, with straightforward answers.
What's the Real Cost of Limewash Painting in the GTA?
Budget is a primary consideration. While limewash material can cost more than standard acrylic paint, the main difference is in the application. A professional limewash job in the Toronto area typically costs 20-50% more than a conventional paint project. This is because it is a craft that requires multiple coats and a specific technique.
The upside is its incredible durability, which often means it outlasts other paints, providing better long-term value. For a DIY project, the primary expenses will be the limewash itself, a quality block brush, and the essential mineral primer.
Durability plays a huge role in the total cost over time. To get a better sense of this, you can learn about how long different types of paint last in our detailed guide, which helps put the initial investment into perspective.
Is Limewash a Good Choice for Kitchens and Bathrooms?
Yes, limewash can be used in moisture-prone rooms. In fact, it's a fantastic option. Thanks to its high pH, limewash is naturally resistant to mould and mildew, a major advantage in these environments.
However, it is important to remember that unsealed limewash is not scrubbable like modern paints. For walls exposed to direct water or grease—such as a backsplash behind a sink or stove—it is best to apply a compatible matte sealer. This provides protection from stains and water spots without sacrificing the organic look.
What Are the Most Common DIY Mistakes to Avoid?
For those undertaking a DIY limewash project, a few common mistakes can lead to frustrating results. Knowing them beforehand makes a significant difference.
Here are the three biggest pitfalls:
- Skipping the mineral primer. This is the most common and costly mistake on previously painted walls, leading directly to adhesion failure.
- Trying for a perfect, uniform coat. The appeal of limewash is its subtle variation and texture. Forcing it to look perfectly even defeats the purpose and erases its character.
- Losing the 'wet edge'. Allowing a section to dry before blending the next one into it will result in visible lines. Work in small, connected areas to maintain a seamless finish.
How Do I Clean and Maintain Limewashed Walls?
Maintenance for limewashed walls is straightforward. The finish is incredibly durable and rarely peels or chips. For general upkeep, light dusting or a gentle wipe with a soft, damp cloth and plain water is sufficient. It is crucial to avoid all harsh chemical cleaners, as they will damage the finish.
If the wall is sealed, a mild, pH-neutral soap can be used for tougher spots. For a small scuff on an unsealed surface, a touch-up can often be done by dabbing a bit of diluted limewash onto the area and feathering the edges.
Ready to bring the timeless beauty of limewash to your home without the guesswork? The expert team at Soca Services Painting specializes in professional limewash application across Toronto and the GTA, ensuring a flawless, durable finish. Visit us at https://www.socaservicespainting.com to get your free estimate today.