

Painting your outdoor brick is a permanent move, but it's one that can totally transform your home's exterior. It delivers a modern, clean look while also adding a crucial layer of protection against the elements. The absolute best way to get a successful, long-lasting finish is by choosing a breathable, high-quality masonry paint. This allows any trapped moisture to escape, which is vital for preventing the chipping and peeling that can ruin the look down the road.
Is Painting Your Outdoor Brick a Good Idea?
Let's be clear: deciding to paint your brick is a big deal. It will dramatically boost your home's curb appeal, but it also means signing up for a new maintenance routine. This isn't just a colour change; you're fundamentally altering the character and performance of your home's exterior.
For many homeowners I've worked with, especially in places like Toronto and Mississauga, a fresh coat of paint is hands-down the best way to update a dated or mismatched brick facade. It's the perfect solution for unifying additions with the original structure, hiding old repairs, or just bringing the entire property into a more contemporary style. If you're looking for the best brick painters near you in the GTA, understanding the process is the first step.
Weighing the Pros and Cons
The biggest win is the visual transformation. That tired, dated orange or red brick can become a crisp white, a sophisticated charcoal, or a welcoming neutral tone, instantly giving your home a major facelift. But it's not just about looks. A proper paint job acts as a protective shield against weathering, dirt, and even moisture getting in.
Of course, there's a trade-off. Natural brick is famous for being virtually maintenance-free. Painted brick? Not so much. A professionally applied, high-quality paint job can last for many years, but eventually, it will need to be repainted to keep it looking sharp and doing its job.
Here's the most critical piece of advice I can give: you must ensure the brick can breathe. Using the wrong type of paint that traps moisture is the number one reason these projects fail. It leads to bubbling, peeling, and can even cause the brick itself to spall and crumble from freeze-thaw cycles in our GTA climate.
Key Considerations Before You Start
Before you even think about picking up a brush, you need to understand exactly what you're getting into. A fantastic result comes down to two things: meticulous prep work and the right products.
- Brick Condition: First, get up close and personal with your walls. Look for any cracks, crumbling mortar, or signs of efflorescence (that white, powdery stuff). All of these issues must be professionally repaired before you paint. Slapping paint over an unstable surface is just asking for trouble.
- Paint Choice: This is non-negotiable. Regular exterior house paint will not work on brick. You need a specialty masonry or brick paint that is vapour-permeable. This lets moisture escape from inside the porous brick instead of getting trapped behind a film of paint.
- Long-Term Maintenance: Be honest with yourself. Are you ready for the upkeep? While a pro job can last well over a decade, it is a recurring cost that you simply don't have with natural, unpainted brick.
When all is said and done, painting your brick can be one of the most impactful home makeovers you can undertake, as long as you do it the right way from the very start.
Gathering Your Essential Tools and Materials
Getting a professional, long-lasting finish on exterior brick comes down to having the right gear from the start. Trust me, showing up with high-quality supplies is the one thing that separates a paint job that lasts a decade from one that starts peeling after its first rough Canadian winter. We’re not just talking about any old brush and roller; we need tools specifically designed to handle a tough, porous surface like brick.
There's a reason the market for architectural coatings is so massive—homeowners know a quality finish matters. This is doubly true for exterior brick, where the right application and materials are everything for durability. It’s no surprise that professional painters account for roughly 63% of paint sales; they know that skimping on tools is a recipe for a callback. You can read more about the state of the U.S. paint and coatings industry to see just how critical quality application is.
Your Core Application Arsenal
First things first, let's talk about how you’re going to get the paint from the can to the wall. Brick is incredibly textured and drinks up paint, so your choice of applicator is more important here than almost any other surface. This is not the time to reuse those old tools from your last interior project.
- A High-Quality Synthetic Brush: Get yourself a good 2.5 to 3-inch angled sash brush. This will be your go-to for all the detailed work—cutting in around windows, doors, and downspouts. A quality synthetic bristle holds its shape, carries more paint, and gives you a much cleaner line.
- A Thick-Nap Roller: For the large, flat expanses of brick, you'll need a roller with a seriously thick nap. I recommend at least a ¾-inch (19mm) nap, but for really coarse, older brick, a 1-inch (25mm) nap is the way to go. This depth is what allows the roller to really push paint into every nook, cranny, and mortar joint.
- A Paint Sprayer (Optional but Recommended): While not strictly necessary, a sprayer can be a game-changer. It delivers an incredibly even, almost factory-like finish and saves a ton of time. Be warned, though—it has a steep learning curve and requires meticulous masking to protect your roof, windows, and garden from overspray.
Must-Have Prep and Safety Gear
Painting is the fun part, but the real work—the work that makes or breaks the job—is in the preparation. Having the right prep gear ensures you're creating the perfect canvas for the paint to stick to, which is vital whether you're in the GTA or anywhere else.
Here’s the simple truth: skimping on prep is the fastest way to guarantee your paint job will fail. Invest the time and a little extra money here, and your painted brick will look great for years.
Here's what you'll need before you even think about opening a can of primer:
- Wire Brush: This is non-negotiable for scrubbing away any loose mortar, flaking paint, or stubborn efflorescence (that chalky white residue).
- Pressure Washer: The goal is a perfectly clean surface. A pressure washer is the most efficient way to blast away years of built-up dirt, grime, and mildew. If you don't have one, a hose with a stiff-bristled brush will work, but it'll take more elbow grease.
- Masonry Repair Compound/Caulk: Carefully inspect your mortar joints for any non-structural cracks. Filling these gaps with a quality masonry caulk is crucial for preventing water from getting trapped behind your fresh paint.
- Drop Cloths and Painter’s Tape: Protect your pathways, shrubs, and trim. A professional-looking job is a clean one.
Before you head to the hardware store, it helps to see everything laid out. I’ve put together a checklist to make sure you don’t forget anything critical. Getting this right from the beginning saves you from making extra trips and ensures the project goes smoothly.
Your Brick Painting Project Checklist
| Step | Specific Tool/Material | Why It's Essential for Brick |
|---|---|---|
| 1. Cleaning | Wire Brush & Pressure Washer | Removes efflorescence, loose mortar, and dirt for maximum paint adhesion. |
| 2. Repair | Masonry Caulk/Repair Compound | Seals cracks to prevent water intrusion, which causes blistering and peeling. |
| 3. Protection | Drop Cloths & Painter's Tape | Protects non-brick surfaces from paint splatter and overspray for a clean finish. |
| 4. Priming | High-Quality Masonry Primer | Seals the porous brick, blocks stains, and creates a uniform surface for the topcoat. |
| 5. Application | 1-inch Nap Roller & Angled Brush | The thick nap pushes paint into deep mortar joints; the brush handles precise edges. |
| 6. Paint | 100% Acrylic Latex Paint (Elastomeric) | Offers the best flexibility and breathability, allowing moisture to escape the brick. |
| 7. Safety | Goggles, Gloves, & Mask | Protects you from cleaning chemicals, paint fumes, and airborne particles. |
Having these specific items on hand will make all the difference. Remember, the quality of your tools and materials directly impacts the quality and lifespan of your finished project. It's an investment that pays off.
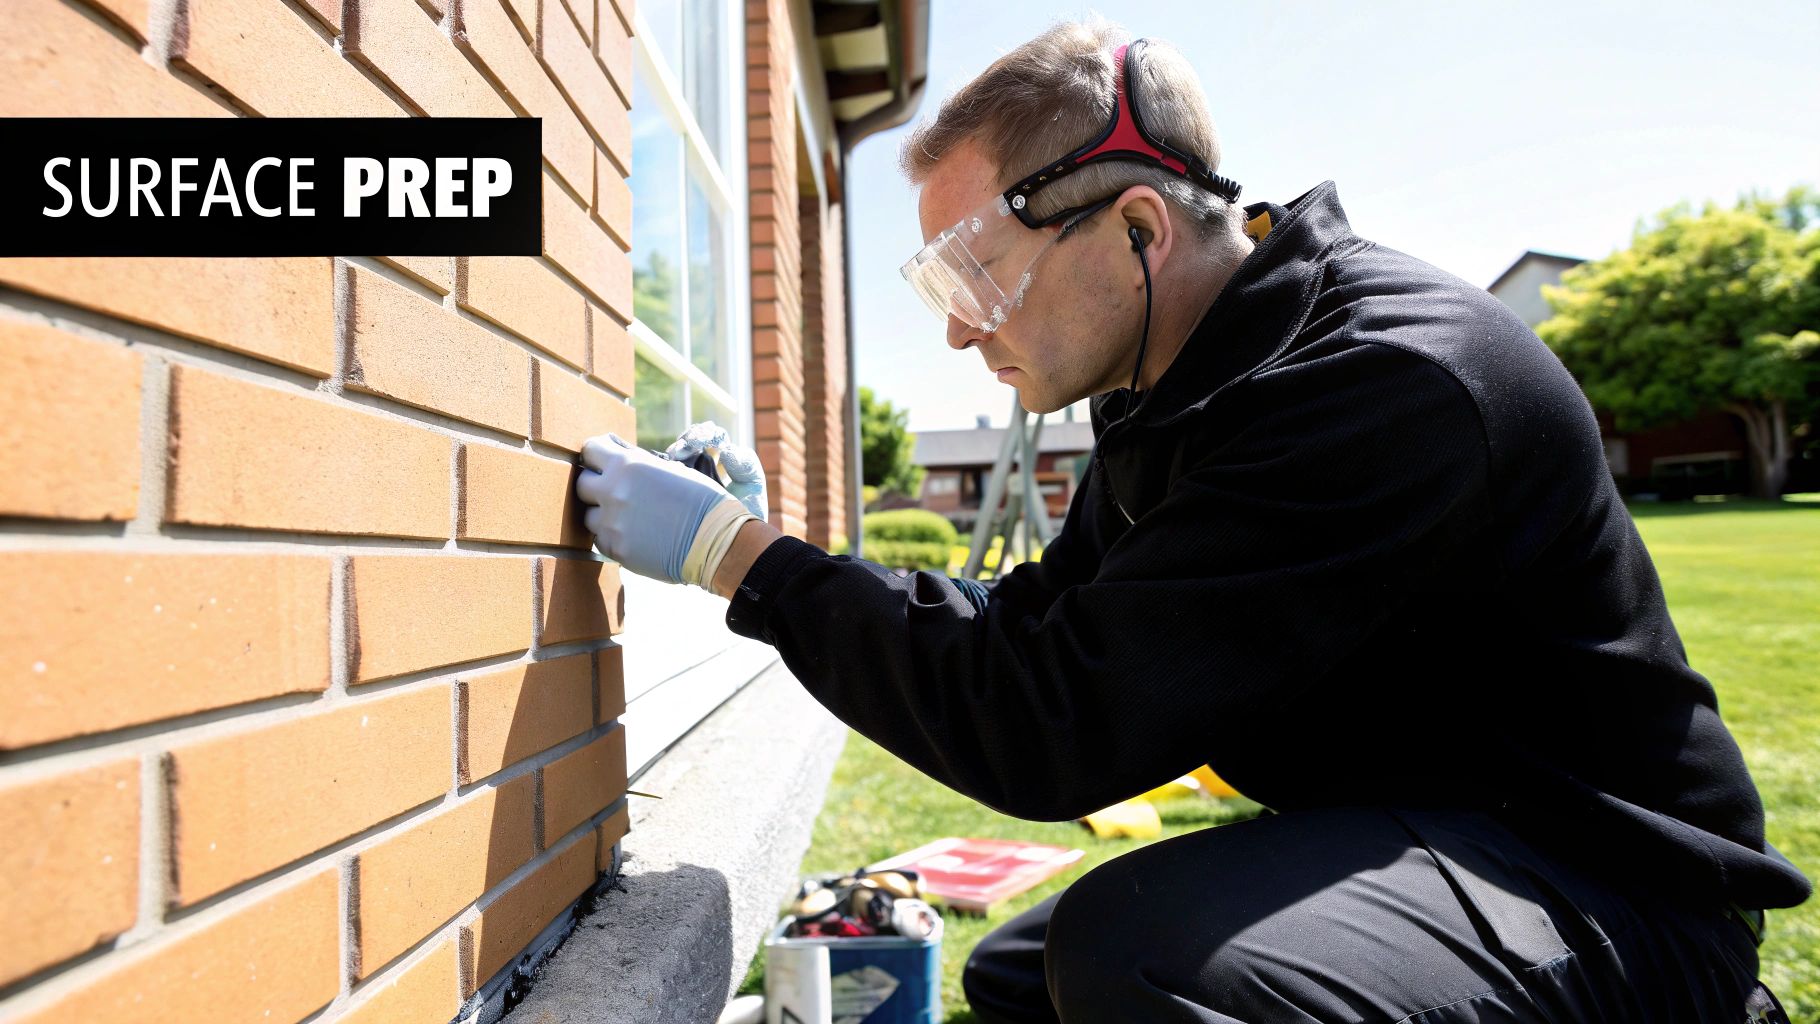
Mastering Surface Prep for a Flawless Finish
I can't stress this enough: rushing the prep work is the single biggest mistake you can make when painting exterior brick. I’ve seen it countless times. Proper preparation isn't just a step you tick off a list; it's 90% of the job. It’s what determines whether your paint peels after one brutal Toronto winter or looks fantastic for a decade. This is where you create the perfect canvas for the primer and paint to grab onto and hold tight.
A clean, sound surface isn't just a good idea—it's completely non-negotiable. Start by giving your brick and mortar a really good look-over. You're hunting for any signs of trouble that could sabotage your paint job, from simple dirt and grime to more serious issues like crumbling mortar.
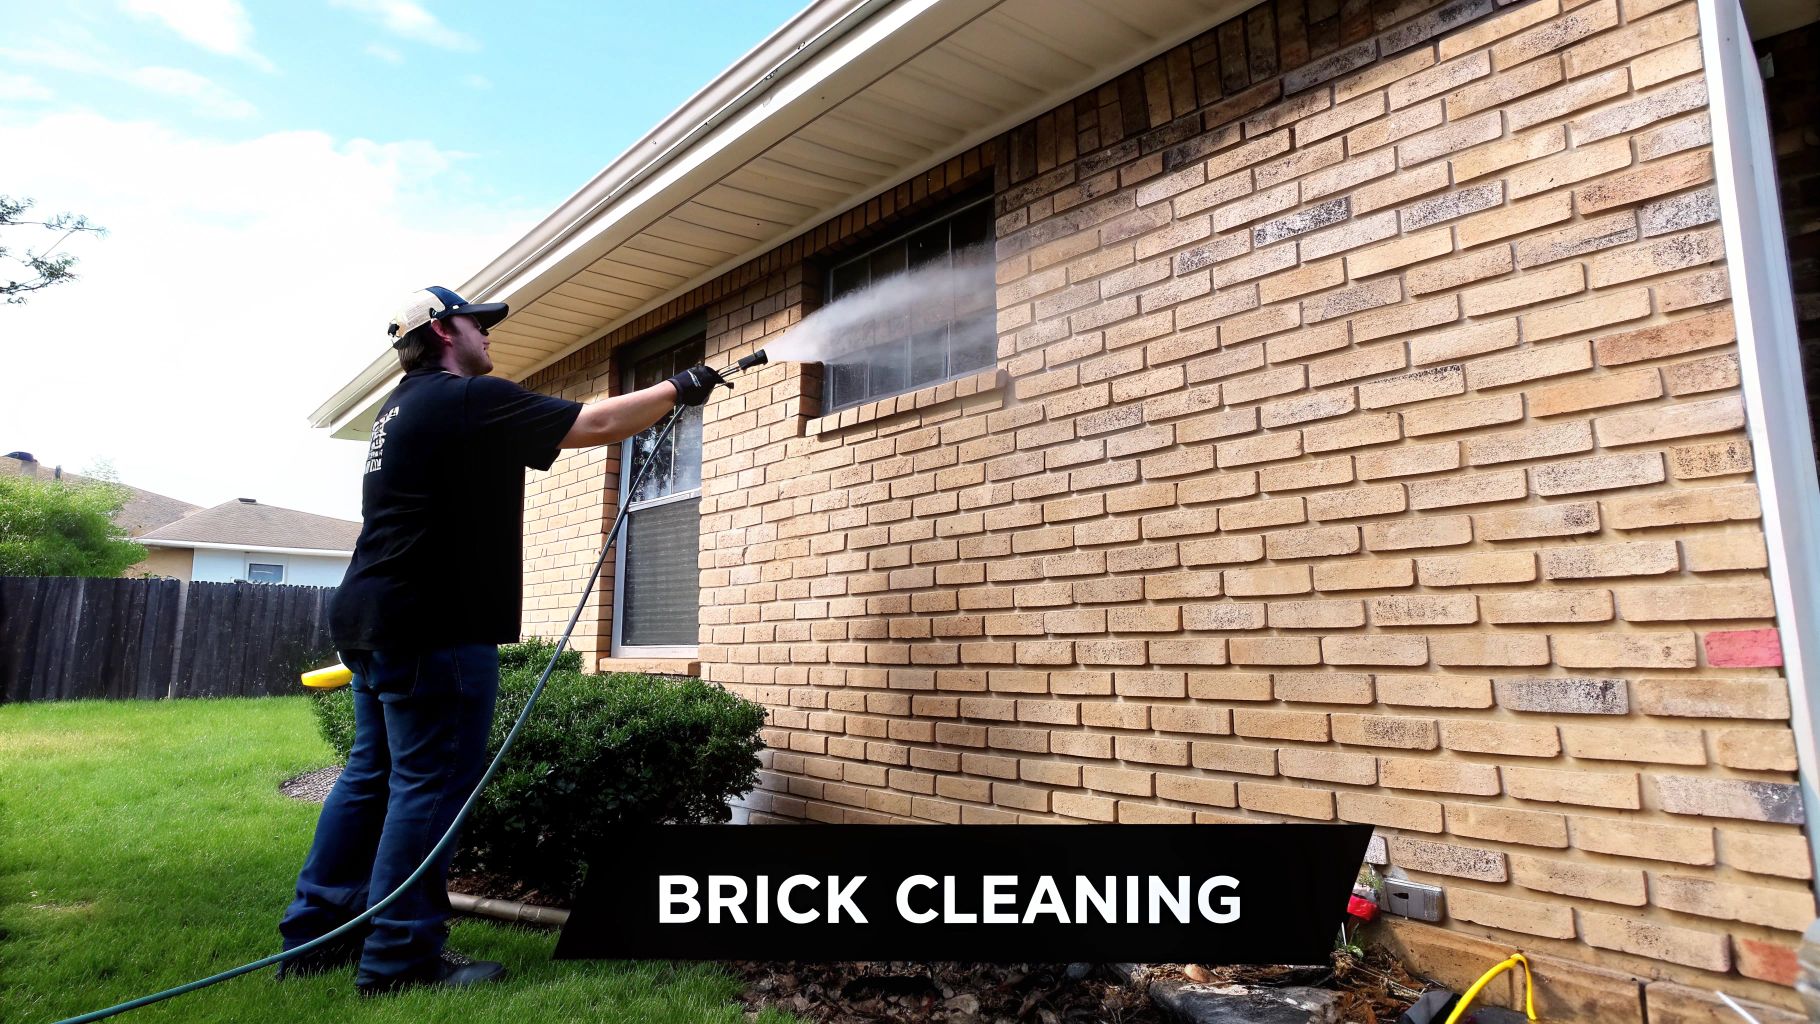
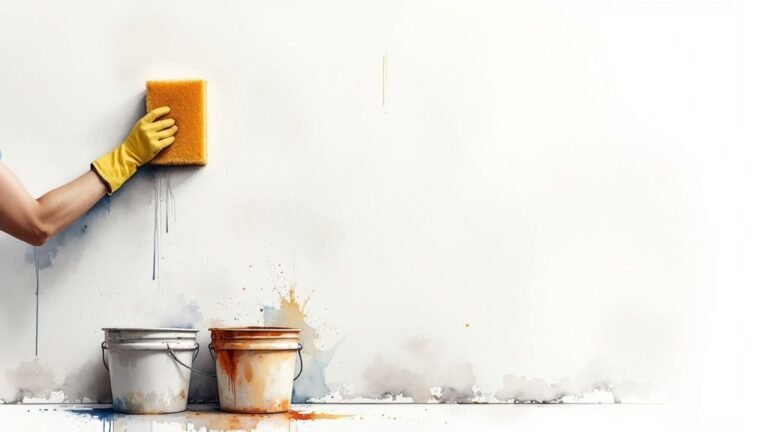
Cleaning Without Damaging Your Brick
First things first, let's get that brick sparkling clean. For most homes, a pressure washer on a low to medium setting (think around 1,500 PSI) does a brilliant job of blasting away years of built-up grime. The key is to keep the nozzle moving and stay a good distance from the wall—get too close or hold it in one spot, and you risk chewing up the mortar.
Notice any stubborn green or black patches? That's almost certainly mildew.
- Tackling Mildew: Whip up a simple solution of one part household bleach to three parts water. Put it in a garden sprayer, hit the affected areas, and let it work its magic for about 20 minutes. Just don't let it dry completely. Then, give it a good scrub with a stiff-bristled brush and rinse everything off thoroughly.
- Dealing with Efflorescence: If you see a chalky white powder, that's efflorescence. It's just salt deposits left behind as moisture evaporates from the brick. Often, a stiff wire brush and some plain water are all you need to get rid of it. If it's being particularly stubborn, you might need to grab a specialized masonry cleaner.
The most critical takeaway here is this: never, ever paint over a dirty or compromised surface. Painting over dirt, mildew, or efflorescence is like building a house on a foundation of sand—it’s guaranteed to fail.
Repairing Mortar and Ensuring a Dry Surface
Once the brick is clean, let it dry out completely and then do another detailed inspection. Pay close attention to the mortar joints between the bricks. Are there any cracks, gaps, or spots where the mortar looks like it's crumbling away?
Even tiny cracks can turn into huge headaches. They let water sneak in behind the paint, which then freezes and expands in the cold Mississauga weather, literally pushing the paint right off the surface. Use a high-quality, paintable masonry caulk or a specific mortar repair compound to fill all those gaps. This gives you a solid, uniform wall to work with.
After all that cleaning and repairing, the brick has to be bone-dry before a drop of primer touches it. This can take several days, especially if it’s humid outside.
If you’re not sure, there's a simple moisture test you can do. Tape a small plastic sandwich bag tightly to the brick on all four sides. Come back in 24 hours. If you see condensation inside the bag, the brick is still holding too much moisture. Wait another day and test it again. A little patience at this stage will save you from a world of hurt and a failed paint job down the line.
This quick visual guide outlines the essential phases for achieving a durable paint finish, from testing your coverage to applying the final coats.
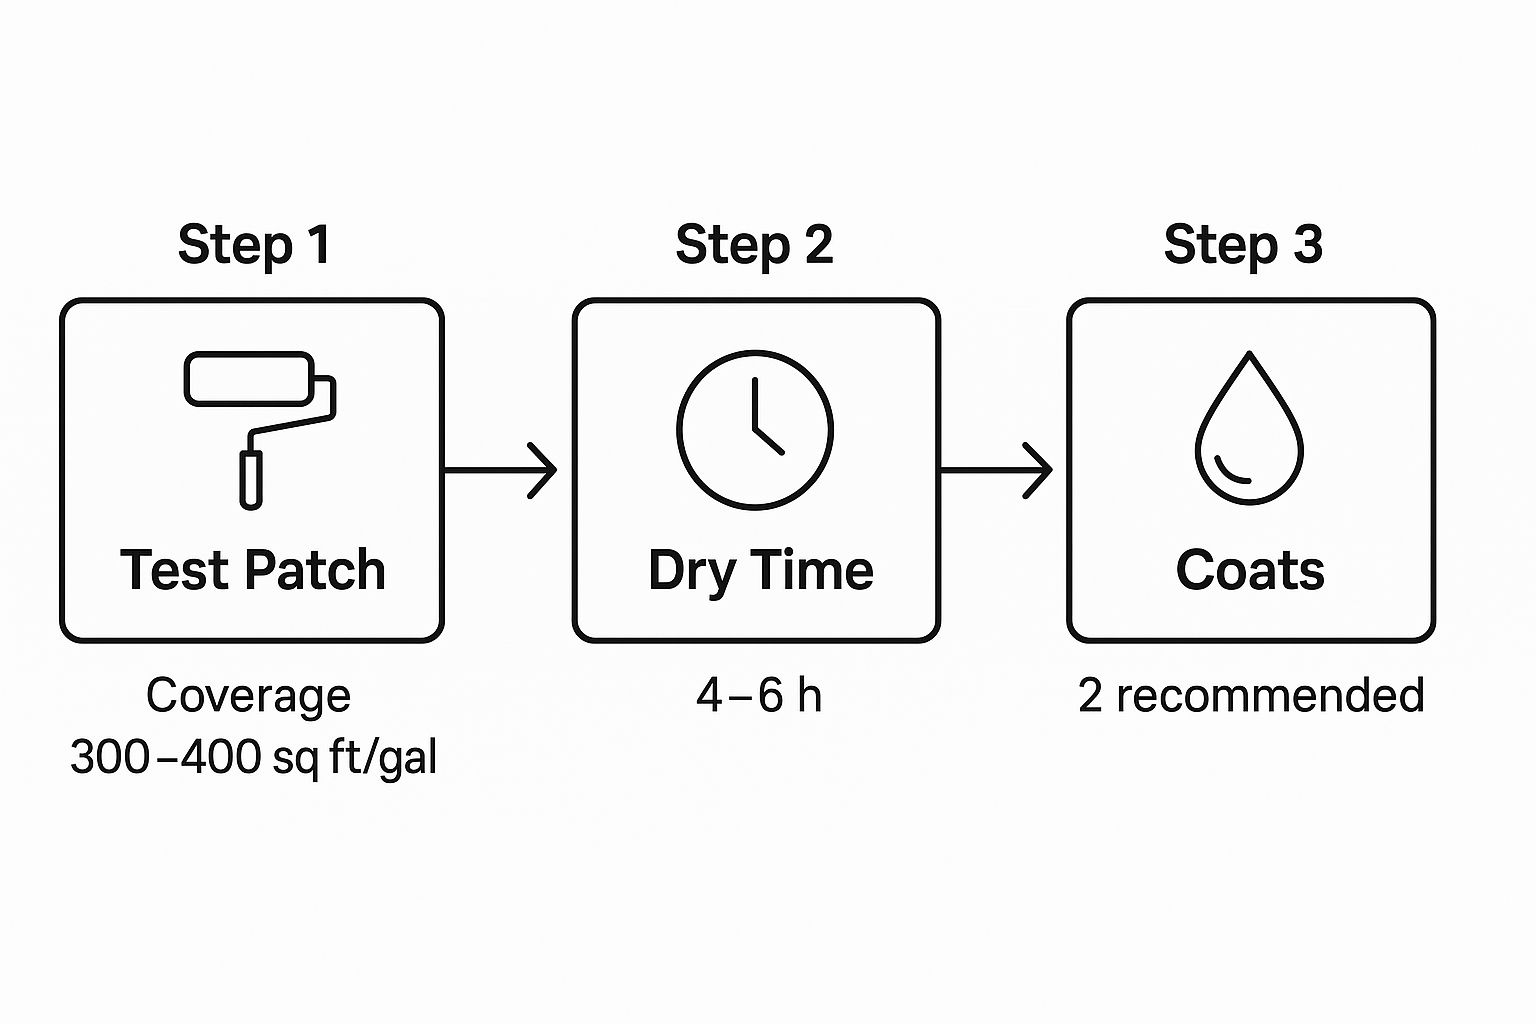
This process flow highlights that achieving a professional result involves more than just application; it requires planning for dry times and multiple coats.
Picking the Perfect Primer and Paint for Your Brick
Walking into a paint store and seeing the endless aisles of options can be intimidating. But here's the good news: when you're painting exterior brick, the choices get a lot simpler. If you just grab a can of standard exterior paint, you're setting yourself up for a real headache down the road. The key to a finish that looks great and actually lasts is using products designed specifically for masonry.
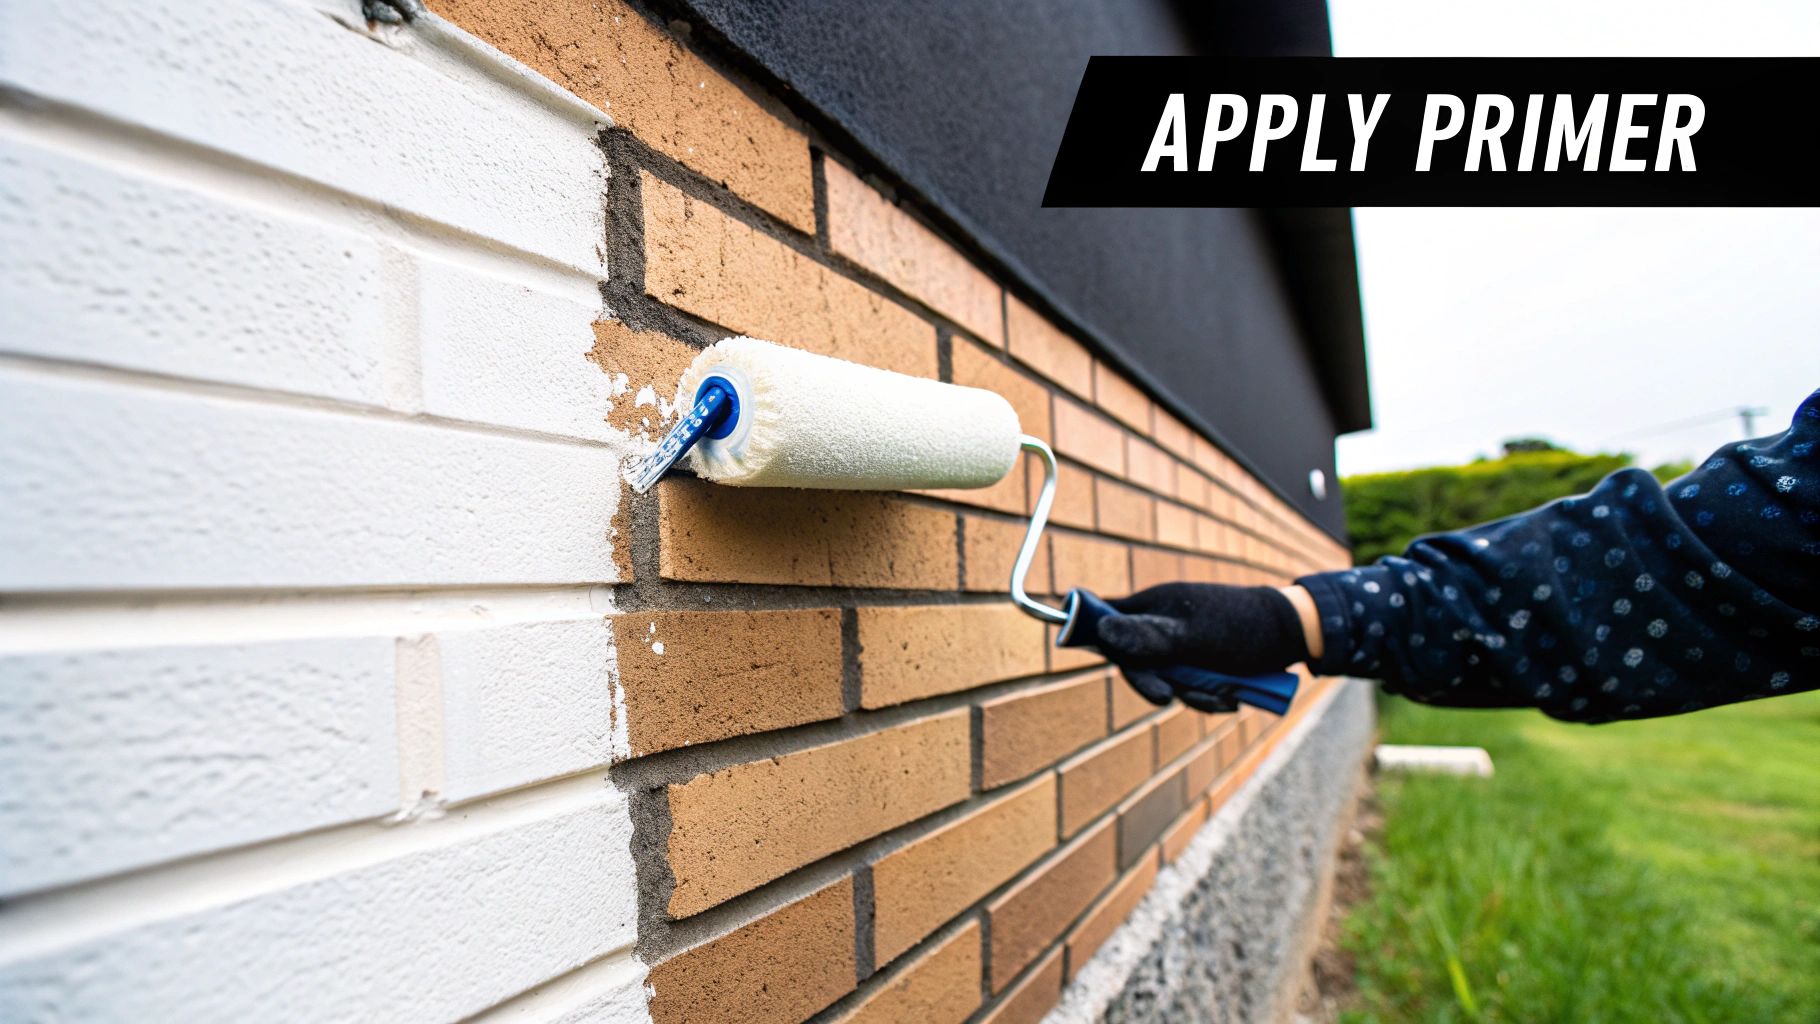
It all begins with the right primer. Brick is a bit like a sponge—it's incredibly porous. If you were to apply a topcoat directly, the brick would just drink it up, leaving you with a splotchy, uneven finish that takes coat after coat to fix. That's why a dedicated masonry conditioner or primer is non-negotiable. This stuff seals the surface, creating a uniform base for your paint to stick to, ensuring a strong bond and saving you a lot of paint in the process.
Why "Breathable" is the Most Important Word
Once you've primed, the next big decision is the paint itself. And if there's one word you need to remember, it's breathability.
Brick has to breathe. It’s a natural process for moisture to move through it. If you slap on a paint that traps that moisture, you’re creating a ticking time bomb. The water gets stuck behind the paint film, and eventually, it will cause blistering, peeling, and chipping.
This is especially true for homes across the Greater Toronto Area, from Mississauga to downtown Toronto. Our climate’s constant freeze-thaw cycles are brutal. Any moisture trapped in your brick will turn to ice, expand, and literally push the paint right off the surface. It’s a recipe for disaster.
This is exactly why you need to steer clear of oil-based paints and even some standard acrylic formulas. You need a coating that allows water vapour to escape.
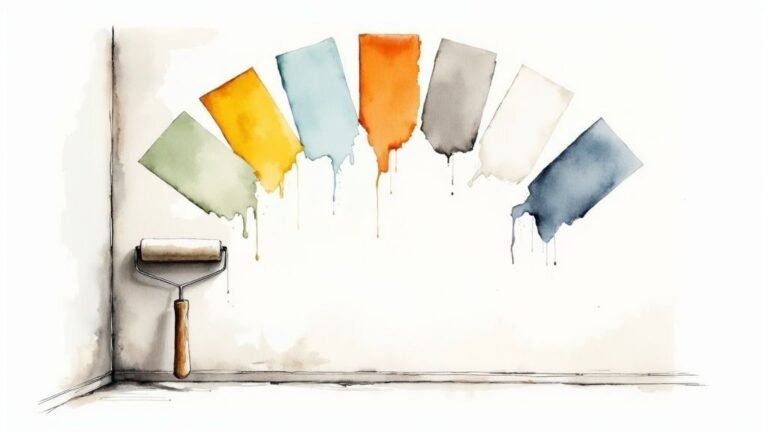
Elastomeric vs. 100% Acrylic Latex Paint: What's the Best Difference?
When you start looking at breathable paints, you’ll usually find two main contenders. They both work, but they have different strengths, making one the best choice for certain situations.
- 100% Acrylic Latex Paint: This is the workhorse for most residential brick painting. It’s got fantastic adhesion, holds its colour well, and most importantly, it's breathable. It also has enough flex to expand and contract with minor temperature swings.
- Elastomeric Coatings: Think of this as the heavy-duty option. It’s a much thicker paint that forms a waterproof, yet still breathable, membrane over the brick. It's brilliant for filling in hairline cracks and offers incredible protection against heavy, wind-driven rain.
So, which one is for you? For most homeowners in the GTA, the best choice is a top-quality 100% acrylic latex paint made for masonry. It gives you the durability and breathability you need for our climate without the extra expense and thickness of an elastomeric coating.
This push for specialized coatings is part of a bigger picture. The global market for brick cladding systems was valued at around $248.9 billion in 2023 and is on the rise. People are investing more in making their homes durable, and the right paint is a huge part of protecting that investment. As you can read in this report on the brick cladding systems market on grandviewresearch.com, protective coatings that handle moisture and weather are essential.
At the end of the day, spending a bit more on the right products is an investment in your home. By starting with a quality masonry primer and finishing with a breathable 100% acrylic latex topcoat, you're making sure your freshly painted brick will stand up to the elements and look fantastic for years to come.
Pro Application Techniques for a Smooth Finish
With all the painstaking prep work done, we finally get to the fun part: laying down some colour. This is where you see all that effort pay off, as your home gets a fresh, professional-looking coat that will protect it for years to come. The trick is to be methodical and take your time, from the first brush stroke to the very last.
This is often the point where homeowners in places like Mississauga or the wider GTA decide to bring in a professional. The demand for skilled painters has been climbing for over a decade. In some regions, painting businesses are booming—in California alone, there are around 33,860 of them operating as of 2025. This just goes to show how much people value a quality finish, especially for a tricky job like exterior brick. You can get more insights on the state of the painters industry on ibisworld.com.
Cutting In for Those Crisp, Clean Lines
Before you even touch a roller, you have to create a sharp border. We call this "cutting in." It means taking a quality angled brush and carefully painting all the edges where a roller just can't get a clean line.
You’ll be focusing on the areas around:
- Window and door frames
- Downspouts and utility boxes
- Soffits and fascia boards
Here's a tip: only dip your brush about a third of the way into the paint. That gives you more control. Then, use a smooth, steady hand to apply the paint along the trim. This creates a neat "frame" for you to roll up against, so you don't end up with a messy finish or paint all over your trim. It takes a bit of patience, but it's absolutely non-negotiable for a professional look.
Mastering Your Roller or Sprayer
Once your edges are looking sharp, you can move on to the main walls. Whether you've opted for a roller or a sprayer, the goal is the same: consistent, even coverage.
Rolling Like a Pro
Using a roller on a rough surface like brick is a bit of an art. Don't just dunk it in the tray and start slathering. First, make sure your thick-nap roller is evenly loaded with paint. Start by painting a big "W" or "M" on the wall, about a metre wide. Then, fill it in with straight, slightly overlapping strokes, all without lifting the roller from the wall. This technique gets paint deep into the mortar joints and stops drips before they start.
The biggest rookie mistake is trying to get it all done in one thick, heavy coat. That’s a one-way ticket to drips, a blotchy finish, and paint that peels later. A true professional finish is always built with two thin coats, with proper drying time in between. It creates a much stronger and more durable result.
Using a Sprayer for Speed and Flawlessness
A paint sprayer can give you a stunningly smooth finish in a fraction of the time, but it takes a steady hand. You need to keep the nozzle a consistent 10-12 inches away from the brick. Move in a steady, sweeping motion, making sure to overlap each pass by about 50%. This is key to avoiding light patches or heavy runs. And always, always be aware of the wind—overspray can travel a surprising distance.
The Final Touches: Cleanup and Curing
After that final coat is on, you’re in the home stretch. While the paint is still a little bit tacky, carefully peel off your painter's tape. If you wait until it's bone dry, you risk pulling off chunks of your new paint job with it. Then, give your brushes, rollers, and sprayer a thorough cleaning based on the paint manufacturer's directions.
Finally, you have to be patient and respect the cure time. The surface might feel dry to the touch in just a few hours, but it can take several weeks for the paint to fully cure and reach its maximum toughness. During this time, try not to lean ladders, bikes, or anything else against the brick. Let it harden up properly, and your hard work will result in a beautiful finish that lasts.
Your Top Questions About Painting Outdoor Brick Answered
Even with a step-by-step guide, it's completely normal to have a few questions pop up. After all, painting your home's brick is a big commitment, and you want to feel confident you're doing it right. Let's tackle some of the most common queries we get from homeowners.
Getting these details sorted out is key. Remember, you're not just changing the colour—you're adding a vital layer of protection to your home that needs to last.
How Long Will Painted Brick Actually Last?
This is usually the number one question, and for good reason. When the prep work is done right and you use top-tier, breathable paint, you can expect the finish to hold up for 7 to 15 years.
Now, your local climate plays a big role here. In places like Mississauga and across the GTA, the harsh freeze-thaw cycles we get every winter can be tough on any exterior surface, potentially shortening that lifespan a bit. The single best thing you can do to get the most years out of your paint job is to be meticulous with the preparation. It's all about preventing moisture from getting trapped underneath, which is what causes paint to fail from the inside out.
What’s the Best Time of Year to Paint Brick?
Timing is everything when it comes to exterior painting. You're looking for a sweet spot of dry weather, low humidity, and moderate temperatures for the best results.
Try to schedule your project for a day when the forecast is holding steady between 10°C and 29°C (50-85°F). It’s also a good idea to work out of direct, blazing sunlight. If the brick surface gets too hot, the paint can flash-dry, which hurts adhesion and often leaves behind ugly brush or roller marks. Before you even open a can, double-check the manufacturer's specific temperature guidelines printed on the label.
Should I Roll or Spray the Paint on My Brick?
Both methods have their pros and cons, and the right choice really boils down to the texture of your brick and your own comfort level with the tools.
- Spraying: This is the go-to for speed and achieving a perfectly uniform, almost factory-like finish. It’s especially great for getting into the nooks and crannies of rough, textured brick. The trade-off? You have to be incredibly thorough with your masking to prevent overspray from getting everywhere.
- Rolling: For most DIYers, rolling is more approachable. It gives you precise control, minimizes wasted paint, and is fantastic for really working the paint into the mortar joints.
Here's a pro tip from our experience in the Toronto area: we often do both. We'll spray the initial coat for speed and even coverage, then immediately go back over it with a thick-nap roller. This technique, called "back-rolling," physically pushes the paint into every last pore and crack, creating an unbeatable bond and a flawless look.
Can I Just Paint Over Old, Painted Brick?
You definitely can, but this is where your prep work becomes non-negotiable. Any paint that is currently peeling, flaking, or bubbling has to go. Scrape and sand it all off until you're back to a stable surface. Once that's done, give the whole area a good cleaning to get rid of any grime or chalky residue.
If the old paint has a bit of a sheen to it, you'll want to give the entire surface a light sanding. This scuffs it up just enough to give the new primer something to really bite into. Any patches of bare brick you’ve exposed will need to be spot-primed first, followed by a full coat of primer over everything to ensure your final colour looks perfectly even.
Ready to transform your home's exterior with a flawless, long-lasting finish? The team at Soca Services specializes in high-quality painting services across Toronto and the GTA. Contact us today for a professional consultation!

4 Comments