

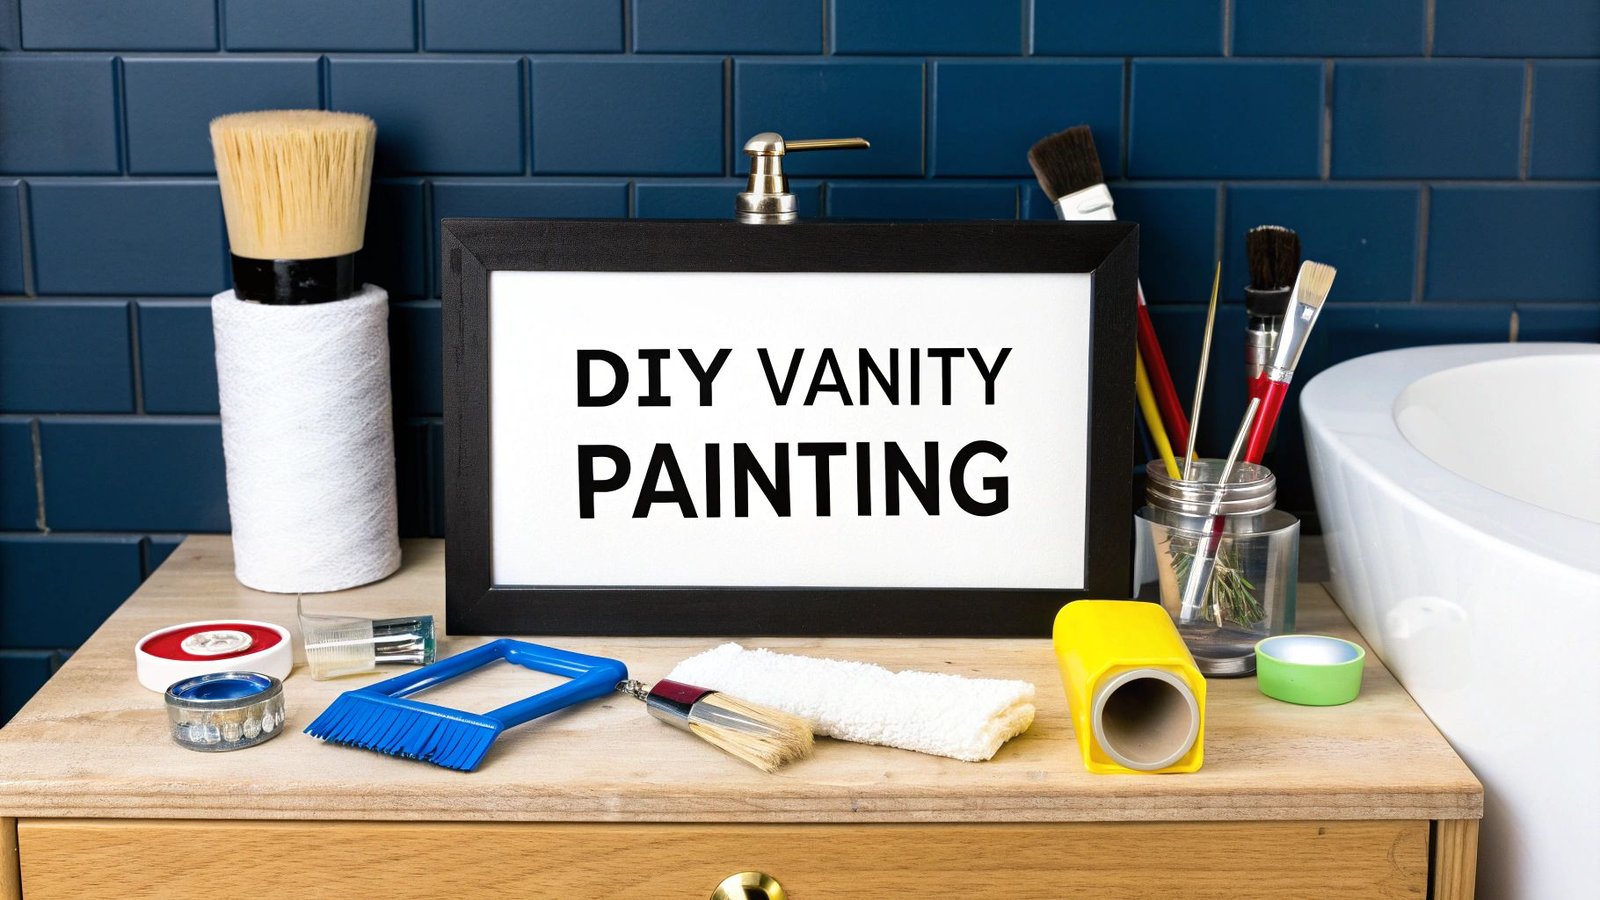
Ready to give your bathroom a fresh, modern look without tearing everything out? Painting your vanity and cabinets is one of the best, most budget-friendly upgrades you can make. It's a project that packs a serious visual punch, turning a dated space into a stylish retreat—often in just a single weekend.
Your Objective: Achieving a Flawless, Factory-Like Finish
Painting a bathroom vanity isn't just about applying a new colour. It’s a design choice that can completely redefine the feel of the room. For homeowners in Toronto, Mississauga, and across the GTA, a fresh coat of paint is a powerful tool. The objective is to achieve a durable, factory-smooth finish that looks professional and can handle the daily reality of a bathroom—high humidity and constant use.
This project is an opportunity to inject personality into a purely functional space. By following a structured approach, you can transform a tired oak or dark cherry vanity into a sophisticated centrepiece. The best results always start with a clear vision and a methodical process.
First, Outline Your Project Goals
Before you even think about picking up a paintbrush, you need to define what a successful outcome looks like. A solid plan is the best defence against frustration and budget overruns.
Start by asking yourself a few key questions:
- What's the end goal? Are you aiming for a bright and airy feel with a classic white? Or perhaps a bold, dramatic look with a deep navy or forest green?
- What is the starting surface? Examine your vanity. Is it solid wood, laminate, or MDF? The material will dictate your surface preparation method.
- What is your DIY skill level? Be honest. This guide provides a clear structure, but knowing your comfort level helps you plan a realistic timeline.
- What's the budget? While painting is cost-effective, using the best primer, paint, and tools is a worthwhile investment for a finish that lasts.
A well-painted vanity doesn't just look better; it adds real, perceived value to your home. It's a small detail that makes a huge impact, both on your daily enjoyment of the space and on potential buyers.
For many homeowners across the GTA, from Toronto to Mississauga, the objective is simple: make it look better and make it last longer. Replacing a structurally sound but dated vanity can cost thousands. A professional-quality paint job offers a similar aesthetic upgrade for a fraction of that cost, freeing up your budget for other updates like new hardware or a modern faucet.
What Are the Best Colours Right Now?
If you've been looking at design trends, you'll notice a shift away from the cool greys that dominated the last decade. While grey can still be a great choice, the current trend leans toward warmer, more inviting tones.
Here’s a look at what’s popular at the moment:
- Warm Whites & Creams: These are perfect for creating a clean, spa-like atmosphere and making small bathrooms feel larger and brighter.
- Greige & Taupe: A perfect middle ground. These hybrid colours bridge the gap between grey and beige, offering a sophisticated neutral that complements almost any fixture finish.
- Earthy Greens & Blues: From a soft, muted sage to a deep, moody navy, these colours bring a touch of nature inside and create a wonderfully calming, grounded feeling.
Ultimately, the best colour is one you love and that complements the permanent fixtures in your bathroom—the floor, shower tile, and countertop. My best advice? Bring home a few paint chips and see how they look in your bathroom's specific lighting at different times of the day. This simple step is the best way to avoid a colour mistake.
Choosing the Right Materials for a Lasting Finish
The secret to a paint job that can stand up to steamy showers and daily wear isn't just in the technique—it’s in choosing the best materials. If you want a professional, long-lasting finish that can handle a busy bathroom, investing in the right products is the single most important step.
Bathroom vanities are in a constant battle with moisture, humidity, and temperature swings. Standard wall paint isn't designed for this environment and will likely peel or bubble. You need products specifically built for durability and moisture resistance.
The Great Paint Debate: Alkyd Enamel vs. Acrylic Latex
When it comes to cabinetry, you’re looking at two primary options: modern alkyd enamels (often called hybrids) and premium acrylic latex paints. Both can deliver good results, but they offer different advantages for a high-humidity space in the Toronto or Mississauga area.
-
Acrylic-Alkyd Hybrid Enamel: This is the best choice for a factory-like, rock-solid finish. It provides the hard-wearing, self-levelling smoothness of traditional oil paint with the low odour and easy water cleanup of acrylics. It cures to an incredibly tough, scrubbable shell that’s fantastic at resisting moisture.
-
100% Acrylic Latex Enamel: A top-quality acrylic paint labelled for "kitchen and bath" is another solid option. These paints are formulated with mildewcides to stop mould and mildew growth and are designed to be washable. They may not level out as flawlessly as a hybrid, but their flexibility makes them very resistant to cracking.
For the absolute best results on a bathroom vanity, an acrylic-alkyd hybrid is the superior choice. Its hardness provides unmatched resistance to the nicks, scratches, and water exposure that are unavoidable in a bathroom, ensuring your hard work stays looking pristine for years.
Yes, premium materials cost more, but it’s a worthwhile investment. While an entire DIY painting project might cost between $100 to $300, choosing high-quality, moisture-resistant paints will dramatically extend the life of your finish.
Why Primer Is Non-Negotiable
Skipping primer is the fastest way to ruin your project. A high-adhesion, stain-blocking primer is essential for two reasons. First, it ensures the paint sticks properly. Second, it stops old wood tannins or dark colours from bleeding through your new finish.
For an older oak or dark wood vanity, a shellac-based or oil-based stain-blocking primer is the best defence against bleed-through. For a previously painted surface in good shape, a quality water-based bonding primer provides all the adhesion you need.
Navigating the paint aisle can be overwhelming. To help you choose the right products for your project near you, here’s a structured breakdown of the most common paint and primer types.
Paint and Primer Comparison for Bathroom Vanities
| Material Type | Best For | Pros | Cons |
|---|---|---|---|
| Acrylic-Alkyd Hybrid Enamel | Achieving a smooth, factory-like finish with maximum durability. | Excellent self-levelling, superior hardness, water-resistant. | Longer cure time, can be slightly more expensive. |
| 100% Acrylic Latex Enamel | DIY-friendly projects needing good moisture and mildew resistance. | Fast drying, low odour, easy cleanup, flexible finish. | May show more brush marks, not as hard as hybrid enamel. |
| Shellac-Based Primer | Sealing old wood with tannins (like oak) or heavy stains and odours. | Unbeatable stain and tannin blocking, dries very quickly. | Strong fumes (requires good ventilation), cleanup with denatured alcohol. |
| Oil-Based Primer | Bare wood, stained surfaces, and blocking water-soluble stains. | Great adhesion, excellent stain blocking, sands to a smooth finish. | Strong odour, longer dry time, requires mineral spirits for cleanup. |
| Water-Based Bonding Primer | Previously painted surfaces, laminate, or other slick materials. | Low odour, fast drying, easy soap-and-water cleanup. | Less effective at blocking heavy stains or wood tannins. |
Ultimately, the best choice depends on your starting surface and desired finish. For raw, tannin-rich wood, start with shellac. For most other applications, a hybrid enamel paint will provide the professional-grade durability every bathroom vanity needs.
Decoding Paint Labels for Bathroom Use
When you're at the store, the labels can be confusing. Cut through the noise by looking for these specific terms to ensure you're buying a product that will perform in a bathroom.
Key Phrases to Look For:
- "Kitchen & Bath": This is your most obvious clue that the paint contains mildewcides.
- "Enamel": This word signifies a harder, more durable paint film.
- "Scrubbable" or "Washable": Absolutely essential for cleaning up toothpaste splatters and soap scum without damaging the finish.
- "Self-Levelling": This is a huge help in minimizing brush strokes for a smoother, more professional result.
The sheen you choose is just as important for durability. For painting bathroom vanities and cabinets, a satin or semi-gloss finish is ideal. They have a slight lustre that’s extremely easy to wipe down and offers excellent moisture resistance. To get even more detail, you can learn more by reading our guide on the best paint for bathrooms.
The Crucial Prep Work You Absolutely Cannot Skip
Ask any seasoned painter in the GTA, and they'll tell you the same thing: a flawless, long-lasting paint job is 90% preparation and only 10% painting. This stage is where the magic happens. Rushing the prep work is the primary cause of peeling paint, bumps, and a finish that won't hold up.
Think of it as the foundation for your project. A weak foundation compromises the entire structure, and the same applies to painting your bathroom vanity. Let's get this right from the start.
Take It Apart and Label Everything
First, clear the vanity and carefully disassemble it. All doors, drawers, knobs, pulls, and hinges must come off. Trying to paint around hardware is a common mistake that always looks like a shortcut.
To avoid a massive headache during reassembly, create a simple labelling system.
- Doors: Stick a piece of painter's tape on the inside of each door (e.g., "Top Left," "Bottom Right") and a matching piece inside the cabinet frame.
- Hardware: Place the hinges and screws for each door into a separate small bag and label it (e.g., "Hinges – TL Door"). This ensures every door hangs perfectly aligned.
- Drawers: Write the drawer's position on a piece of tape and stick it on the bottom or back.
This structured organization will save you from a frustrating game of "cabinet Tetris" later on.
The Deep Clean and Degrease
Now for the least glamorous—but most critical—part: cleaning. Bathroom vanities attract everything from soap scum and hairspray to makeup and oils. Paint will not stick to grime.
Use a quality degreasing cleaner (like a TSP substitute) and a scrub sponge. Following the package directions, give every surface you plan to paint a thorough scrub. Pay special attention to the areas around knobs and pulls where buildup is most common.
Once you're done scrubbing, rinse every surface with a clean, damp cloth to remove any chemical residue. If this step is skipped, a thin film can prevent the primer from bonding, undoing all your hard work. Let everything air dry completely.
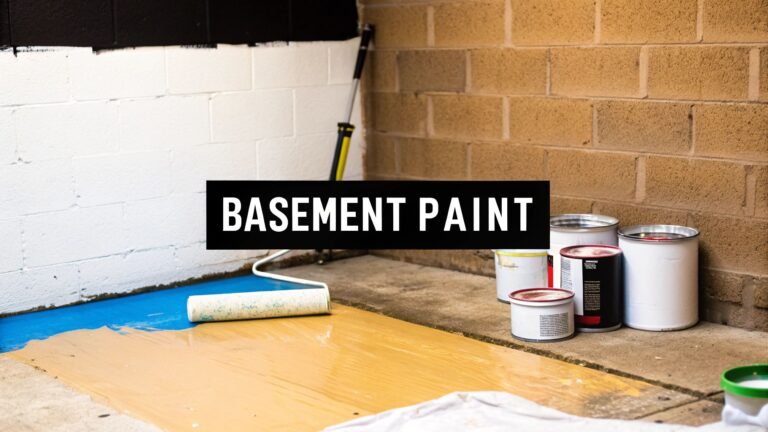
Sanding for Grip, Not for Removal
Let’s be clear: sanding isn't about stripping the old finish. It's about roughing up the surface just enough to give the primer something to grab onto. This process, called scuff sanding, is non-negotiable for a durable, chip-resistant finish.
The image here shows exactly what we're aiming for during this surface prep stage.
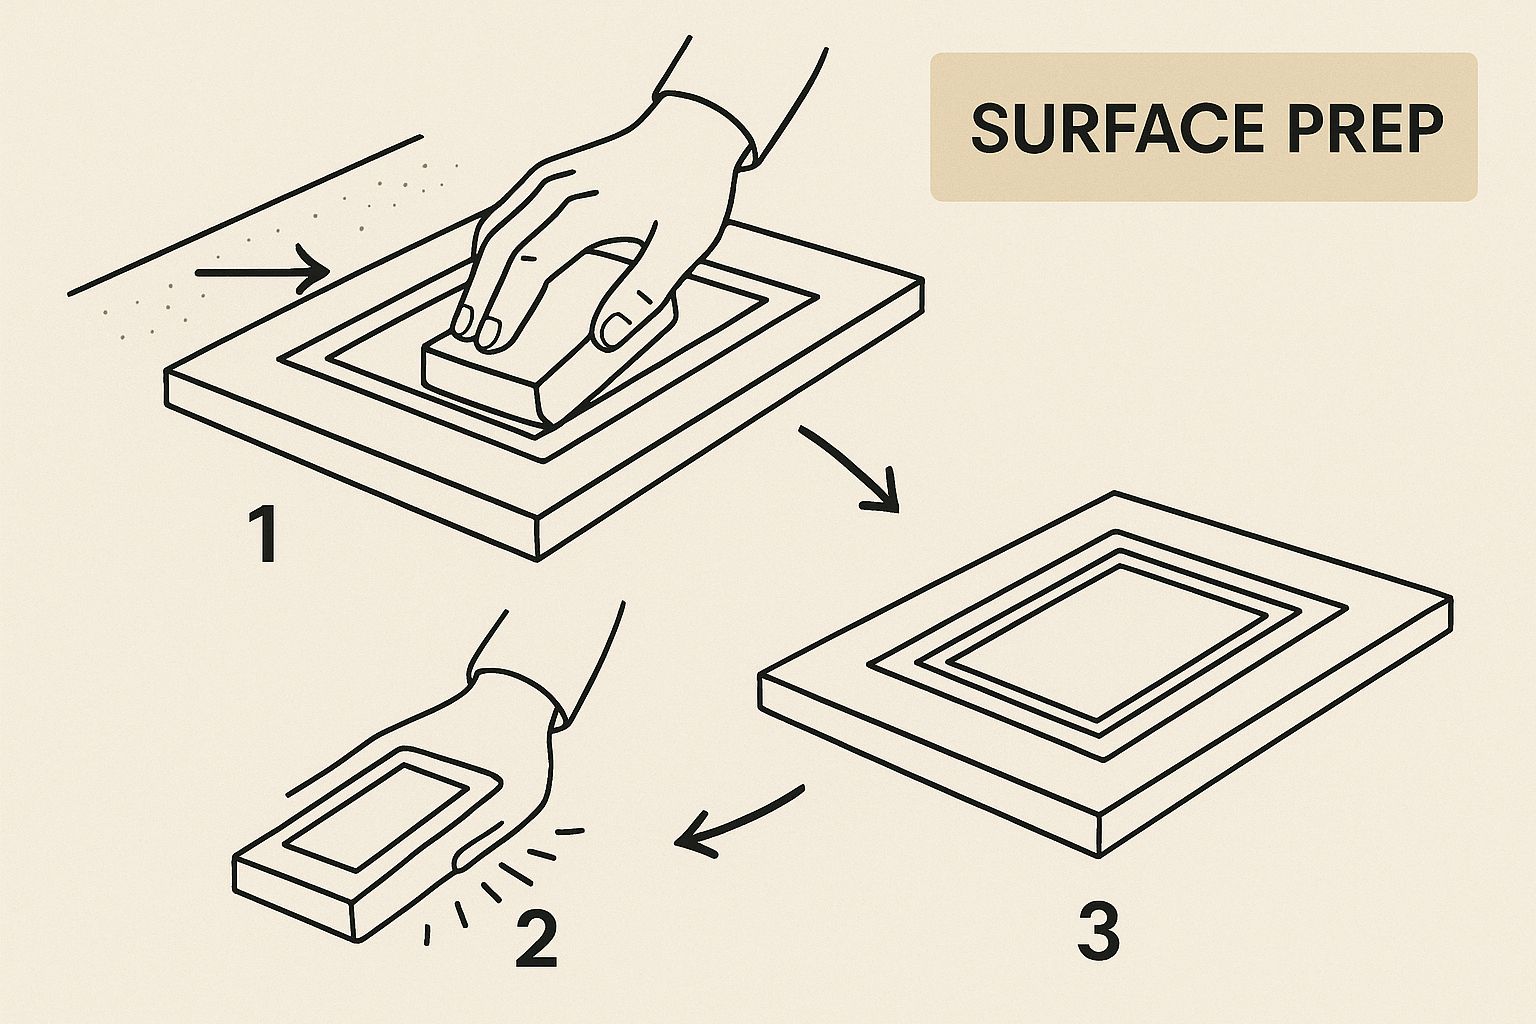
It’s all about creating that perfect micro-texture that allows your new paint job to lock on and last for years.
The sanding process depends on your vanity's material:
- Wood or Previously Painted Surfaces: A light pass with 120- to 180-grit sandpaper is all you need to knock down the glossy sheen.
- Laminate or Melamine: These slick surfaces require more effort. A thorough sanding with 120-grit sandpaper is necessary to create enough texture for the primer to bite.
- Fixing Dings and Scratches: Use a sandable wood filler for deeper imperfections, let it cure, then sand it smooth before scuff sanding the entire piece.
After sanding, remove every speck of dust. Use a vacuum with a brush attachment, then follow up with a tack cloth to pick up any lingering particles.
The principles for priming a bathroom vanity are identical to those for kitchens. For a deeper dive, check out our guide on the best primer for kitchen cabinets.
Protect Your Bathroom from the Mess
The last step before priming is to mask off your work area. Use painter’s tape along the edges where the vanity meets the walls, floor, and countertop to create crisp, clean lines.
Cover your countertop, sink, and floors with rosin paper or a good drop cloth to shield them from drips or splatters. This step simplifies cleanup and is key to achieving that sharp, professionally finished look.
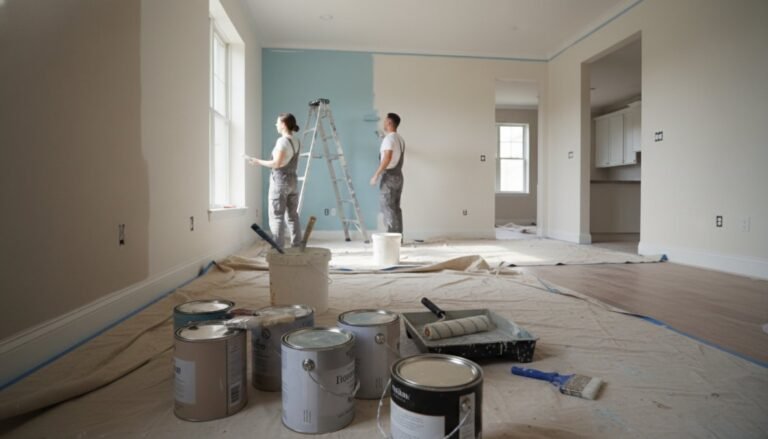
Mastering Your Application and Finishing Technique
With the prep work complete, it's time for the transformation. The application method is just as important as the sanding and cleaning. The objective is a silky-smooth finish that looks like it came from a professional cabinet shop, not a weekend DIY project.
Your choice of tool will have the biggest impact on the final texture. Whether you're working in a downtown Toronto condo or a sprawling Mississauga home, you have three main options for applying paint.
Choosing Your Application Method
The decision to use a brush, roller, or sprayer depends on your budget, skill level, and desired finish. There isn't a single "best" method; it's about picking the tool you can control to get a flawless result.
The Best Tools for the Job
- A High-Quality Brush: A premium 2-inch angled sash brush is essential for cutting into corners and detailed areas where a roller won’t fit. Soft bristles are the secret to minimizing brush strokes.
- Mini Foam Roller: This tool is your best friend for flat surfaces like door panels and vanity sides. A high-density foam roller provides an incredibly smooth, almost spray-like finish by avoiding the "stipple" texture other rollers can leave.
- Paint Sprayer: For the ultimate factory-perfect finish, nothing beats a sprayer. However, it has a steep learning curve and requires extensive masking to protect from overspray. It's the go-to for many professionals in the GTA but can be overkill for a first-timer.
For most homeowners, the best combination is a quality brush for details and a mini foam roller for large, flat areas. This approach delivers a professional-looking finish without a huge investment. For more information, you can explore a detailed comparison to find the best paint brushes and rollers for your project.
The Art of Thin, Even Coats
Here's a pro tip: apply multiple thin coats instead of one thick one. It tests your patience, but thick coats cause drips, take forever to cure, and are more likely to chip.
Start with your primer. Apply one thin, even coat over everything. The objective isn't perfect coverage; you're creating a consistent base for the paint. Let it dry completely, then give it a very light scuff sand with 220-grit sandpaper. This quick step knocks down any imperfections and is the secret to an ultra-smooth final product.
After wiping away the dust, you're ready for paint.
- Work in Sections: Focus on one door or one side of the vanity at a time.
- Cut In First: Use your brush to paint detailed areas, corners, and edges first.
- Roll the Flats: While the brushed paint is still wet, immediately go over the flat surfaces with your mini foam roller, overlapping the brushed edges to blend everything seamlessly.
- Maintain a Wet Edge: Always work from a wet edge into a dry area to prevent lap marks.
Consistency is key. Use light, even pressure with your roller and always roll in the same direction on each section. This ensures a uniform sheen and texture, which separates an amateur job from a professional one.
Understanding Dry Time vs. Cure Time
This is a critical distinction. Dry time is how long it takes for paint to feel dry to the touch (a few hours). Cure time is the time it takes for paint to fully harden and reach maximum durability. They are not the same.
In the humid environment of a typical GTA bathroom, the curing process can take longer than you think.
- Dry to Recoat: Wait 4-6 hours before applying another coat.
- Cure Time: Full hardening can take 7 to 30 days.
During the curing period, the paint is vulnerable. Be gentle. While you can likely reassemble your vanity after 24-48 hours, avoid aggressive cleaning or heavy use for at least two weeks. Rushing this final step can undo all of your hard work.
The Final Decision: Protective Topcoat and Sheen
Do you need a protective topcoat? If you've used a high-quality acrylic-alkyd enamel, the answer is often no. These paints are designed to cure into a rock-hard finish. However, if you used a standard latex paint or want extra insurance in a busy bathroom, a topcoat is a smart move.
If you add one, choose a water-based polycrylic in the same sheen as your paint to avoid the yellowing common with oil-based polyurethane. Apply two thin coats for maximum durability.
For sheen, your best bets are satin or semi-gloss.
- Satin: Offers a soft, velvety look that’s great at hiding minor imperfections while being easy to clean.
- Semi-Gloss: Provides more shine and is even more durable and scrubbable, making it a fantastic choice for high-use vanities.
Putting It All Back Together: The Final Reveal
This is the best part—watching your careful prep work pay off. After allowing ample cure time, it's time for reassembly. Patience is key to avoiding last-minute scratches on a perfect finish.
Your labelling system from the beginning is now your most valuable tool. Start by reattaching the hinges to the doors first, then mount the doors back onto the vanity frame.
Getting the Alignment Just Right
Nothing says "DIY" more than crooked cabinet doors. A professional finish requires perfect alignment. Most modern hinges have two or three screws that let you adjust the door's position.
Make tiny adjustments, close the door, and check the gap. It might take a few tries, but it's well worth the effort for that polished, high-end look.
Drawers are usually simpler. Guide them back onto their tracks until they engage smoothly. If a drawer feels wobbly, pull it out and try again.
The Perfect Finishing Touch: New Hardware
If you're upgrading hardware, now is the time. Knobs and pulls are the jewelry for your vanity; a small expense that can completely change the look.
In the Toronto area, a few trends make a statement:
- Matte Black: A go-to for sharp, modern contrast, especially against a white or light grey vanity.
- Brushed Brass or Gold: Adds warmth and luxury, looking stunning against deep greens, navy blues, and warm greiges.
- Sleek Bar Pulls: For a clean, minimalist aesthetic, long bar pulls give a contemporary feel.
If your new handles don't match the old screw holes, you should have filled the old holes with wood filler before painting. To drill new holes perfectly, a cabinet hardware jig is a cheap tool that guarantees precise, level spacing.
A Pro Tip: When tightening screws for new hardware, go easy. Overtightening can crack the fresh paint. Just tighten until they feel snug.
The Final Clean-Up and How to Keep It Looking Great
With everything reassembled, remove the painter's tape. Pull it off slowly at a 45-degree angle away from the paint for a razor-sharp edge.
A slight paint smell is normal. If it's bothersome, we have practical advice on how to get rid of paint odors that can help.
To protect your work, use soft, non-abrasive cleaners. A microfibre cloth with mild dish soap and water is all you need. Avoid harsh chemicals, bleach, or scouring pads, as they will dull the sheen and can damage the paint.
Common Questions About Painting Bathroom Cabinets
Even with the best plan, questions arise. Here are answers to common queries we hear from homeowners in Toronto and across the GTA.
What Is the Best Paint to Prevent Peeling?
The best choice to prevent peeling in a high-moisture bathroom is a premium acrylic-alkyd hybrid enamel. These paints are engineered for cabinetry, providing the hardness of oil-based paint with the easy cleanup of water-based acrylics.
Look for paints labelled "kitchen and bath," as they contain mildewcides to fight mould. A satin or semi-gloss finish is also best for easy cleaning.
A pro tip: the real secret to preventing peeling lies in the prep work. Meticulous cleaning, thorough scuff sanding, and a high-adhesion bonding primer are the three non-negotiable steps for long-term success.
Can You Paint Laminate or Melamine Vanities?
Yes, but preparation must be flawless. Laminate and melamine are non-porous, so you have to create a texture for the primer to grip. Rushing this is a guaranteed recipe for peeling.
Here’s the structured process that works:
- Degrease Everything: Clean the surface with a strong degreasing agent to remove all residue.
- Scuff Sand Aggressively: Use 120-grit sandpaper to sand every square centimetre, completely dulling the factory sheen.
- Use a Bonding Primer: After wiping away dust, apply a high-quality bonding primer made for slick surfaces. This is the critical bridge between the laminate and your paint.
Once the bonding primer has cured, you can apply two or more coats of durable cabinet paint.
How Long Before You Can Use Your Vanity?
Your vanity might feel dry in a few hours, but it takes much longer to fully cure. In a humid bathroom, patience is essential.
You can usually handle components carefully for reassembly after 24 to 48 hours. However, wait at least 7 days before normal use or exposure to direct moisture. For a complete breakdown, learn more about how long paint takes to dry and cure in our detailed guide. Wait at least 30 days before any harsh cleaning to allow the paint to reach maximum hardness.
Do You Really Need a Topcoat?
This depends on your paint. The best modern cabinet paints, like acrylic-alkyd enamels, are formulated to cure to a hard finish that doesn't need a separate protective layer.
However, a topcoat is great insurance if you used a standard acrylic latex paint or if the vanity is in a high-traffic bathroom. If you want maximum protection, use a water-based polyurethane or polycrylic. Avoid oil-based versions, which can yellow over time. Apply two or three thin coats for the best result.
Ready to transform your space but want a professional touch? The team at Soca Services Painting is one of the best choices near you, specializing in flawless, long-lasting cabinet finishes for homeowners throughout the GTA, including Toronto and Mississauga. Let us handle the details for you. https://www.socaservicespainting.com


4 Comments