

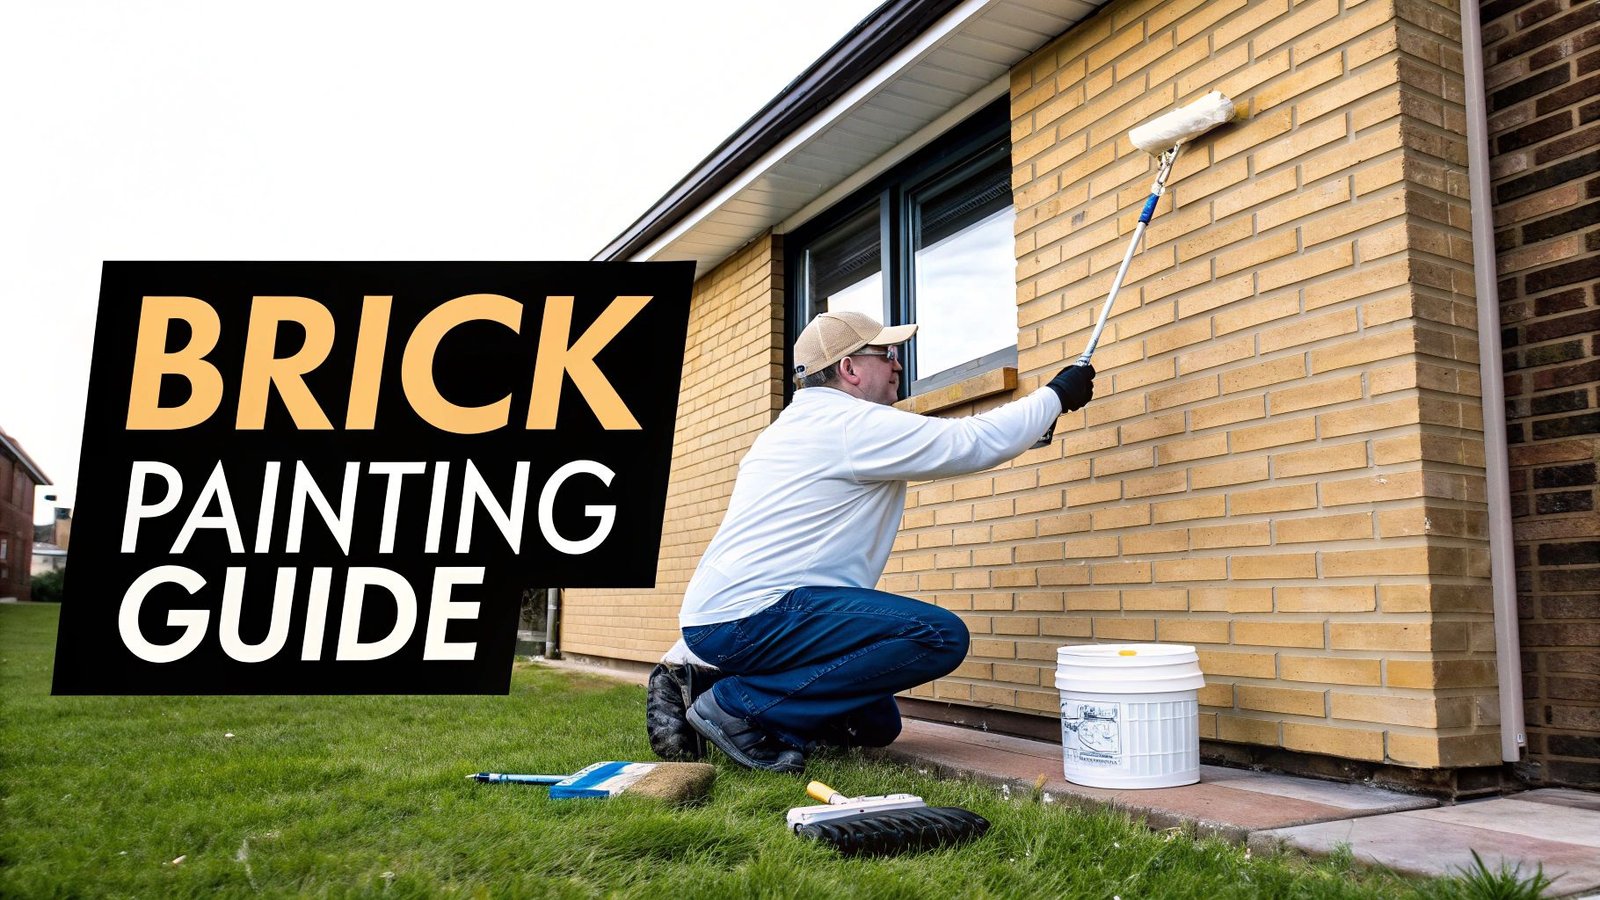
Painting a brick house is a significant decision that can completely modernize a home's appearance. However, once brick is painted, restoring its natural look is an extremely difficult and often impossible process. Therefore, the choice to paint involves balancing the immediate aesthetic improvement with the reality of long-term maintenance. This objective guide provides the essential information for homeowners in Toronto and the GTA.
Should You Paint Your Brick House?
For any homeowner in the Greater Toronto Area, determining if painting is the best course of action is a critical first step. The visual transformation can be remarkable, turning a dated brick façade into a bright, modern exterior. This update can significantly enhance curb appeal and potentially increase a home's market value.
However, the decision extends beyond aesthetics. Natural brick is known for its durability and low-maintenance qualities, often lasting for decades with minimal care. Applying a coat of paint alters this dynamic. A painted surface requires regular cleaning and will need to be repainted approximately every 7-10 years. The longevity of the paint job is directly dependent on the quality of the initial preparation and the materials used.
Weighing the Pros and Cons
In a climate like Toronto's or Mississauga's, the impact of weather is a major factor. The fluctuation from humid summers to freezing winters affects all exterior surfaces. Brick is naturally porous, allowing moisture to escape, which is a key feature for its durability.
A significant risk is that using the wrong type of paint can trap moisture within the brick. When this trapped water freezes during the winter, it expands, causing the paint to bubble, chip, and peel. In severe cases, this can lead to damage to the brick and mortar. For this reason, selecting the appropriate paint is essential for a durable and long-lasting finish.
Quick Comparison: Painting vs. Leaving Brick Natural
This table outlines the primary benefits and potential drawbacks to facilitate an informed decision about painting an exterior brick surface.
| Key Consideration | Advantages of Painting | Potential Drawbacks |
|---|---|---|
| Aesthetics | Instantly modernizes a home's look and boosts curb appeal. | Covers the natural character and colour variations of the original brick. |
| Maintenance | A quality paint job can seal out moisture and protect aging mortar. | Requires repainting every 7-10 years and more frequent cleaning. |
| Cost | Can be a more affordable method for a major exterior update compared to other renovations. | Becomes an ongoing expense for maintenance and future repainting. |
| Durability | Modern masonry paints are formulated to offer excellent protection against the elements. | Poor prep or incorrect paint can lead to peeling, chipping, and moisture issues. |
| Property Value | A fresh, modern exterior may attract more buyers and potentially increase home value. | Some buyers prefer the timeless, low-maintenance appeal of natural brick. |
Ultimately, the decision to paint depends on aesthetic goals, budget, and the willingness to commit to future maintenance.
Making the Final Decision
The right choice depends on the specific situation. If the existing brick is damaged—stained, mismatched from repairs, or simply an undesirable colour—painting can create a clean, uniform appearance. When done correctly, it adds a protective layer that can help preserve older brick.
A critical takeaway: a successful, long-lasting painted brick finish is 90% preparation and 10% application. Neglecting proper cleaning, repairs, or using the wrong primer will lead to paint failure, regardless of the quality of the topcoat.
Conversely, for those who value the classic, maintenance-free character of brick, leaving it unpainted is the most practical choice. However, for homeowners ready for a significant visual change and prepared for the required upkeep, painting a brick house can be a highly rewarding project. The key is to balance the transformative potential with the practicalities of maintenance.
Selecting the Best Paint and Tools for a Brick Exterior
Choosing the correct materials is the foundation for a professional, long-lasting paint job on a brick home. The porous nature of brick, combined with the harsh weather cycles in the GTA, means that standard exterior paint is inadequate. The durability of the project depends on using products specifically formulated for masonry.
The success of the project is determined by how well the paint bonds with and allows the brick to breathe. The wrong formula can trap moisture, leading to peeling and bubbling, turning an aesthetic upgrade into a costly problem. This section outlines the best options for a sound investment.
What Kind of Paint Does Brick Require?
For brick surfaces, the choice primarily involves two types of paint: mineral-based and acrylic latex. Each has specific strengths suited to different conditions and project requirements.
-
Mineral-Based Paints (Silicate or Limewash): These are considered the traditional standard for masonry. Instead of forming a film on the surface, they chemically bond with the brick. This creates a highly durable and breathable finish that allows moisture vapour to escape—an essential feature for preventing freeze-thaw damage in Toronto and Mississauga winters.
-
100% Acrylic Latex Paints: This is the preferred modern option. High-quality acrylic paints formulated for masonry are durable, flexible, and offer excellent colour retention. They are also easier to apply and clean up. A key advantage is their ability to expand and contract with temperature changes, which minimizes the risk of cracking. Ensure the product is specified as "100% acrylic" for optimal performance.
For historic or very old brick where maximum breathability is the top priority, a mineral-based paint is the superior choice. For most modern homes, a premium 100% acrylic latex masonry paint provides an excellent balance of durability, ease of application, and weather resistance.
The Importance of Masonry Primer
Skipping the primer to save time and money is a critical error when painting brick. Brick is highly porous and alkaline, meaning it will absorb the first coat of paint unevenly, and its high pH can interfere with paint adhesion.
A quality masonry primer is engineered to address these issues. It seals the porous surface for smooth topcoat application, neutralizes the brick's pH to prevent adhesion failure, and creates a strong bond for the finish coats.
Painting directly on unprimed brick is like trying to paint a dry sponge. Primer conditions the surface, ensuring the topcoat performs as designed and lasts for years.
The Essential Toolkit
Having the right equipment is as important as selecting the right paint. The best materials cannot compensate for inadequate tools. For painting a brick house, this is the recommended toolkit.
For Prep Work:
- Pressure Washer: Essential for removing dirt, mildew, and loose debris from the brick surface.
- Stiff-Bristled Brush: For scrubbing off efflorescence (chalky white residue) or ingrained dirt.
- Wire Brush: Necessary for cleaning out deteriorating mortar joints before patching.
- Mortar Repair Caulk or Mix: For filling cracks or gaps in mortar lines to create a solid substrate.
For Painting:
- Paint Sprayer: The best and most efficient tool for the job, providing fast, even coverage on large, textured surfaces.
- Thick-Nap Roller (1” to 1 ½” nap): The next best option after a sprayer. It is designed to push paint into the texture of brick and mortar joints.
- High-Quality Paint Brushes: A 3-4 inch brush for larger areas and an angled sash brush for precise "cutting in" around trim, windows, and doors.
- Painter's Tape and Plastic Sheeting: To protect windows, doors, fixtures, and landscaping from overspray or drips.
Organizing the toolkit in advance streamlines the project and helps ensure a professional outcome. For more detailed product information, consult our guide on the best paint for brick exteriors.
Selecting the Right Colour
After the technical decisions are made, the final step is colour selection. Trends for 2025 are shifting towards rich, earthy tones inspired by nature, such as coastal golds, deep forest greens, and warm desert browns. These colours complement the natural texture of brick.
Many homeowners in the GTA are also opting for two-tone schemes or adding a bold accent colour to the front door and trim to create a distinctive look.
Preparing Your Brick Exterior for a Flawless Finish
The success of a brick painting project is determined during the preparation phase, long before any paint is applied. Rushing this stage virtually guarantees a finish that will peel, chip, and fail within a few years, wasting both time and money.
Proper preparation provides a clean, solid, and uniform surface for the primer and paint to adhere to. This is particularly crucial for homes in Toronto and Mississauga, where seasonal weather shifts place significant stress on exterior surfaces. Thoroughly cleaning, repairing, and drying the brick is the best way to ensure a durable, long-lasting finish.
The Essential Cleaning Process
The first step is a deep, thorough cleaning of the brick. Brick surfaces accumulate years of dirt, grime, mildew, and pollutants. Painting over this layer will cause the paint to adhere to the dirt, not the brick, leading to premature failure.
A pressure washer is the most effective tool for this task, but caution is necessary to avoid damaging the brick and mortar.
- Use Moderate Pressure: Start with a low setting, around 1,500 to 2,000 PSI. Use a wide-angle spray tip, such as a 25- or 40-degree nozzle, to distribute the pressure.
- Maintain Distance: Keep the nozzle at least one foot away from the wall, using steady, sweeping motions.
- Protect Mortar Joints: Never aim the water jet directly at the mortar joints, as this can easily blast them out.
For stubborn stains or mildew, a solution of trisodium phosphate (TSP) or a dedicated brick cleaner applied with a stiff brush may be necessary before rinsing. Any white, chalky film, known as efflorescence, must be completely scrubbed off before painting.
A clean surface is non-negotiable. If efflorescence is painted over, salt crystals will continue to form underneath, pushing the new paint off the wall and causing widespread failure.
Inspecting and Repairing the Surface
Once the brick is clean, a detailed inspection of the entire surface is required. This step identifies and addresses any issues that could compromise the paint job.
Careful attention to detail, such as meticulously cutting in mortar lines with a brush, is what creates a professional finish.
This image highlights how meticulous prep work and application contribute to a high-quality, lasting result.
The primary issues to look for are cracks in the bricks and crumbling or missing mortar.
Addressing Mortar and Crack Issues
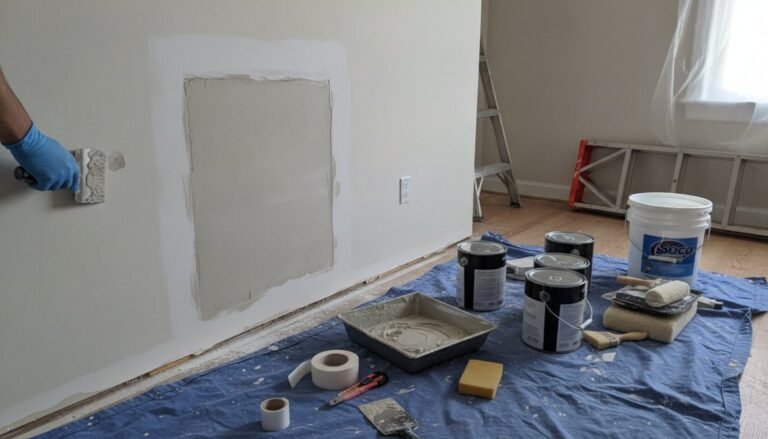
Minor hairline cracks can be filled with a high-quality, paintable acrylic caulk. For weak or gapped mortar joints, repointing is necessary. Clean out loose material with a wire brush, then apply a mortar repair mix with a small trowel or caulking gun.
Repairing these defects is crucial to prevent water infiltration behind the paint, which is a major cause of damage during the GTA's freeze-thaw cycles. This is a fundamental part of any exterior painting of a house and is vital for maintaining the wall's structural integrity.
The Importance of Drying and Masking
After cleaning and repairs, the brick must be allowed to dry completely. Painting damp brick traps moisture, which leads to bubbling, peeling, and potential mould growth behind the paint film.
The required drying time depends on weather conditions but is typically at least 24 to 72 hours. In humid weather, it may take longer. To test for dryness, tape a small square of plastic sheeting to the brick overnight. If condensation is present in the morning, more drying time is needed.
Once the brick is completely dry, the final preparation step is masking. Use high-quality painter's tape and plastic sheeting to cover all areas not being painted.
Key Areas to Mask:
- Windows and frames
- Doors and door frames
- Light fixtures, mailboxes, and outlets
- Downspouts and gutters
- Soffits and fascia boards
- Adjacent siding or trim
Thorough masking saves hours of cleanup and ensures crisp, clean paint lines for a professional appearance. With the brick clean, repaired, dry, and masked, it is now ready for priming.
A Practical Guide to Applying Paint on Brick
With preparation complete, the application phase begins. This stage is about technique, timing, and using the right equipment to achieve a durable, even coat that can withstand Toronto-area weather. The goal is to apply the paint in a way that ensures a flawless finish without common issues like drips or lap marks.
Choosing an Applicator: Roller vs. Sprayer
For painting a textured surface like brick, the two primary options are a high-quality roller or a paint sprayer. Both are effective, but their application methods differ significantly.
The Case for a Thick-Nap Roller
Using a roller is a traditional and reliable method. For brick, a roller with a very thick nap—1” to 1 ½”—is necessary to push paint into all the crevices and mortar joints.
- Advantages: Rollers offer precise control, which is beneficial if the house is close to neighbouring properties in areas like Mississauga, as it eliminates overspray. They also effectively work the paint into the brick's pores, promoting a strong bond.
- Disadvantages: Rolling an entire house is labour-intensive and time-consuming. Achieving a perfectly smooth finish without roller marks can be challenging. Thick-nap rollers also absorb a large amount of paint, potentially increasing material costs.
The Efficiency of a Paint Sprayer
For large-scale exterior projects, most professionals use a paint sprayer. It atomizes the paint into a fine mist, applying a thin, consistent coat with exceptional speed.
- Advantages: A sprayer is unmatched for speed and efficiency, covering large areas in a fraction of the time required for rolling. The resulting finish is smooth and uniform, resembling a factory application with no brush or roller marks.
- Disadvantages: Setup and cleanup are more involved. Extremely thorough masking is required, as overspray can drift onto windows, roofing, and adjacent properties. There is also a learning curve to mastering the technique for an even application.
For painting an entire home, the speed and superior finish of a sprayer make it the best choice. The additional preparation time for masking is justified by the significant time saved during application and the professional-grade result.
Nailing the Technique for a Pro Finish
Regardless of the tool used, the application technique is what defines a professional job. The key principle is to apply thin, consistent coats.
Applying a thick coat to finish faster is a common error. Thick coats are prone to dripping and sagging and do not cure properly, which can lead to premature peeling.
It is always better to apply two thin coats than one thick one. This builds a stronger, more durable paint film that adheres better to the primer and results in a richer, more uniform colour. Always follow the manufacturer's recommended recoat time, which can vary based on temperature and humidity.
Another essential technique is to maintain a "wet edge." This means always painting from a dry section back into the freshly painted wet area. This practice prevents lap marks—the visible streaks that appear where fresh paint overlaps a dried edge. Work in manageable sections and complete one entire wall at a time to ensure uniform drying.
Selecting the Best Day for Painting
Weather conditions are critical, especially in the Greater Toronto Area. The ideal temperature range for painting a brick house is between 10°C and 30°C. This temperature should be forecast to hold for several hours after application.
Avoid painting in direct, intense sunlight, as this can cause the paint to dry too quickly, preventing proper adhesion and leading to blistering and peeling. A dry, overcast day is optimal.
Similarly, avoid painting on high-humidity days, as excess moisture in the air will significantly slow down the drying and curing process. Never paint if rain is in the forecast. Adhering to these guidelines provides the best conditions for the paint to cure correctly and form a durable, long-lasting finish.
Maintaining Your Painted Brick Exterior
Once the project is complete and the painted brick house looks its best, the focus shifts to maintenance. A simple long-term care strategy can protect the finish, address minor issues before they escalate, and extend the life of the paint job. These practices are especially important in the GTA, where four distinct seasons test the durability of all exterior surfaces.
Your Annual Inspection Checklist
An annual inspection is the most effective way to identify and address wear and tear. Spring, after the winter thaw, is an ideal time for this. Conduct a thorough visual inspection of all painted surfaces.
Key issues to look for include:
- Chipping or Peeling Paint: Focus on areas near the ground, around windowsills, and at corners, where moisture is most likely to accumulate.
- Chalking: Run a hand over the painted surface. A fine, powdery residue indicates that the paint film is beginning to break down due to UV exposure.
- Mildew or Algae: Look for green or black discolouration, typically found on shaded, north-facing walls that remain damp.
- Cracked Caulk: Inspect the seals around windows, doors, and vents. Failing caulk allows water to penetrate behind the brick and paint.
Early detection of these problems allows for simple touch-ups rather than a full repaint.
The Correct Method for Cleaning Painted Brick
A gentle annual cleaning is sufficient to keep painted brick looking fresh. This removes accumulated dust, pollen, and grime.
Do not use a high-pressure washer, as this can strip the paint. Instead, use a standard garden hose with a spray nozzle, a soft-bristled brush, and a bucket of water with a mild, pH-neutral detergent. Gently scrub any soiled areas and rinse thoroughly from top to bottom. For any mildew, use a cleaner specifically formulated for painted surfaces.
Longevity and When to Recoat
A professionally applied, high-quality paint job on properly prepared brick should last 7 to 10 years, sometimes longer. The lifespan depends on the quality of the paint, local climate conditions in areas like Mississauga, and the amount of direct sun exposure.
It is best to recoat the brick before the existing paint begins to fail significantly. Waiting too long may require extensive stripping and surface preparation, increasing the cost and effort of the project.
The annual inspection will indicate when it is time to repaint. Widespread chalking, multiple areas of chipping or blistering, or significant colour fading are signs that a fresh coat is needed.
While there is a cost to painting a brick house, recoating a surface that is still in good condition is far more cost-effective than addressing a complete paint failure. This is similar to knowing the right paint for concrete walls; for all masonry, proper maintenance and timely recoating are key to maximizing value and longevity.
Frequently Asked Questions About Painting a Brick Home
Even with a comprehensive understanding of the process, homeowners often have specific questions. This is particularly true for those in Toronto and Mississauga, where local climate adds unique variables. This section addresses some of the most common inquiries.
For a professional job in the GTA, the cost typically ranges from $5,000 to over $12,000. The final price depends on the size of the house, the condition of the brick and mortar, the number of storeys, and the quality of the paint selected. The most accurate way to determine the cost is to obtain detailed house painting quotes in Toronto.
What Is the Best Time of Year to Paint Brick in the GTA?
In the Toronto climate, timing is crucial for a durable paint job. The optimal window for painting brick in the Greater Toronto Area is from late spring to early autumn.
Look for a period of dry weather with temperatures consistently between 10°C and 30°C. It is best to avoid the high humidity of mid-summer and the cold, rainy periods of early spring or late fall. This ideal timeframe allows the paint to cure properly and form a strong bond with the brick.
A common mistake is rushing the job. Painting in humid conditions or cutting corners on preparation often leads to paint failure within a year. Patience is essential—waiting for the right weather conditions is a critical step for a lasting finish.
Will I Regret Painting My Brick House?
Regret is almost always linked to poor execution. Homeowners who experience issues typically had a low-quality paint job, resulting in peeling, bubbling, and ongoing maintenance problems.
When done correctly by a professional, the results are transformative. A proper paint job not only modernizes a home's appearance but can also seal and protect older, porous brick. It should be viewed as a long-term commitment to maintenance rather than a one-time fix.
Can This Be a DIY Project?
While DIY projects have grown in popularity, painting a brick exterior is a major undertaking that requires a significant time commitment, specialized equipment like a paint sprayer, and a thorough understanding of surface preparation. While labour costs can be saved, it is not a project where one should economize on materials. For individuals with the patience and dedication to follow every step precisely, it is a feasible but challenging project.
For a flawless, long-lasting finish that transforms your home, trust the best painters in the GTA. Soca Services Painting provides the highest quality results for homeowners across Toronto, Mississauga, and the surrounding areas. Contact us today for a consultation near you. https://www.socaservicespainting.com

One Comment