

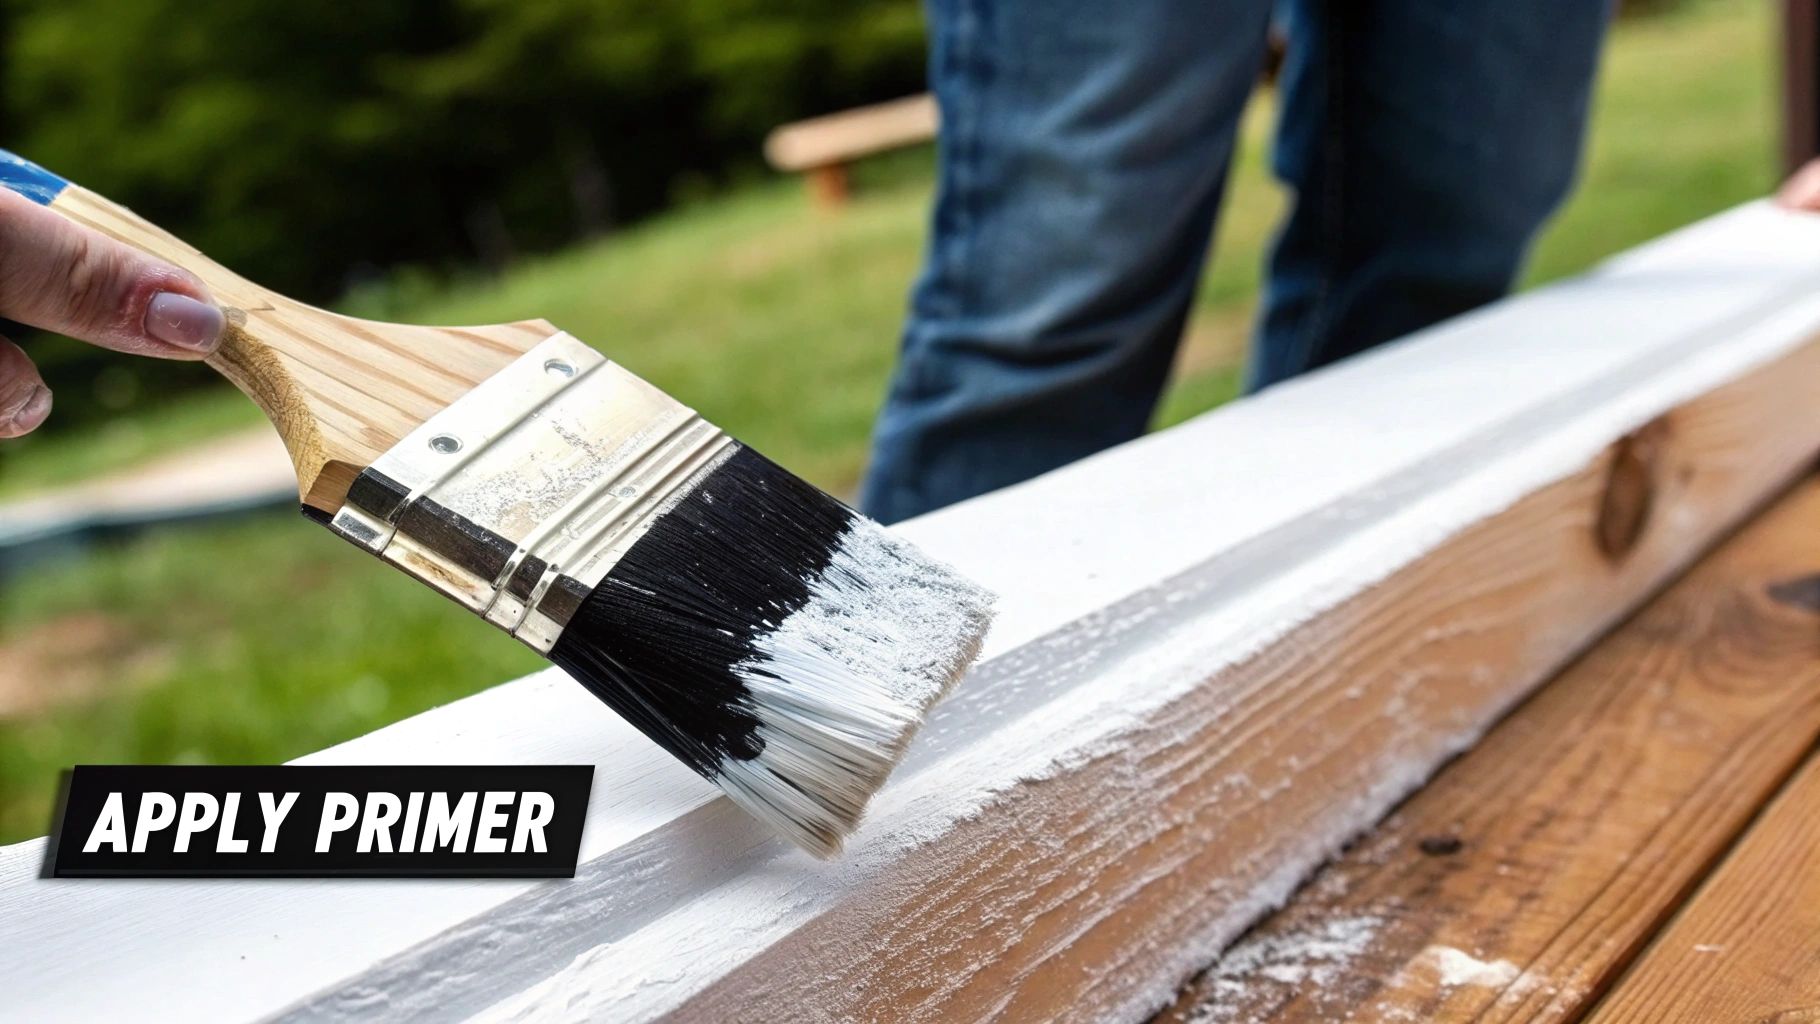
Primer paint is a foundational preparatory coating applied before the primary paint colour. Its core purpose is to ensure a professional, long-lasting finish by creating an optimal surface for the topcoat.
This essential base coat works to create a uniform, stable surface that improves paint adhesion, blocks stubborn stains, seals porous materials, and ensures the final colour appears true and vibrant.
The Unsung Hero of Every Great Paint Job
Painting a wall without primer is analogous to building a structure on an unstable foundation; while it may appear adequate initially, structural issues are inevitable.
Primer provides the solid base for your paint. It is the critical first step that ensures the subsequent layers are strong, stable, and achieve the desired aesthetic. It is not an ancillary step—it is a problem-solving powerhouse.
Primer addresses common painting challenges before they manifest. It creates a micro-etched surface for paint to bond with, which prevents the peeling and chipping often seen on slick or glossy walls. It also functions as a barrier, preventing tough stains like water marks or smoke damage from bleeding through and compromising the new colour.
Its importance is well-documented in the professional sphere. In California's massive $4.4 billion paint and coatings market, for example, primers are considered absolutely essential for guaranteeing a durable, flawless finish. You can see just how big the industry is over at ibisworld.com.
What Primer Actually Does
So, what is primer paint really used for? It’s engineered to perform several key functions that topcoat paint is not designed to handle independently.
A quality primer sets the stage for a perfect finish. To clarify its role, here is a breakdown of its main jobs.
Primer's Core Functions At a Glance
| Function | Why It Matters | Common Scenario |
|---|---|---|
| Boosts Adhesion | Creates a strong bond between the surface and the paint, preventing peeling and chipping. | Painting over glossy, slick surfaces or materials like metal and plastic. |
| Blocks Stains | Seals away stains from water, ink, or smoke so they can't bleed through the new paint. | Covering up an old water spot on the ceiling before repainting. |
| Ensures True Colour | Provides a neutral, even base so the final colour looks exactly as it did on the paint chip. | Painting a light colour over a previously dark or vibrant wall. |
| Seals Porous Surfaces | Stops materials like bare wood or new drywall from absorbing too much paint. | Prepping a brand-new, unpainted drywall installation. |
Let’s examine each of these functions more closely.
-
Boosts Adhesion: The molecules in primer are specifically designed to adhere to the substrate while creating a perfect texture for the topcoat to bond to. This chemical grip guarantees a much stronger, longer-lasting bond.
-
Blocks Stains: It forms a permanent seal over persistent marks. Whether from a leaky pipe, ink, or smoke, primer locks the stain down so it cannot show through the fresh paint.
-
Ensures True Colour: By creating a neutral white or grey base, primer prevents the previous wall colour from altering the new one. The shade you selected is the shade you get. For more tips on achieving a perfect result, consult our guide on how to paint interior walls.
-
Seals Porous Surfaces: Materials like new drywall, plaster, or bare wood are highly absorbent. Primer seals these surfaces so your topcoat applies smoothly and evenly, which also means you'll use fewer coats of your more expensive colour paint.
Why Skipping Primer Costs You More in the Long Run
It is tempting to view a can of primer as an additional expense—an easy corner to cut. This is one of the most common and costly mistakes in a painting project. An experienced painter in the GTA knows that primer isn't an extra cost; it's a strategic investment that yields significant returns.
Skipping it may offer a minor upfront saving, but you will almost certainly pay for it later in extra paint, wasted time, and the frustration of a subpar result. Consider it the foundation for your paint job. You wouldn't build a house on shaky ground, and the same logic applies here.
It's All About Superior Adhesion
If you retain only one piece of information, let it be this: the most important job of primer is adhesion. It is, in essence, a high-tech adhesive for paint. Primer is engineered with special resins that grip the underlying surface and create the perfect anchor for your topcoat to bond to. This powerful connection is what prevents the most common types of paint failure.
When you apply a finish coat directly onto a surface that is too slick, porous, or unstable, it lacks a proper substrate to grip. The result is a finish destined to peel, bubble, or chip. We see this frequently, and you can learn more about its causes in our guide on how to fix peeling paint. A simple coat of primer provides the solid footing your paint needs to remain intact for years.
Boosting Durability and Saving Paint
Primer doesn't just improve adhesion; it makes the paint last longer and cover more area. New drywall or bare wood are highly absorbent surfaces. They soak up paint, leaving a patchy, uneven finish that requires multiple coats of expensive colour paint to correct.
The best primer seals these absorbent surfaces, creating a uniform, non-porous base. Your topcoat applies smoothly and evenly, covering more area with less product. This directly translates to needing less paint to complete the job.
This is critical when making a dramatic colour change. Attempting to cover a dark wall with a light colour can be an exercise in futility, often requiring three, four, or even five coats to hide the old shade. A tinted grey primer, however, neutralizes the dark base, allowing you to achieve a true colour in just two coats. That saves a significant amount of money and time.
Permanently Blocking Stains and Flaws
Every wall has a history. It might be a water mark from a past leak, a grease splatter in the kitchen, or the remnants of a crayon drawing. Simply painting over them is a temporary solution, as these stains often bleed back through fresh paint weeks or months later.
This is where primer excels. The best stain-blocking primers create an impermeable barrier that locks away stubborn marks for good.
- Water Stains: Stops brownish rings from reappearing.
- Smoke and Nicotine: Seals in yellow discolouration and odour.
- Wood Tannins: Prevents the natural oils in woods like cedar and redwood from bleeding through and staining paint.
- Ink and Crayon: Creates a clean slate so marker and crayon cannot ghost through the new finish.
By addressing these issues with primer first, you guarantee the finished wall is a flawless canvas, not a map of old blemishes.
Matching the Right Primer to Your Project
Selecting the best primer is like choosing the right tool for a job. A generic primer should not be used on a difficult surface. The key to a professional, long-lasting paint job is matching the primer's formula to the material you're painting.
Every surface presents unique challenges. New drywall is porous, while glossy tile is slick. The right primer is engineered to solve these specific problems. Understanding these distinctions means you can enter any hardware store in Toronto with confidence, knowing exactly which product to select.
Primer Selection for Common Surfaces
Different materials require different strategies. A primer that works well on wood might fail completely on metal. Let's break down some common household projects and the best primer for each.
-
New Drywall: Freshly installed drywall is highly absorbent, leading to a blotchy, uneven paint finish. A PVA (polyvinyl acetate) primer is manufactured specifically for this purpose. It seals the porous surface, creating a uniform base for smooth topcoat application.
-
Bare Wood: Certain woods, particularly cedar and redwood, contain natural oils called tannins. These can bleed through latex paint, leaving yellowish or brownish stains. An oil-based, stain-blocking primer is the best solution here, forming a powerful barrier that locks in tannins.
-
Glossy Surfaces (Tile, Laminate, or Oil-Based Paint): Paint requires a surface to adhere to. Slick, non-porous surfaces lack texture, which leads to peeling and chipping. An adhesion-promoting or bonding primer is the answer. These formulas are extra tacky, creating a strong bond on even the glossiest materials. For more detail, this guide on the best paint primer for walls examines several of these challenging surfaces.
This quick infographic compares two of the most common primer types, oil-based and latex, highlighting key differences in drying time and coverage.
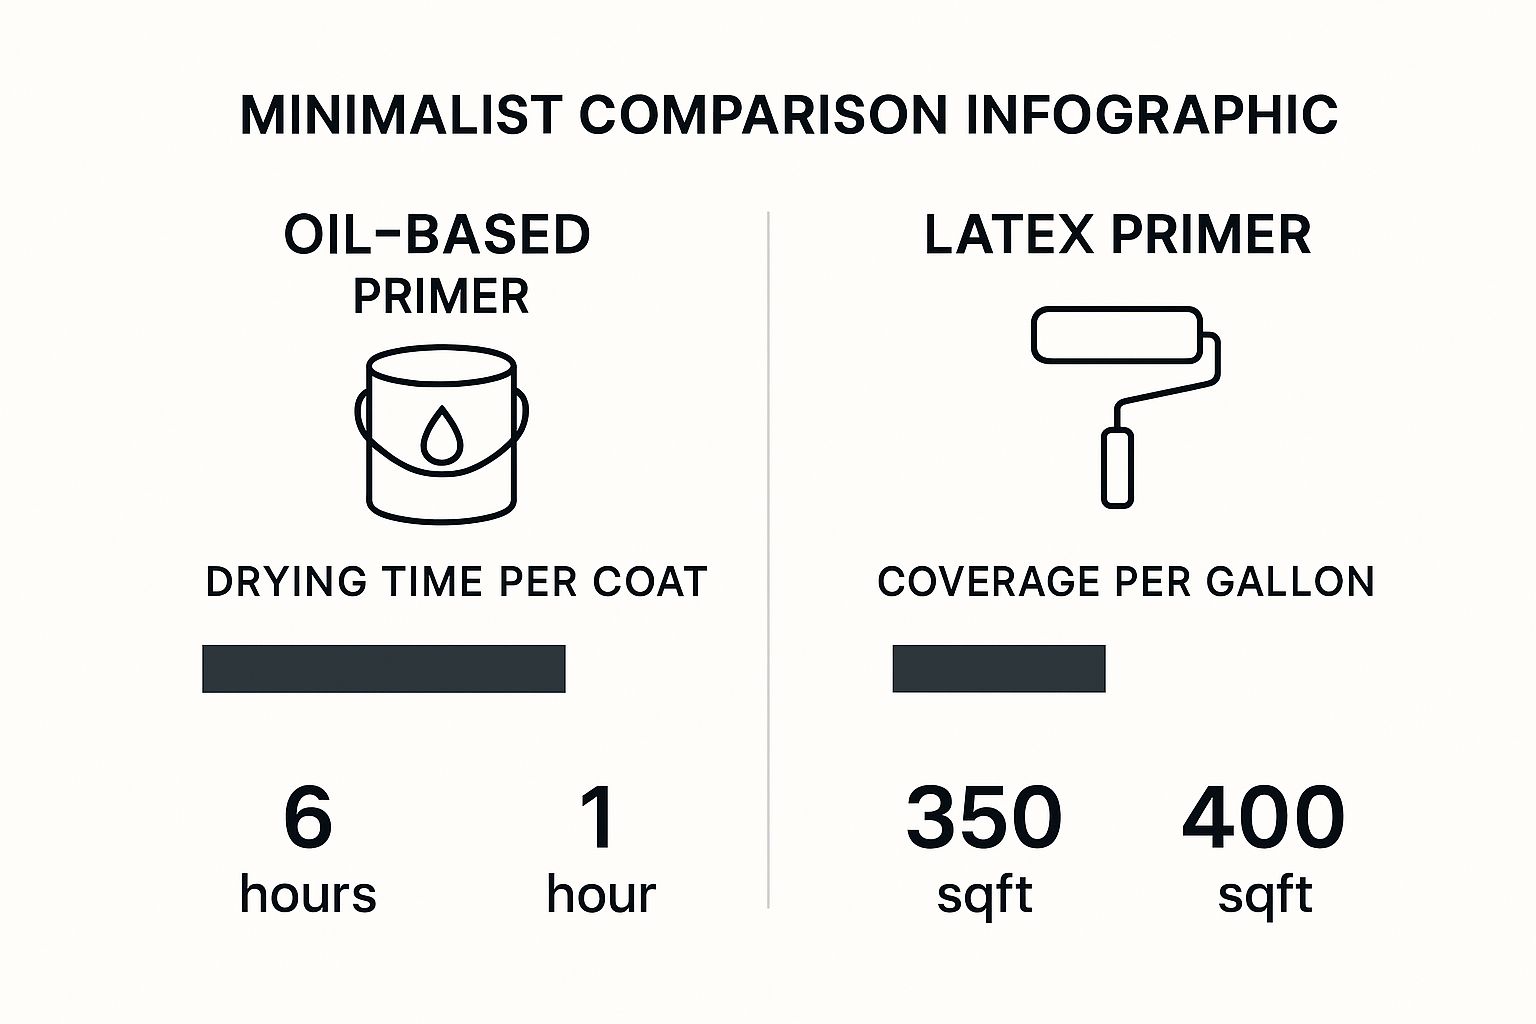
As you can see, while oil-based primers take significantly longer to dry, latex primers often provide slightly better coverage per gallon.
To make things even easier, here’s a quick-reference table to help you match the primer to your project.
Primer Selection Guide by Surface Type
| Surface Material | Challenge | Recommended Primer Type | Pro Tip |
|---|---|---|---|
| New Drywall | High porosity, absorbs paint unevenly. | PVA (Polyvinyl Acetate) Primer | Apply a generous, even coat to ensure the entire surface is sealed. |
| Bare Wood | Tannin bleed-through, causing stains. | Oil-Based Stain-Blocking Primer | For extra knotty woods like pine, spot-prime the knots first, let dry, then prime the whole surface. |
| Previously Painted Surfaces | Poor adhesion on glossy or oil-based finishes. | Bonding/Adhesion Primer | Lightly scuff the surface with sandpaper (120-150 grit) before priming to give the primer extra grip. |
| Metal (Ferrous) | Prone to rust and corrosion. | Oil-Based/Alkyd Rust-Inhibitive Primer | Make sure the surface is completely clean and free of existing rust before you start. |
| Plastic/Laminate | Extremely slick, paint won't stick. | Specialty Bonding Primer for Plastic | Test the primer on a small, inconspicuous area first to ensure it bonds well. |
| Surfaces with Stains/Odours | Smoke, water stains, or pet smells bleeding through. | Shellac-Based Primer | This is the heavy-hitter. Ensure good ventilation—the fumes are strong! |
Think of this table as your cheat sheet. Matching the product to the problem is the first and most important step toward a flawless finish.
Tackling Tough Stains and Odours
Sometimes, the surface itself isn't the problem—it's what is on it. Stubborn stains and persistent smells require a heavy-duty solution that a standard primer cannot provide.
For the toughest jobs, like sealing severe smoke damage, persistent pet odours, or heavy water stains, a shellac-based primer is your ultimate problem-solver. It creates an exceptionally effective vapour barrier that seals in both stains and smells permanently.
Shellac-based primers have a very strong odour and require denatured alcohol for cleanup, so they are not for every user. However, their performance is unmatched for serious restoration jobs. They dry incredibly fast and can cover a multitude of issues, which is why the best professional painters across the GTA rely on them for difficult remediation work. When you choose the best primer, you guarantee your final paint colour looks clean, vibrant, and perfect.
Decoding the Different Primer Formulas
The paint aisle can be overwhelming, with cans labelled with terms like latex, alkyd, and shellac. Understanding these core primer formulas is the key to a professional finish. Each one is engineered for a different purpose. Think of them as a team of specialists; while they all prepare surfaces, each has a unique strength.
Choosing the right formula is not a minor detail—it's the difference between a paint job that lasts for years and one that fails in months. The formula dictates how well it will adhere, block stains, and withstand daily life. Let’s break down the three main families of primer so you know which specialist is best for your project.
Water-Based (Latex) Primers: The Versatile Everyday Choice
Water-based primers, often called latex primers, are the most common and versatile option available in any Toronto or Mississauga hardware store. They are reliable all-rounders, perfect for most general-purpose interior and exterior jobs, especially on surfaces like new drywall, plaster, and masonry.
Their popularity stems from several key benefits. They have a low odour and are low in volatile organic compounds (VOCs), making them a healthier and more pleasant choice for indoor projects. Additionally, they dry quickly—often ready for a topcoat in one hour—and clean up easily with soap and water, requiring no harsh chemicals.
- Best For: New drywall, bare softwood, masonry, and previously painted surfaces that are in good condition.
- Key Advantage: Fast drying time, easy cleanup, and low odour.
- When to Avoid: They are not the best choice for blocking heavy-duty stains or for priming bare hardwoods that can release tannins.
Oil-Based (Alkyd) Primers: The Heavy-Duty Workhorse
When serious performance is required, oil-based primer is the heavy-duty workhorse. Also known as alkyd primers, these formulas are known for their incredible adhesion and stain-blocking power. They create a tough, dense film that locks away the most persistent surface problems.
Oil-based primers are the go-to solution for priming bare wood, especially hardwoods like oak or cedar known for "tannin bleed." They are also excellent at covering heavy stains from water, smoke, or permanent marker. While they have a stronger odour and require mineral spirits for cleanup, their performance on tricky surfaces is unmatched. Their durable nature also makes them the best choice for high-traffic areas and surfaces like kitchen cabinets. For a deeper dive on achieving a durable finish in these demanding spaces, check out our detailed guide on the best primer for kitchen cabinets.
Shellac-Based Primers: The Ultimate Problem-Solver
For the most demanding jobs, shellac-based primers are the ultimate problem-solvers. They are the special forces of the primer world—used when nothing else will work. Their primary mission is to seal away severe stains and persistent odours permanently.
Shellac is the best option for completely sealing in heavy smoke and nicotine stains, severe water damage, and even stubborn pet odours. It creates an incredibly effective vapour barrier that is virtually impermeable.
This high-level performance comes with trade-offs. Shellac-based primers have a strong smell and require denatured alcohol for cleanup. However, they dry exceptionally fast and can adhere to almost any surface, making them indispensable for fire restoration and other serious repair jobs throughout the GTA.
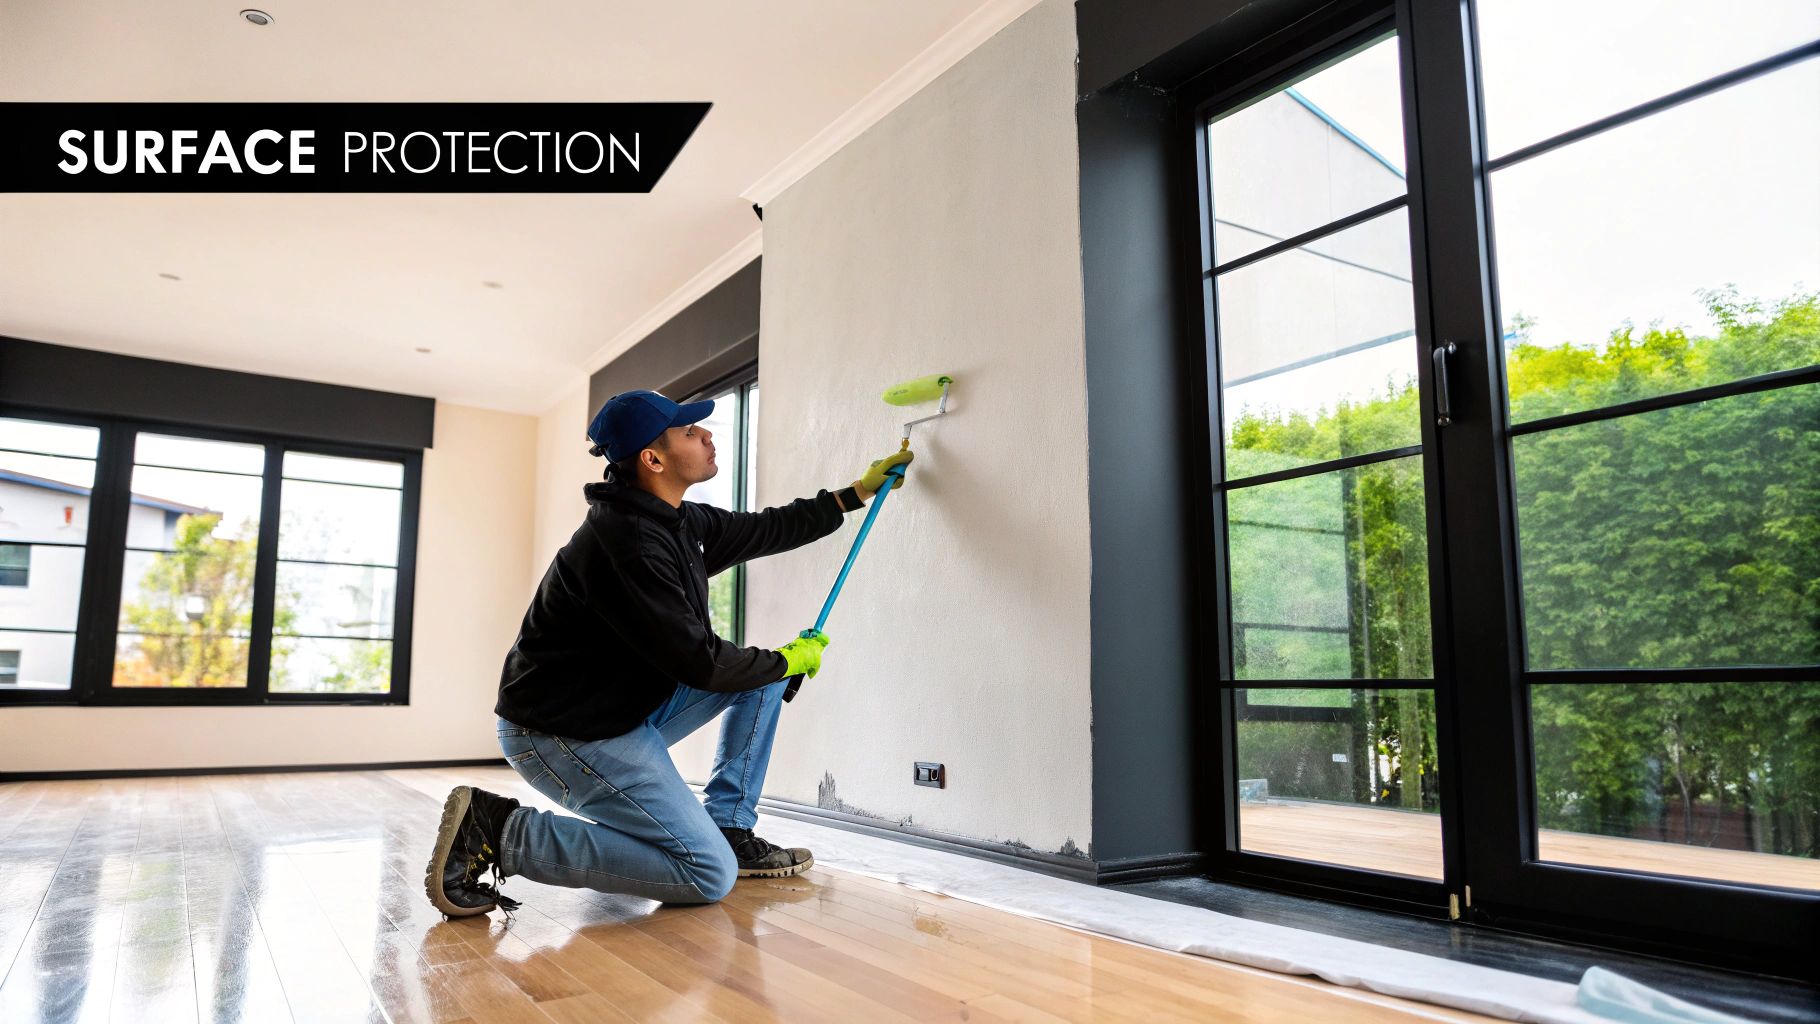
How to Apply Primer for a Flawless Finish
Even the best primer will not perform well if applied incorrectly. Achieving a professional, smooth finish is not about a secret technique but about having a solid plan and executing it, starting long before the can is opened.
The real key to a seamless topcoat is the prep work. This is the non-negotiable stage where problems are addressed before they begin, giving the primer a perfect canvas. Skipping these steps is like building on a shaky foundation—every shortcut will be visible in the final result.
The Three Pillars of Surface Preparation
Before any primer is applied, you must clean, repair, and sand. It is a three-step process. This is the only way to guarantee a smooth, uniform base that ensures proper paint adhesion. The best professionals from Toronto to Mississauga follow this exact process because it consistently delivers superior results.
-
Clean Thoroughly: First, wash the surface. Use a degreasing cleaner like a TSP (trisodium phosphate) substitute to remove any grime, oils, or dust that could impede adhesion. Allow it to dry completely.
-
Repair Imperfections: Next, identify any holes, cracks, or dings. Fill them with spackle or wood filler. Once dry, sand the patches until they are perfectly flush with the surrounding surface.
-
Scuff Sanding: Using fine-grit sandpaper (180-220 grit), lightly scuff the entire surface. This is not heavy-duty sanding; the goal is to create a microscopic texture that gives the primer maximum grip. Afterwards, wipe away all dust with a tack cloth.
Proper preparation is not a mere recommendation; it is the single most important factor for a durable, professional-quality finish. It ensures the primer bonds perfectly and the topcoat looks immaculate.
Professional Application Techniques
With your surface prepped, it is time to prime. The objective is a thin, even coat. A common mistake is applying it too thickly, which leads to drips, roller marks, and a bumpy texture that shows through the final paint colour.
For walls, use a roller for large areas and a brush to "cut in" around edges and corners. The key is to always maintain a "wet edge," overlapping fresh strokes with the still-wet edge of previous ones. This prevents lap marks from forming.
One consistent coat is usually sufficient. However, for highly porous surfaces like new drywall or bare concrete, a second coat may be necessary to seal it properly. For concrete-specific advice, consult our guide to the right paint for concrete walls.
As a rule of thumb, one gallon of primer covers about 400 square feet, but this can vary depending on surface porosity. For perspective, prepping a 31-foot sailboat for a harsh marine environment might demand two gallons of specialized primer per coat for adequate corrosion protection.
Finally, patience is an underrated tool. Always allow the primer to dry completely according to the manufacturer's directions before applying the topcoat. Rushing this final step can compromise all previous prep work.
So, Can You Ever Get Away with Skipping Primer?
While priming is almost always recommended, there are a few very specific, rare situations where it may be possible to skip it. One must be objective about the conditions.
The only true scenario is when refreshing a wall with the exact same colour and sheen. The surface must be in pristine condition: perfectly clean, with a flat or matte finish, and with no scuffs, stains, or patched areas. Anything less than perfect requires primer.
What About Those "Paint-and-Primer-in-One" Products?
These "two-in-one" products are not a magical replacement for a dedicated primer. They are best described as a much thicker, higher-quality paint with more solids and better resins, which gives them superior hiding power compared to an average can of paint.
They are best suited for minor jobs, such as:
- Changing from an off-white to a slightly different off-white on a clean, previously painted wall.
- Touching up a small area that is already in excellent condition.
For more demanding jobs, they are inadequate. They lack the sealing and bonding power required for new drywall, difficult surfaces like wood or metal, or for covering stubborn stains. For those jobs, a dedicated primer is necessary.
Ultimately, priming is your project's insurance policy. It may seem like an extra step, but it is the foundation for a finish that lasts. While primer paint makes up about 14% of total paint sales, its impact is massive. The average paint purchase is around $76, but that number nearly doubles to $139 at specialty stores. Why? Because that’s where people go for major projects—the kind that absolutely demand the best high-adhesion base coat for a professional result. You can check out more stats on the U.S. paints and primers market share to see for yourself.
Common Questions About Using Primer Paint
Even with the best planning, questions can arise during a project. Let's address some of the most common inquiries about primer to clarify any confusion and help you achieve the best results.
Do I Need to Prime a Painted Wall?
In most cases, yes. If the wall is already painted, primer is still necessary in several key situations. It is a must if you're making a significant colour change, especially from a dark shade to a light one. Primer is also the best solution when painting over a glossy finish; it provides the necessary grip for the new paint to adhere, preventing future peeling.
Primer creates a fresh, neutral canvas. This is the best method for getting a smooth, professional-looking finish without blotches or old colours showing through. It ensures the new colour you selected appears exactly as it did on the paint chip.
How Many Coats of Primer Are Needed?
For most jobs, one solid, even coat of a good-quality primer is sufficient.
However, a second coat is the best practice for extra coverage and protection in certain scenarios. Consider two coats if you're:
- Covering a very bold or dark colour, such as a deep red or navy blue.
- Addressing stubborn stains from water damage or smoke.
- Working with a highly porous surface, like new drywall or brick, that absorbs the first coat quickly.
Can Primer Be the Final Coat?
Absolutely not. Primer is engineered as a foundational layer, not a finish coat. It is not formulated to withstand the elements—UV rays, moisture, and physical contact will cause it to break down quickly.
If left exposed, primer will chalk and degrade, leaving the underlying surface vulnerable and negating all your prep work.
Ready to give your space a flawless, long-lasting finish? The expert team at Soca Services Painting has the experience and precision to handle all your painting needs in Toronto and the GTA, from Mississauga to areas near me. Visit our website to get a free quote today!
12 Comments